Getting Started
System Requirements
- macOS 15.0 (Sequoia) or later
- Apple Silicon or Intel Mac
- Git (Admiral can install it for you via the Xcode Command Line Tools)
- An AI agent CLI: either Claude Code or Codex — Admiral can install either one for you during onboarding
Installing Admiral
Download Admiral from the official website. Open the DMG file and drag Admiral into your Applications folder. Admiral is code-signed and notarized by Apple, so it will launch without any security warnings.
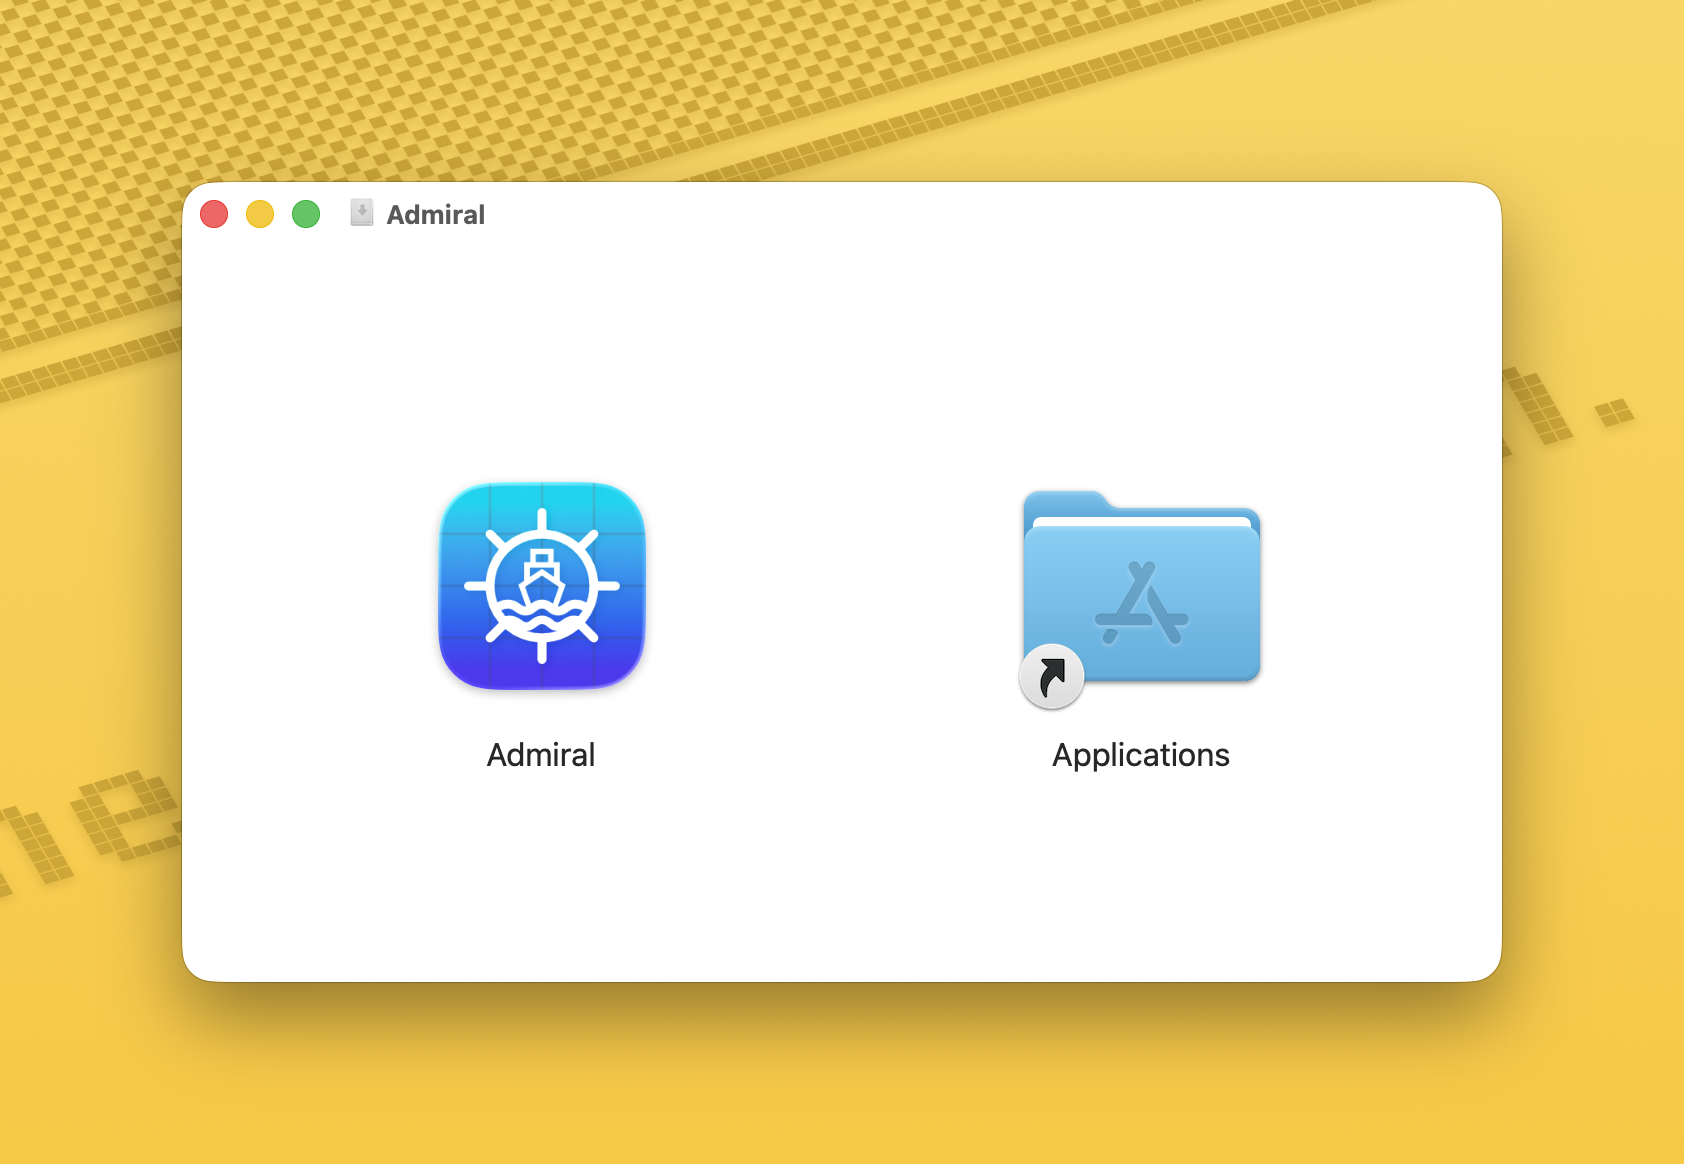
Admiral DMG installer window
/docs/install-dmg.png
First Launch
The first time you open Admiral, a three-stage onboarding flow walks you through everything the app needs to run. The whole thing takes well under a minute and you only see it once.
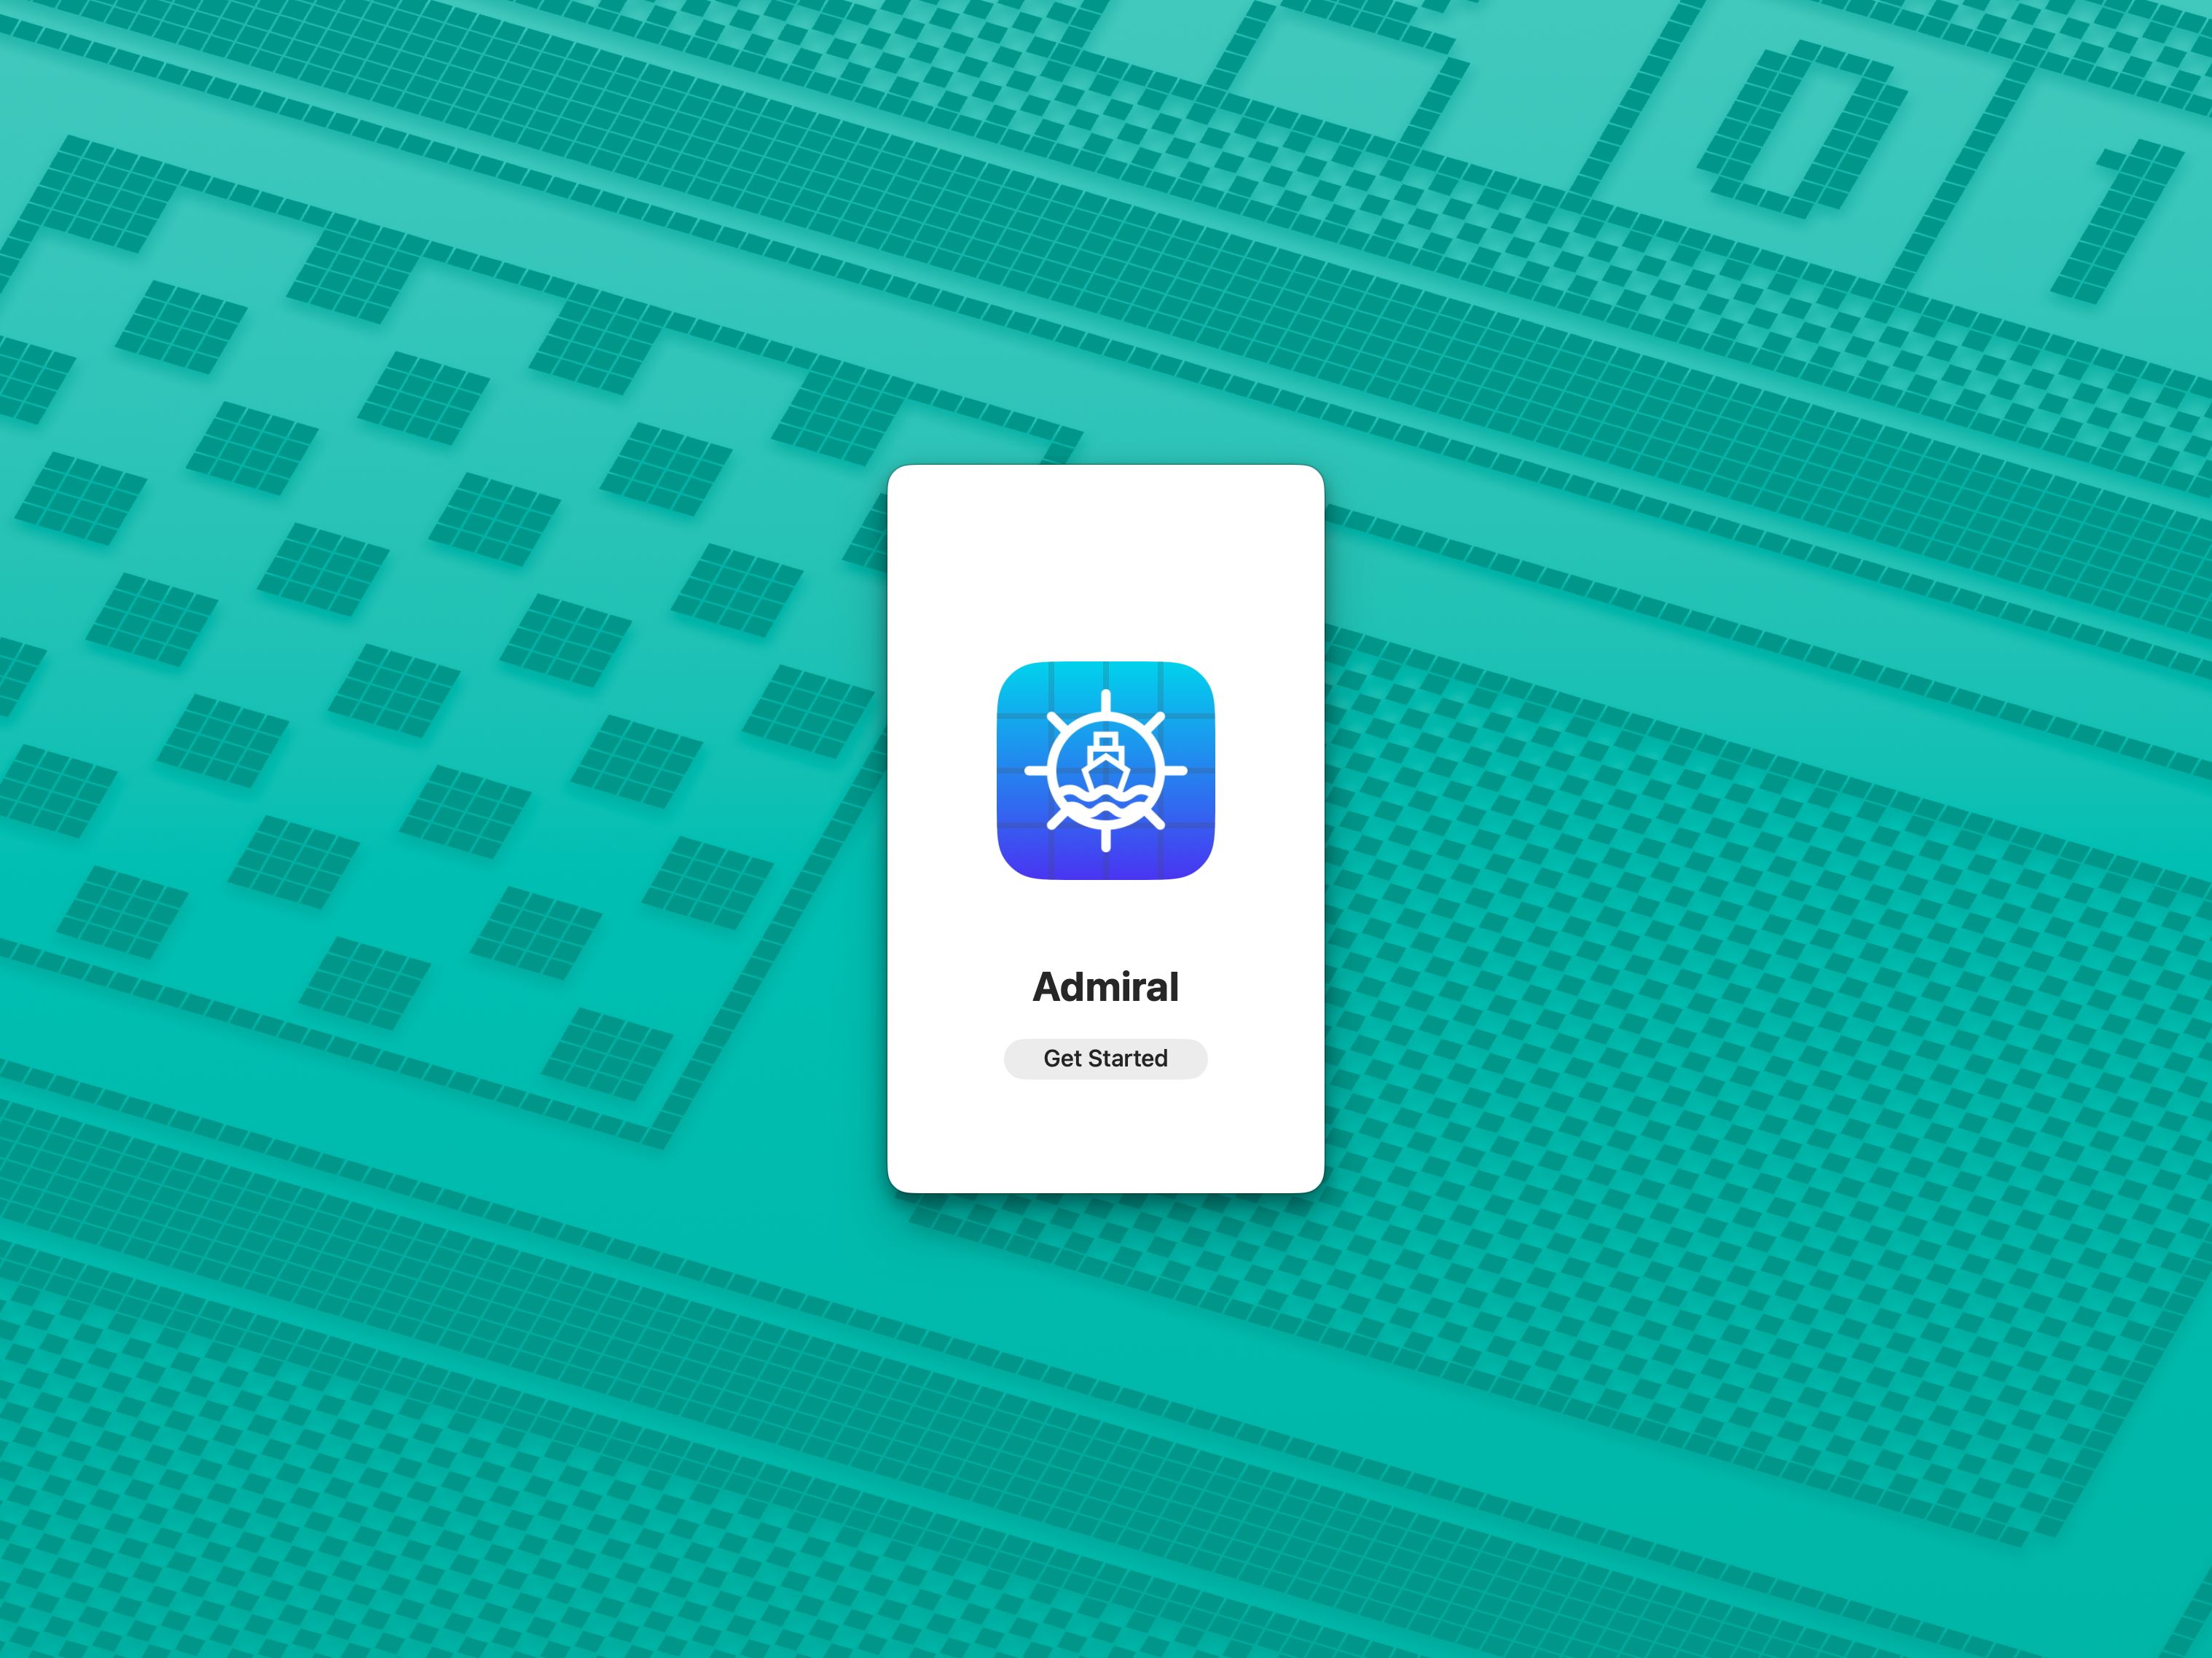
Admiral onboarding screen
/docs/onboarding.png
- Splash — A welcome screen with the Admiral logo and a Get Started button. Clicking it expands the window into the checklist.
- Get Set Up — A checklist Admiral walks through one item at a time. Some items are required (Git, Node.js, Notifications); the agent CLIs and logins are optional, but you need at least one agent connected before you can continue. Microphone access is optional and only needed if you want voice dictation.
- Hello — A short animated greeting screen. Click Get Started to enter the main app.
The Get Set Up Checklist
The checklist covers the dependencies Admiral needs plus the accounts that power the AI:
- Git (required) — if missing, click Install Git to kick off the Xcode Command Line Tools installer.
- Node.js (required) — used by the agent CLIs. If you have
nvminstalled, Admiral detects it and works around it gracefully. - Claude Code (optional) — install via Anthropic's official native installer, no
npmrequired, nosudoprompts, no EACCES failures. - Claude Login (optional) — sign into your Anthropic account via a PTY-backed login sheet inside Admiral. No bouncing to Terminal.
- Codex CLI (optional) — install the Codex CLI if you want to run Codex alongside or instead of Claude.
- ChatGPT Login (optional) — sign into OpenAI for Codex. Onboarding validates the credentials before completing the step, so you find out about a bad token immediately.
- Notifications (required) — grants Admiral permission to surface background notifications when a chat needs you.
- Microphone (optional) — only needed if you want to use voice dictation in the chat input.
You only need one agent connected to finish onboarding — Claude Code plus Claude Login, or Codex CLI plus ChatGPT Login. Pick the one you want now; you can always add the other later from Settings → Profiles.
You can re-trigger onboarding from Settings > General by toggling Show Onboarding on Launch on. The flow will run again the next time you open Admiral.
App Layout
Admiral uses a three-panel layout designed to keep everything you need visible at once - your projects, your conversations, and your code.
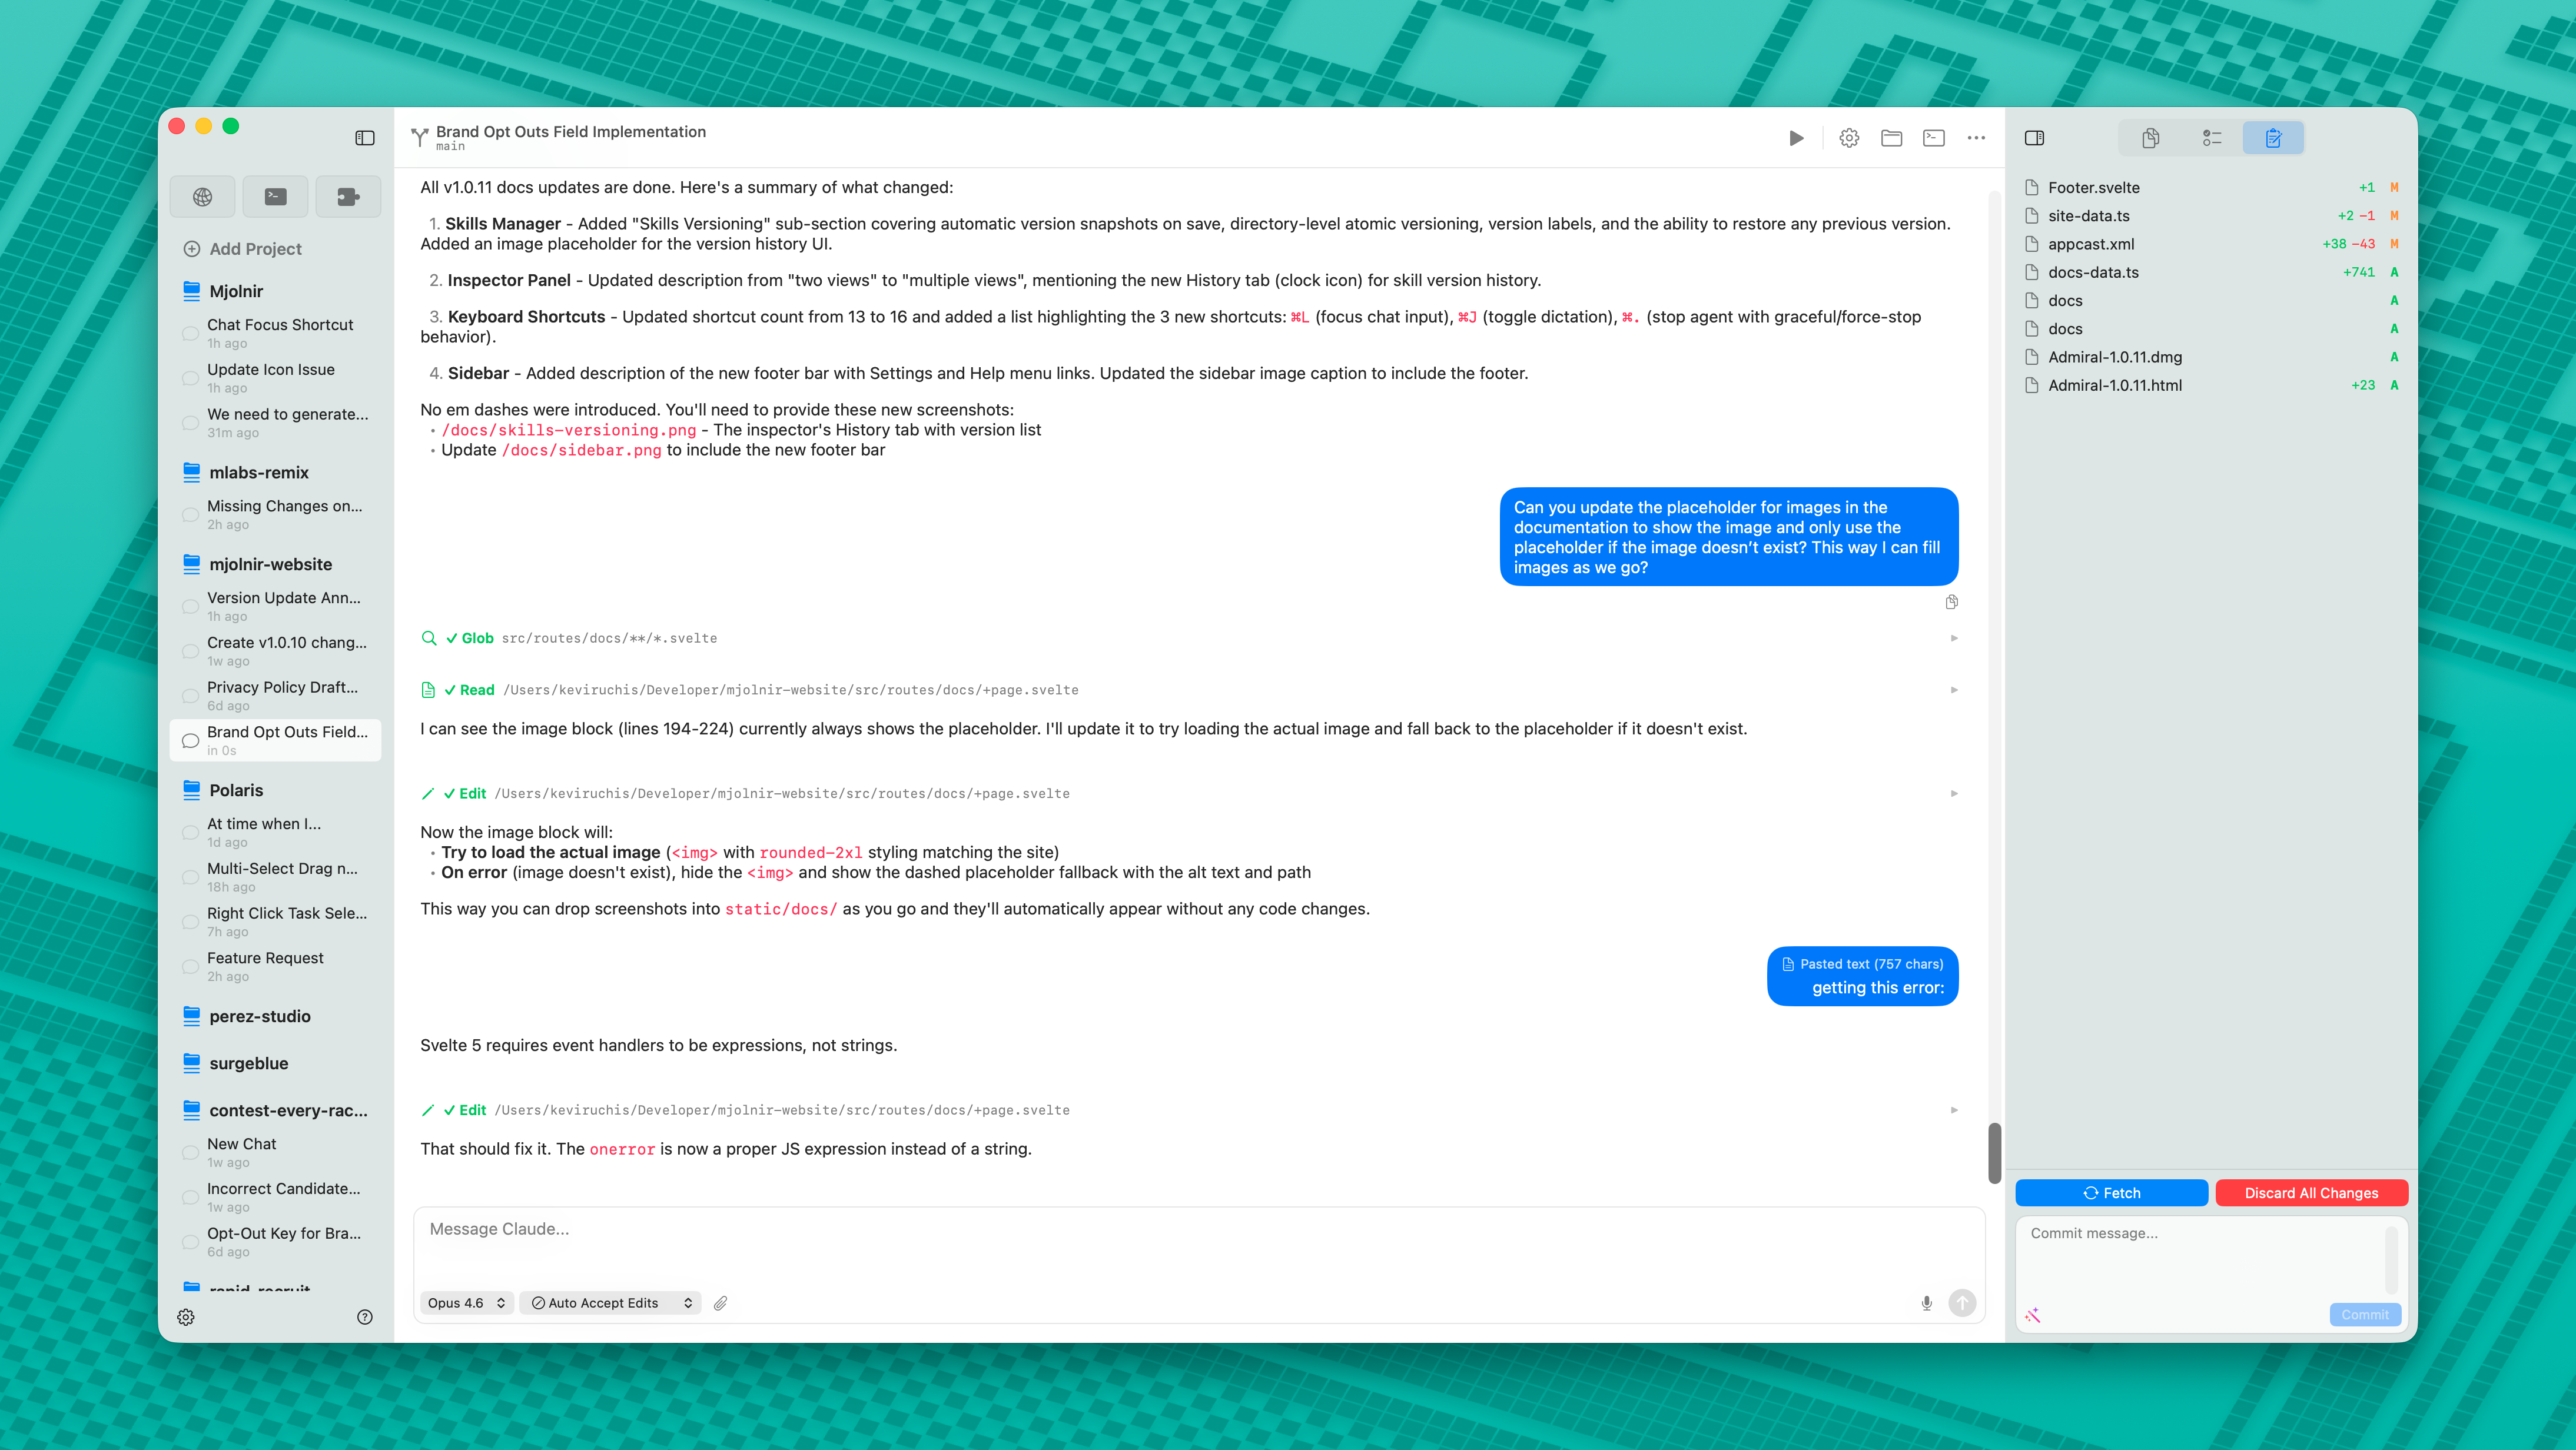
Admiral workspace overview
/docs/workspace-overview.png
Projects Sidebar
The left sidebar lists all your projects and their chat sessions. Each project shows its active chats, and colored dots indicate their status: green means the AI is processing, orange means it's waiting for your permission to proceed.
You can reorder projects by dragging them, collapse the sidebar for more space, and quickly switch between conversations. Archived chats are hidden from view but can be accessed from the project overview.
At the bottom of the sidebar, a footer bar provides quick access to Settings and a Help menu with links to the website, roadmap, blog, feature requests, issue tickets, and more.
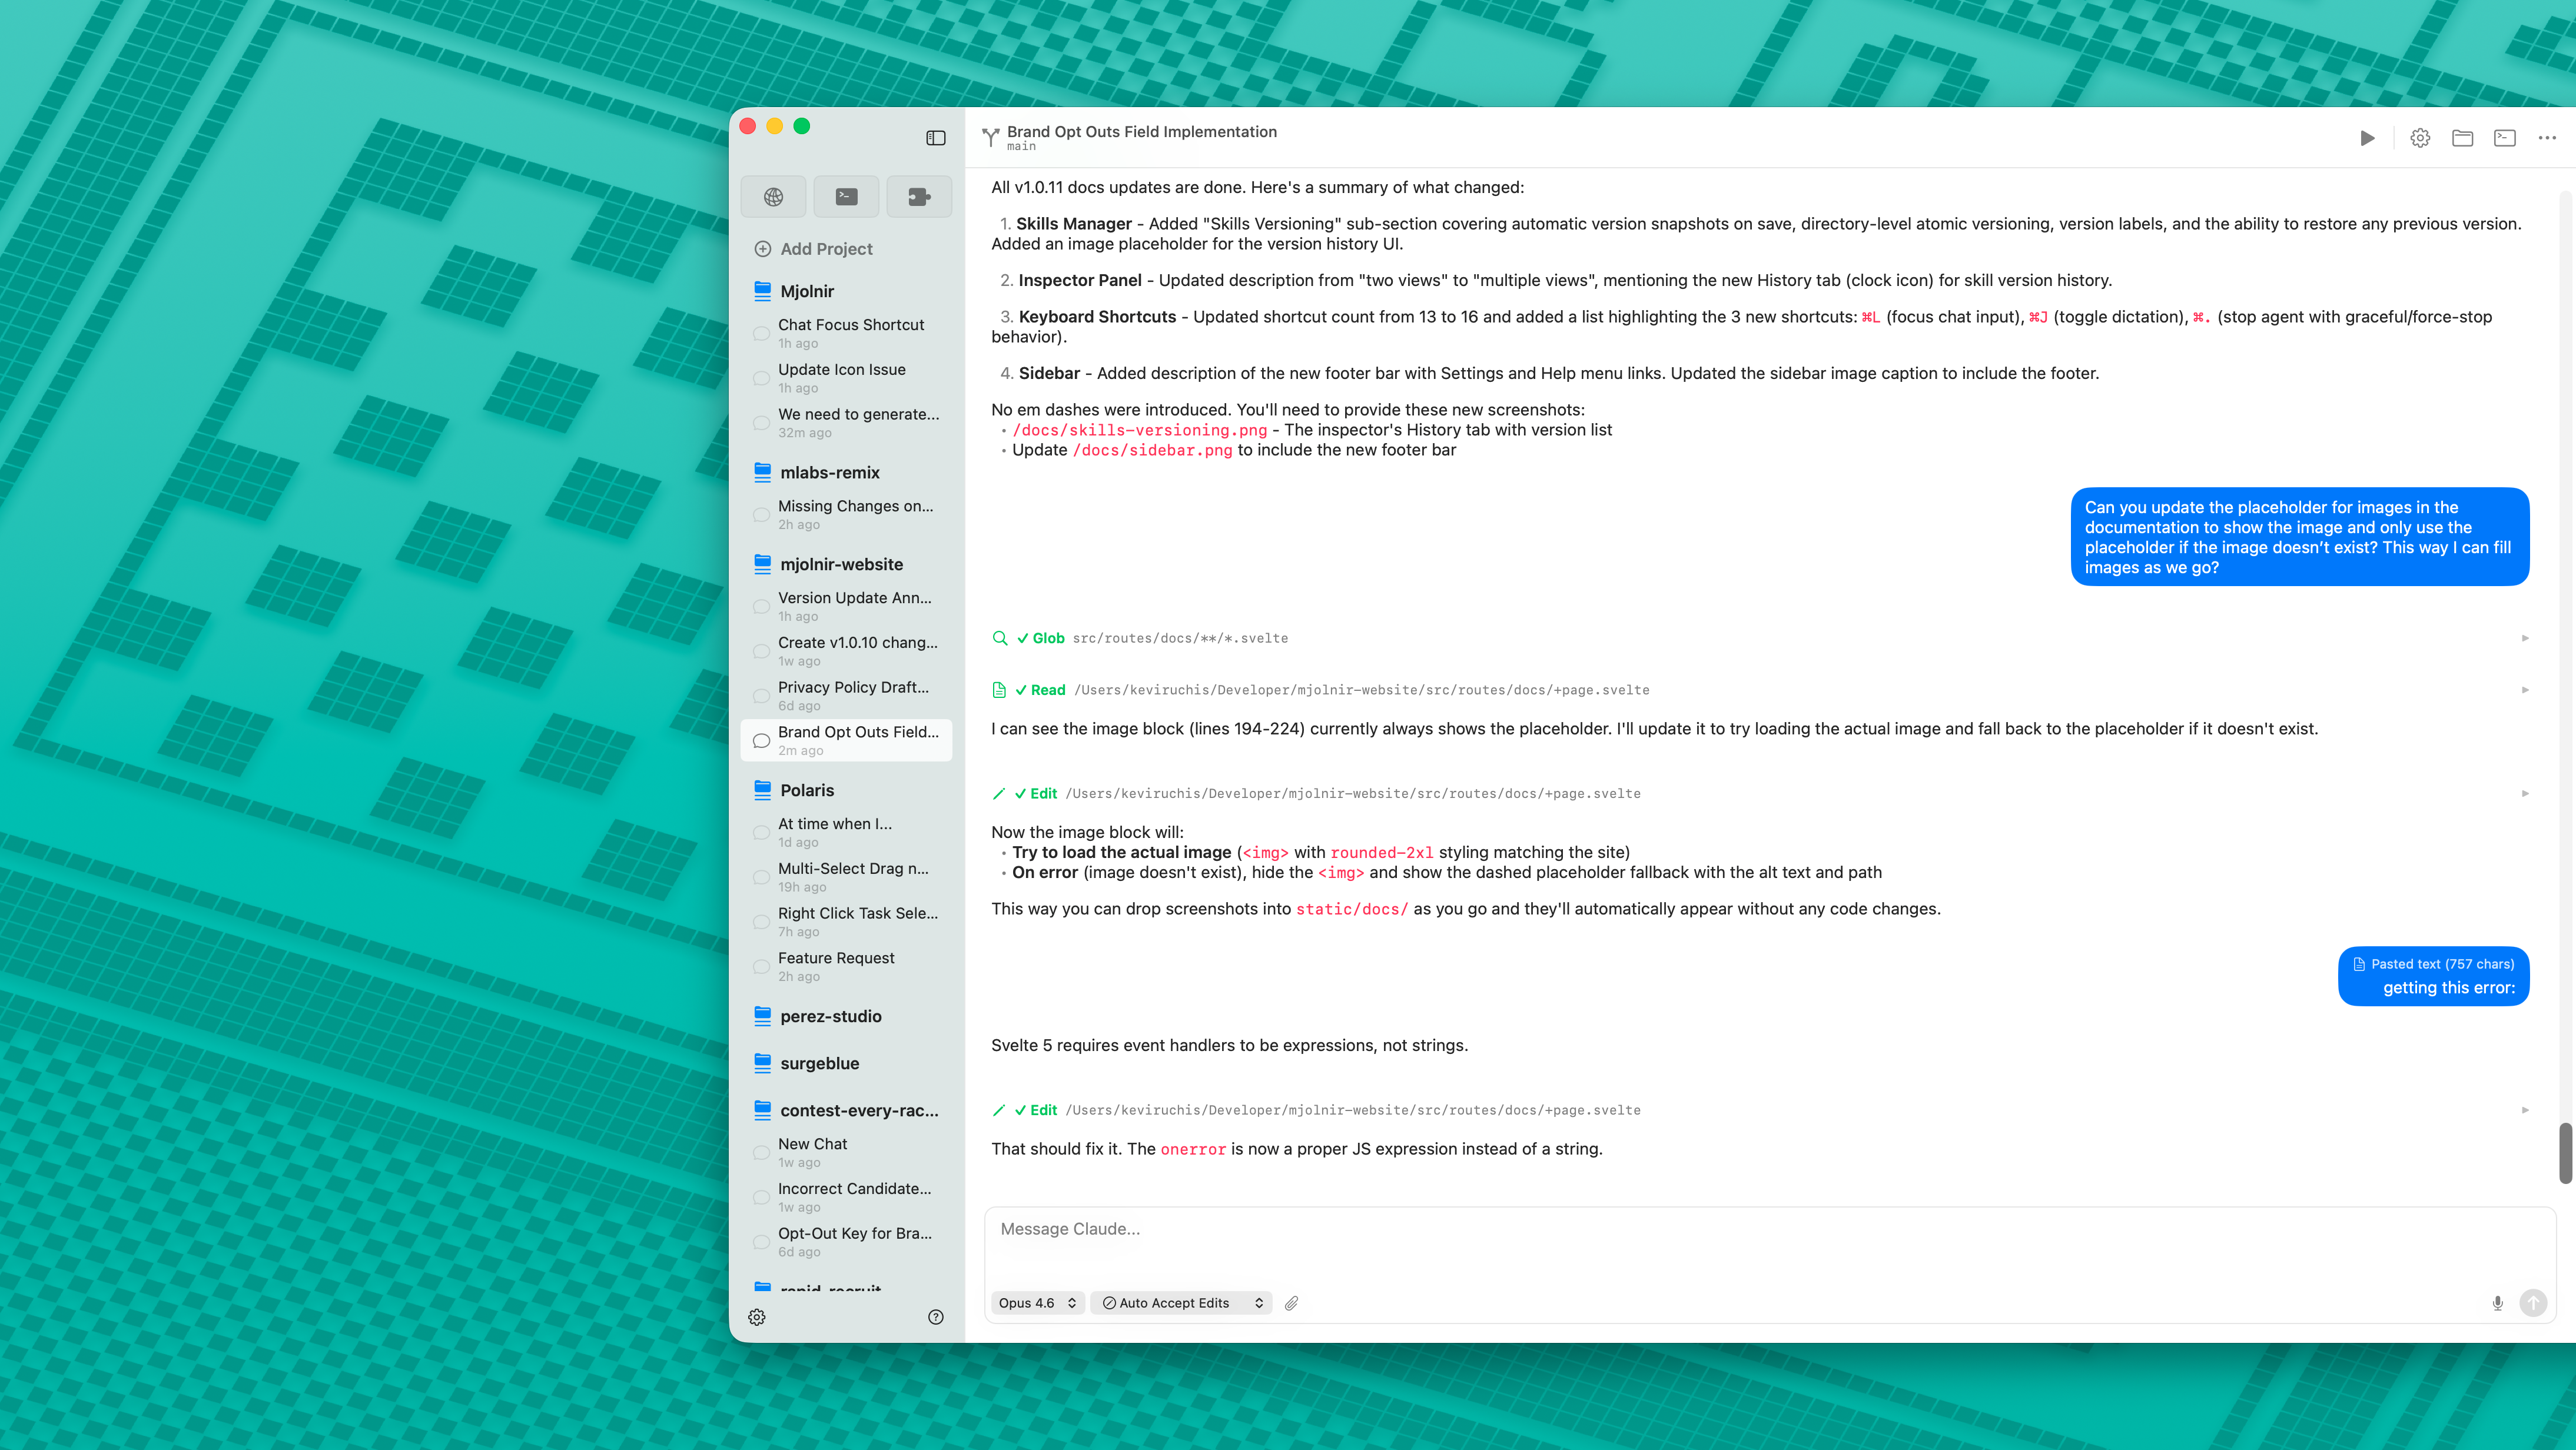
Projects sidebar with status indicators and footer bar
/docs/sidebar.png
Chat Panel
The center panel is where you interact with AI. It shows the full conversation history with syntax-highlighted code blocks, tool use indicators, and thinking blocks. The input area at the bottom supports file attachments and voice dictation.
A persistent workspace tab bar sits at the top of the chat panel. Each open workspace gets a tab with the agent's icon, a close button, and a hover ellipsis menu for rename and archive — plus an inline New Chat button to spin up another conversation without leaving the keyboard. The chat header itself shows the active workspace name and the agent currently driving it.
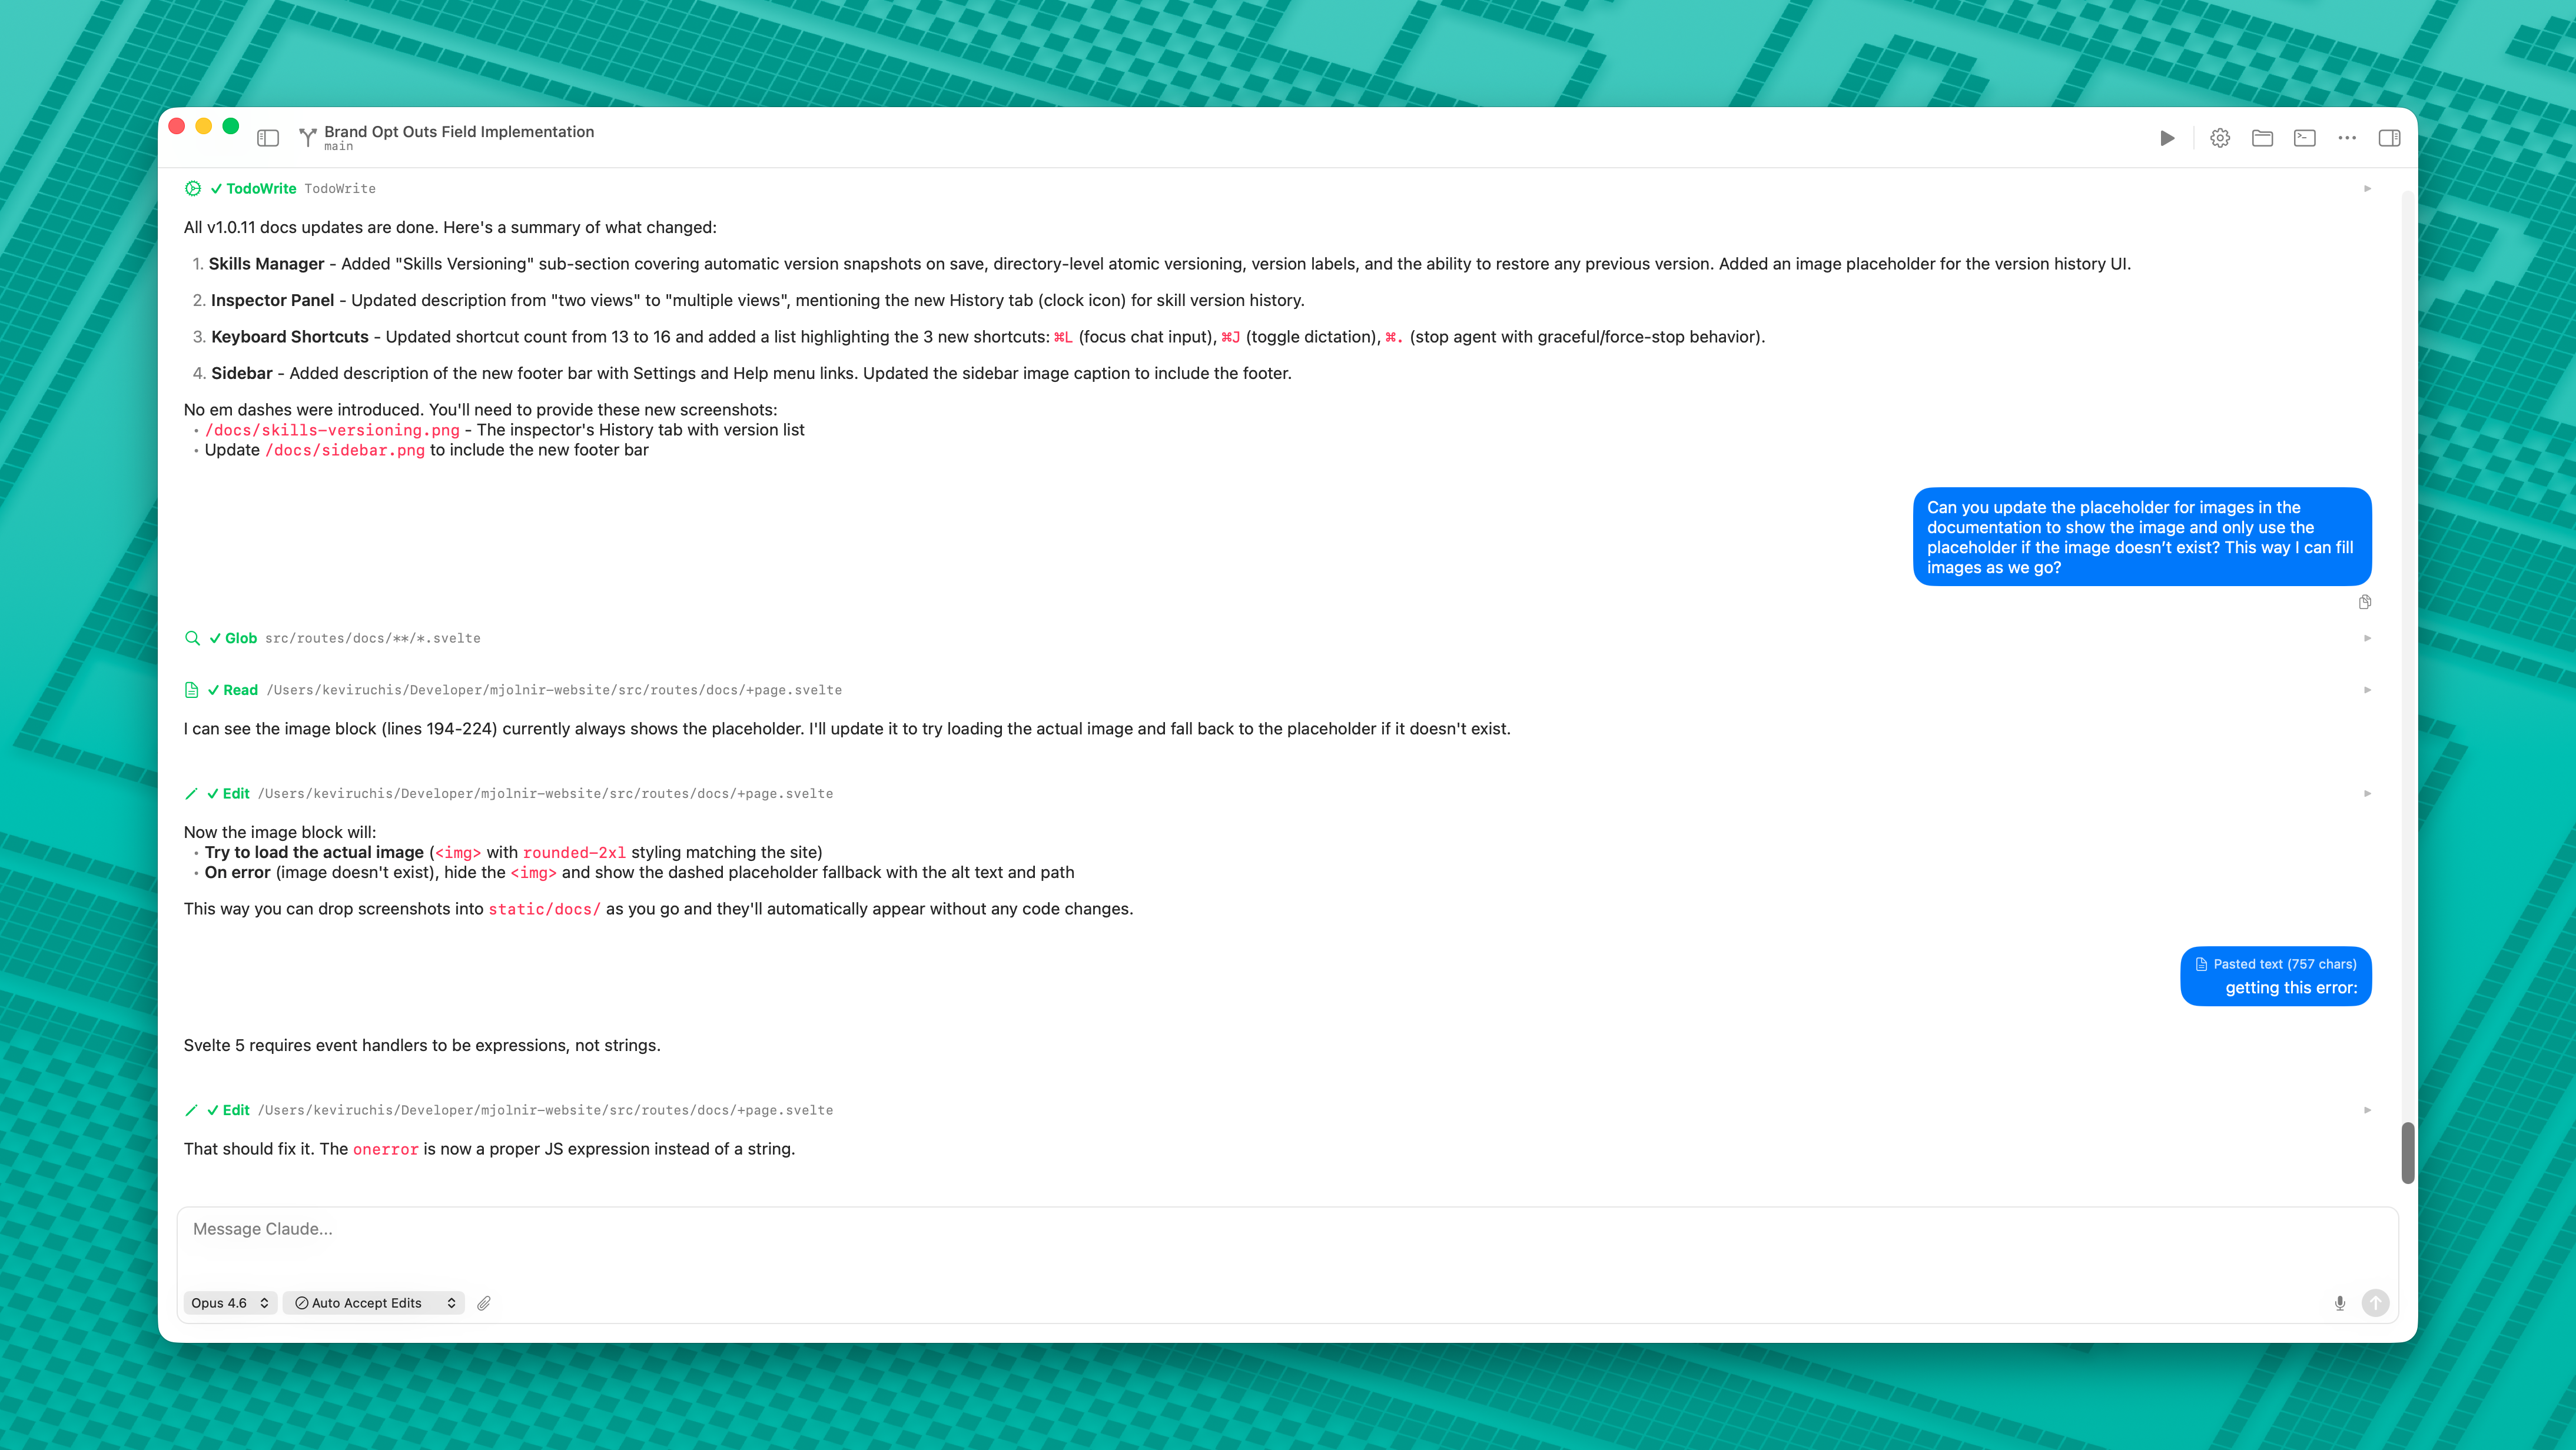
Chat panel with conversation
/docs/chat-panel.png
Inspector Panel
The right panel provides multiple views: a file browser for your project directory, a git status panel showing your current branch, staged changes, and unstaged modifications, and a History tab (clock icon) that displays version history when a skill is selected. When a workspace is linked to an issue, the inspector adds two more tabs — Issue Detail and Plan — for editing the issue's metadata and plan file in place. Switch between tabs using the tab strip, or swipe horizontally on a trackpad.
The inspector remembers which tab you had selected on a per-workspace basis, so switching back to a workspace puts you right back in the view you were using.
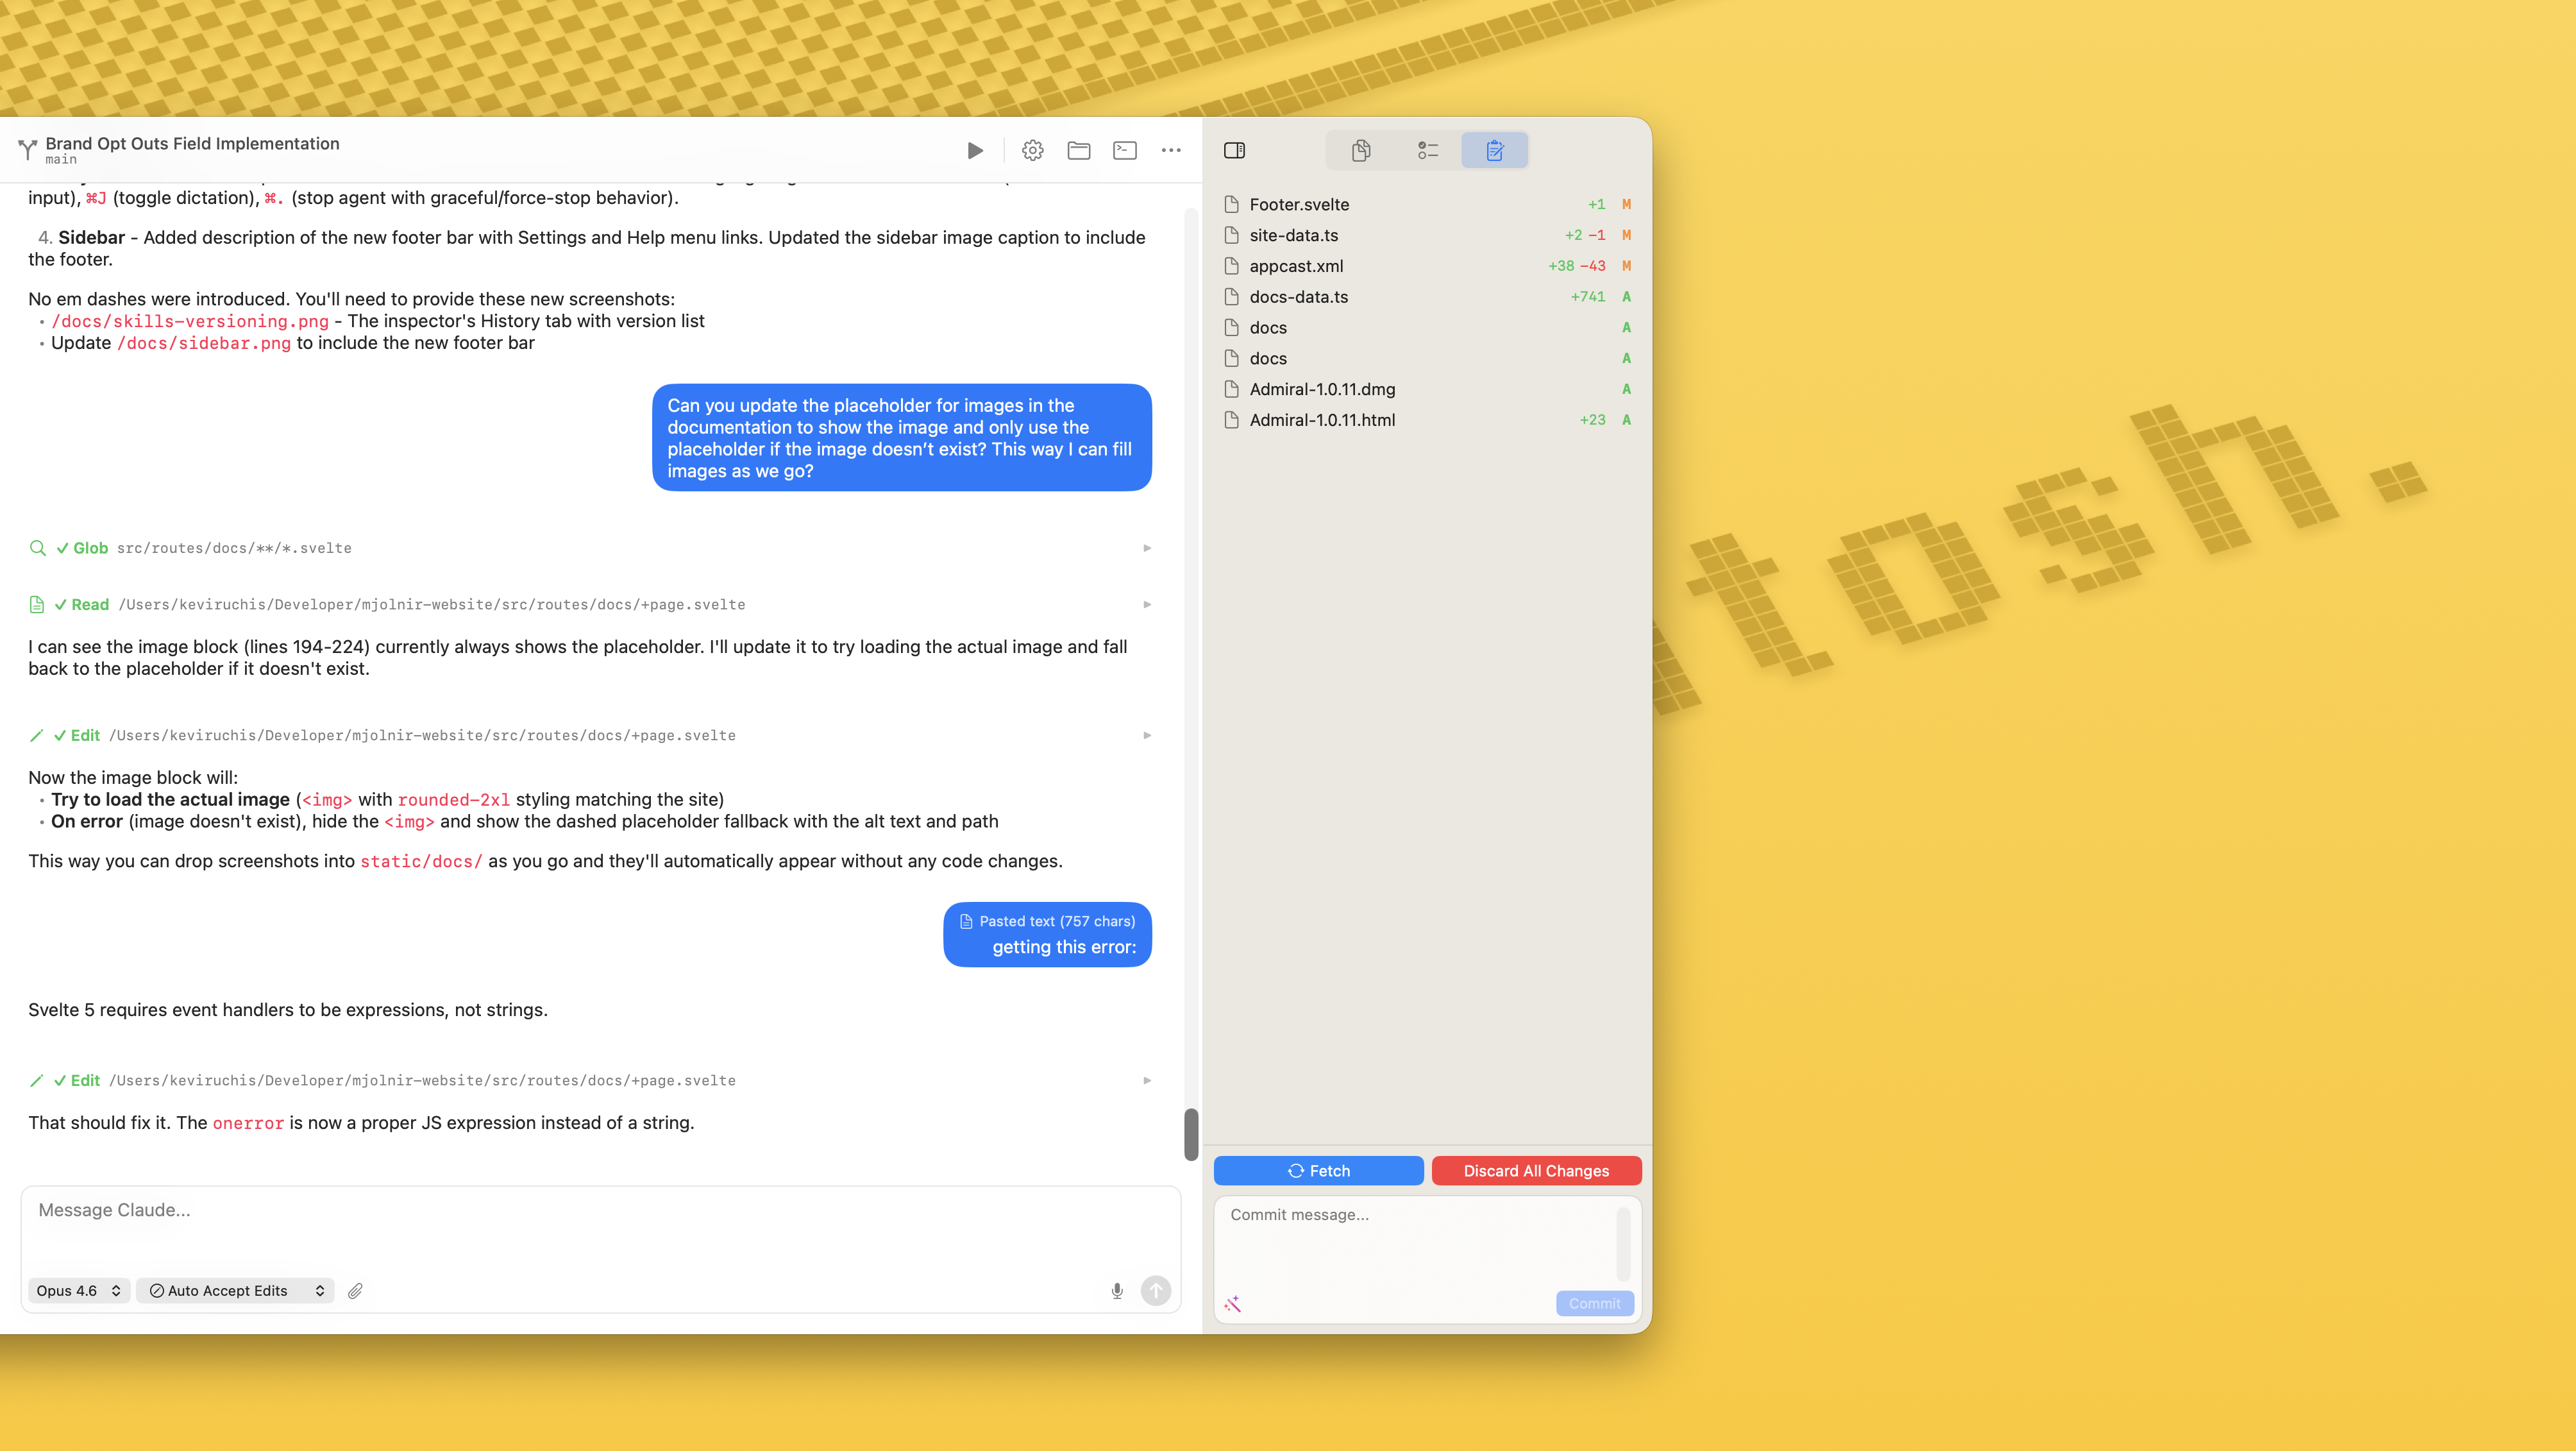
Inspector panel showing file browser and git status
/docs/inspector-panel.png
Permission Panel
When the AI requests permission to take a destructive action — write a file, run a shell command, fetch from a remote — Admiral opens a floating panel window rather than a modal sheet. The panel doesn't block the main window, so you can keep reading the conversation, checking the file browser, or even responding in a different chat while you decide. Approve (⌘Y), approve for the session (⇧⌘Y), or deny (⌘D) from anywhere — focus follows you.
Working with AI
Starting a Chat
Chats live inside workspaces. To start a new conversation, first create a workspace on the branch you want to work against — press ⌘T, click the + next to a project name in the sidebar, or pick File → New Workspace. Once a workspace is open, any chat you add inside it inherits that workspace's branch, worktree, and terminal so you don't have to wire those things up per chat.
Add another chat to an existing workspace from the inline + New Chat button on the workspace tab bar, or by pressing ⌘T while the workspace is selected. Each chat picks an agent (Claude or Codex) and a model — the agent's icon shows up on the tab so you can tell at a glance which engine is responding.
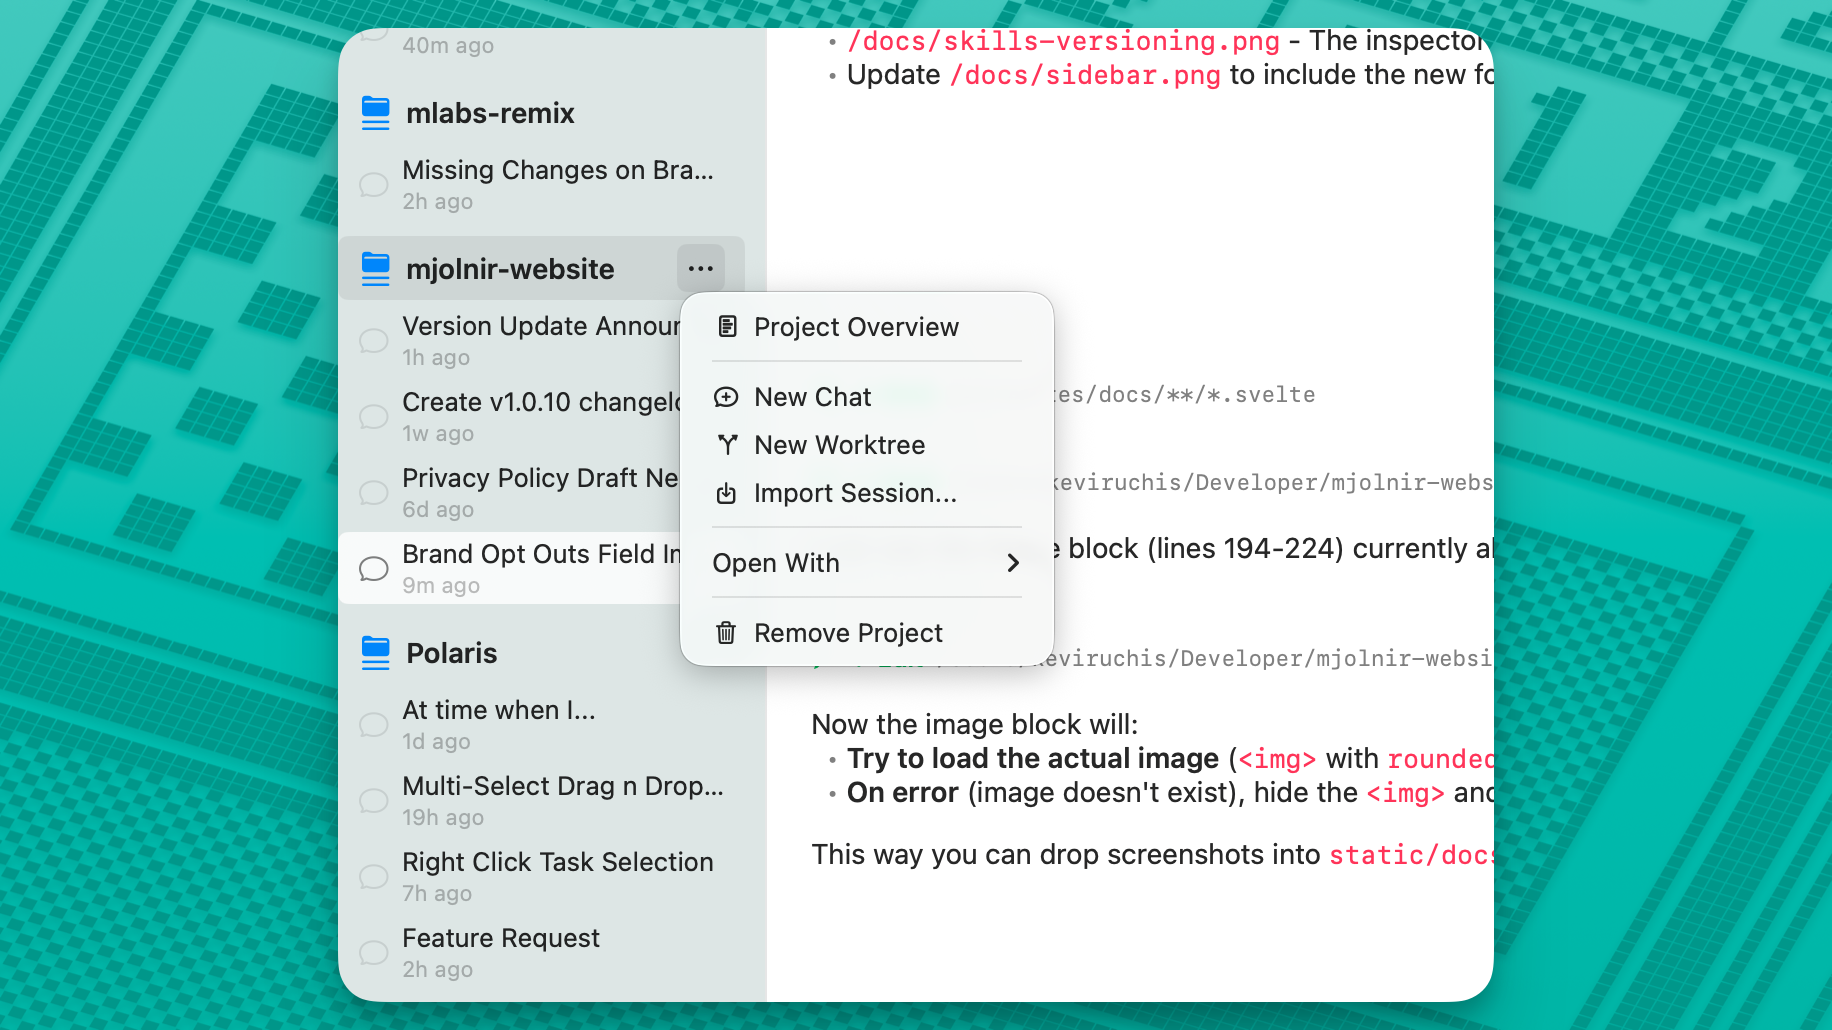
Starting a new chat
/docs/new-chat.png
Running Multiple Chats
You can run many conversations in parallel — across workspaces, or as multiple tabs inside the same workspace. Each chat operates independently with its own agent subprocess (Claude Code or Codex), so a chat working on a feature won't step on one fixing a bug.
Chats continue processing in the background even when you switch to a different conversation. The sidebar status dots keep you informed about what's happening across all your sessions.
Background Processing
When you switch away from an active chat, the agent keeps working. You'll see the status dot change to green while it's processing, and to orange if it needs your permission before continuing. This means you can start a long task and work on something else while waiting.
Permissions & Approvals
Admiral surfaces every action the AI wants to take for your review. File edits, terminal commands, and other operations open as a floating permission panel — a separate window that sits on top of the app without blocking it. You can keep reading the conversation, scroll the file browser, or even respond in another chat while you decide. If multiple chats need approvals at the same time, each one gets its own panel so nothing piles up.
You can grant permissions per action ("Allow Once") or for the duration of the session ("Allow for Session"). When retrying a failed operation, Admiral supports approving multiple tools at once. The panel responds to keyboard shortcuts from anywhere — approve (⌘Y), approve for session (⇧⌘Y), or deny (⌘D) without aiming for the panel first.
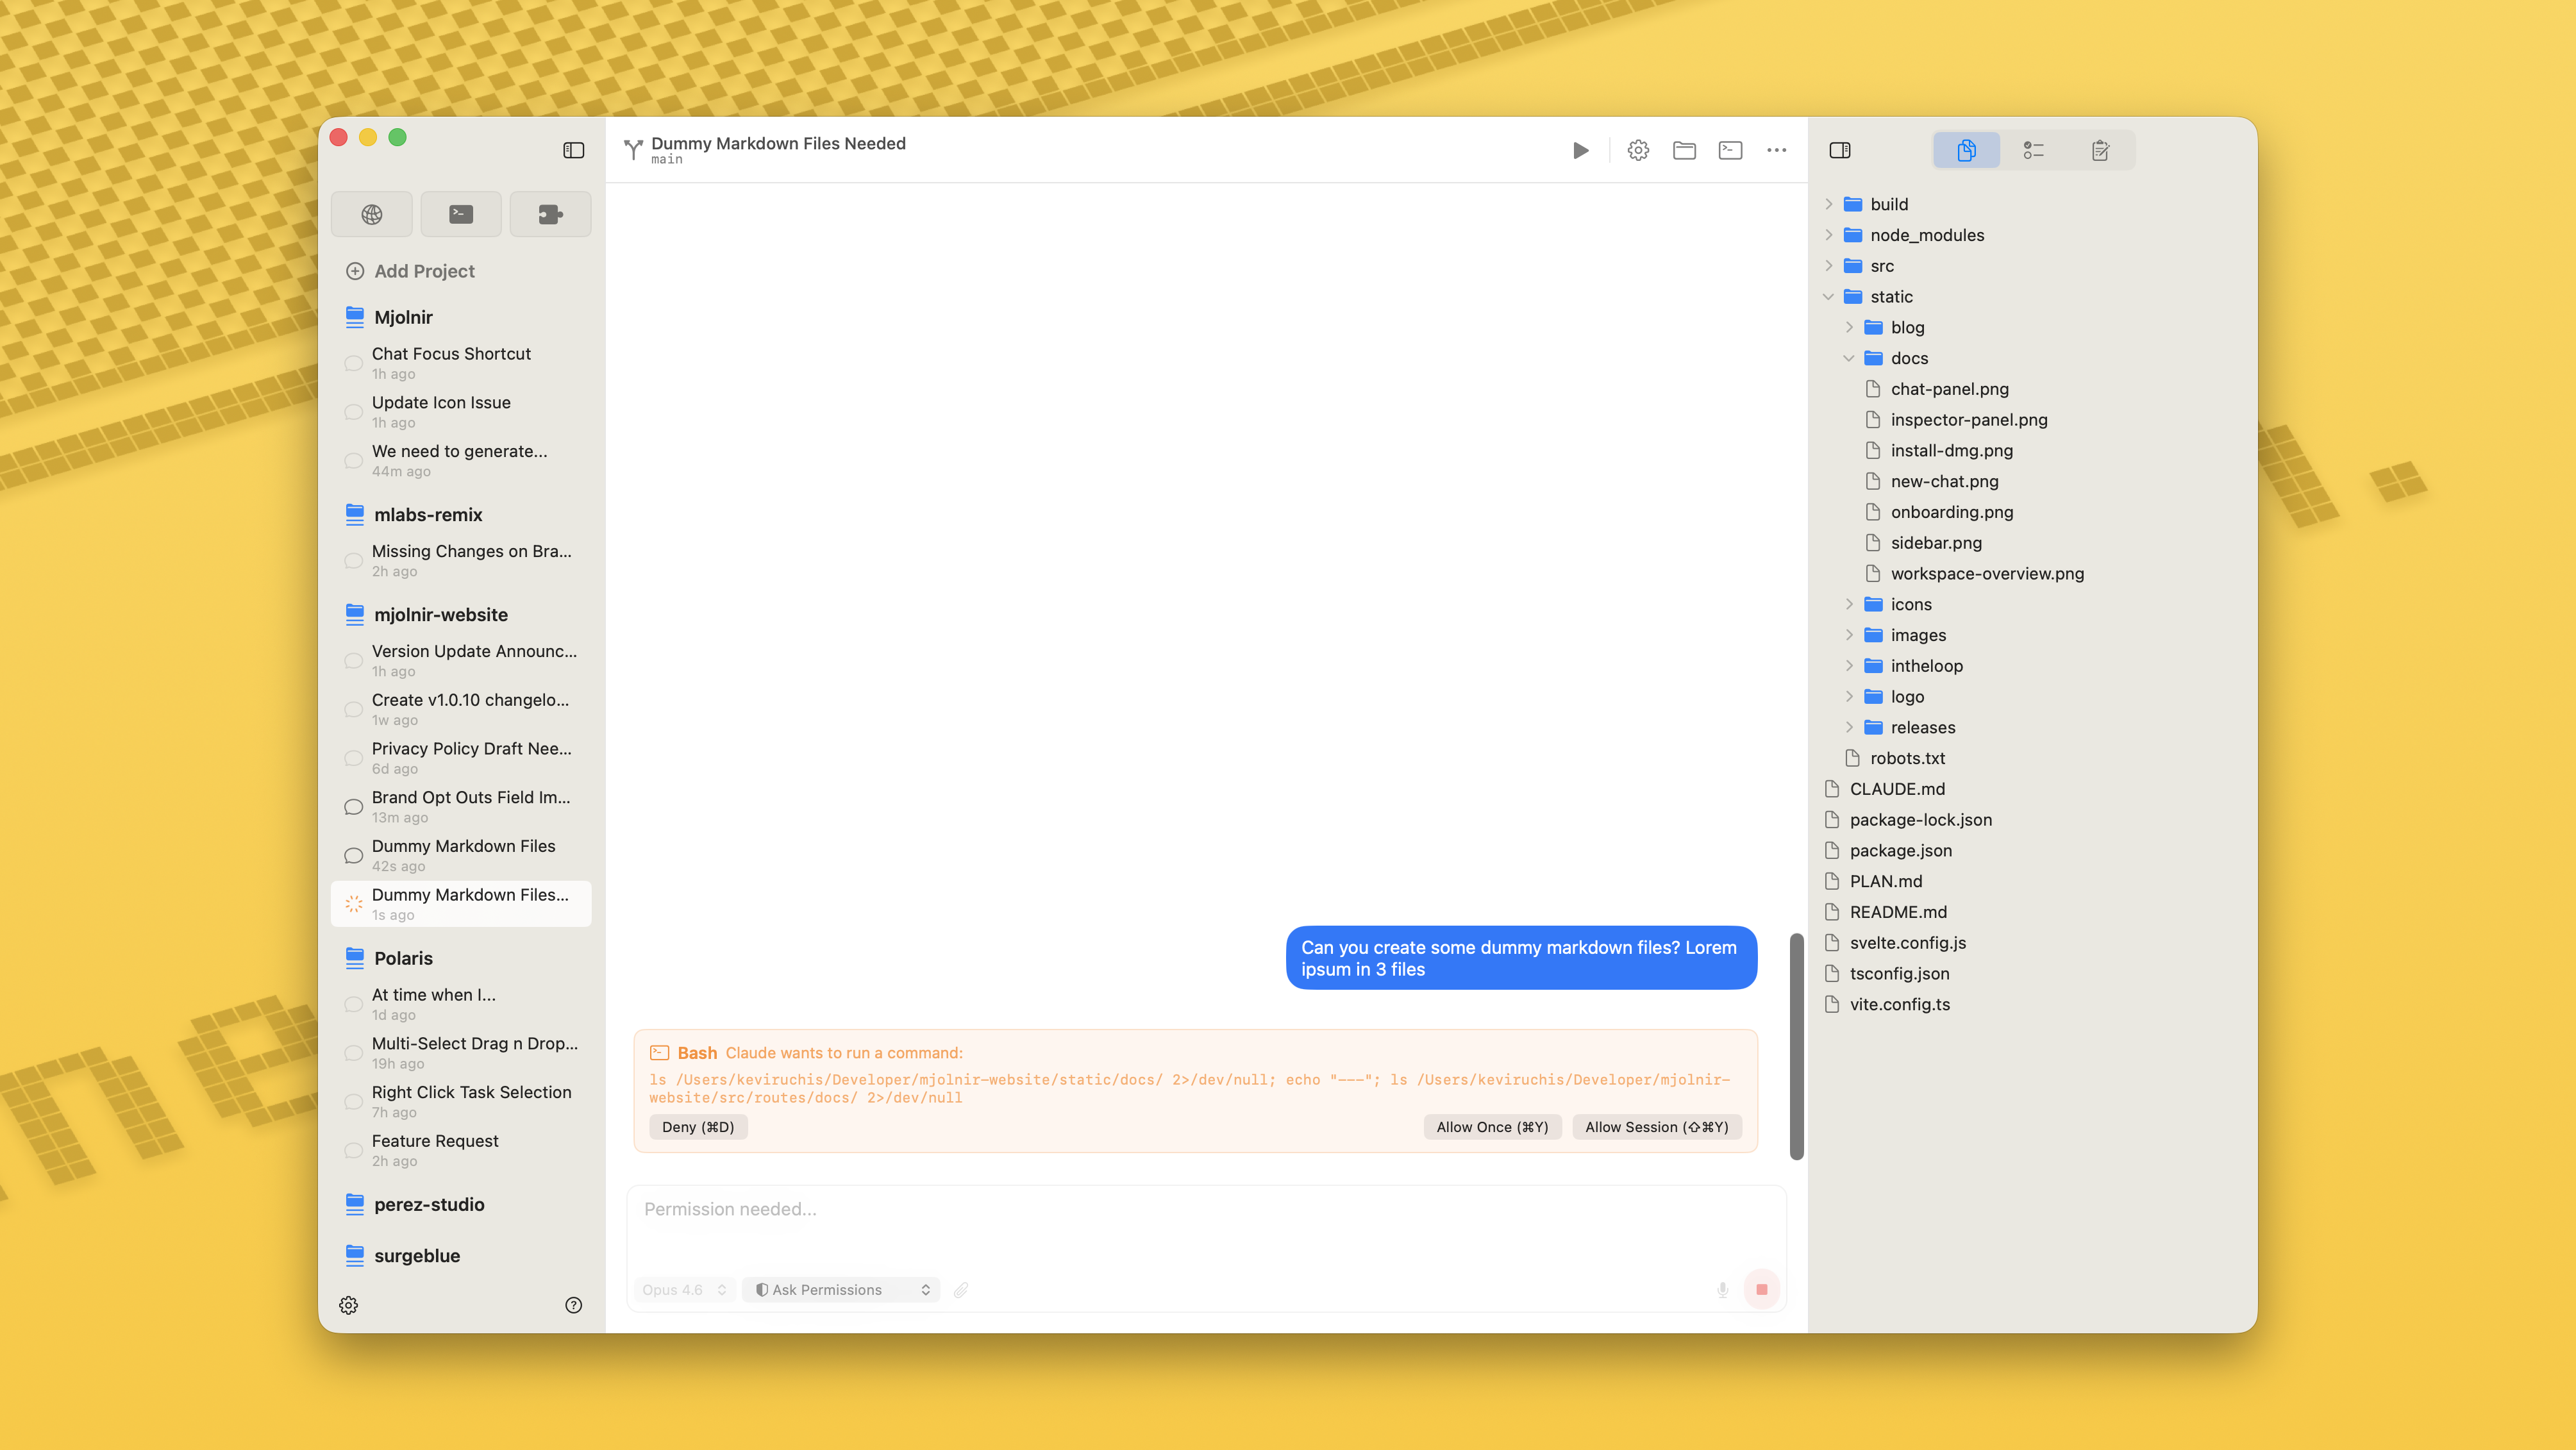
Permission request dialog
/docs/permission-request.png
Slash Commands
The slash commands, Plan Mode, and Subagents sections below describe features built into Claude Code. They apply when the chat's agent is Claude; Codex chats expose Codex's own command set.
Admiral supports slash commands in the chat input for quick actions:
/clear- Reset the current session/compact- Compact the conversation context to free up space/plan- Enter plan mode for structured task planning/pr-comments- Fetch and review pull request comments/security-review- Review your current diff for security issues/init- Initialize your project with a CLAUDE.md file
Type / in the input field to see available commands with autocomplete.
Plan Mode
When you want Claude to think before it acts, type /plan and pick Enter plan mode before making changes from the autocomplete. Plan mode keeps Claude in a read-only stance while it explores the codebase and drafts an implementation plan. Read, Glob, and Grep are still on the table; Write, Edit, and Bash are off the table until you approve.
When the plan is ready, a floating Plan Ready for Review panel appears with the full plan rendered as Markdown on top and a structured task list underneath. Two buttons at the bottom drive the flow:
- Reject (Esc) — discards the plan and lets you redirect the chat.
- Approve (⌘↩) — green-lights execution. The same chat picks up where it left off and starts making changes.

Plan Ready for Review panel
/docs/plan-mode-approval.png
The approval panel is a regular floating window — you can keep working in other chats or windows while it sits there waiting. If Claude wrote the plan to a Markdown file under .claude/plans/ during planning, that file persists on disk; otherwise the plan lives only in the chat transcript.
Subagents
Claude can delegate work to specialized subagents — focused workers that handle one job and report back. Subagents show up inline in your chat as compact colored cards: blue while they're running, green with a checkmark when they're done. Each card names the agent type and what it's doing, so you can follow along without losing the main thread.
Admiral recognizes a handful of common agent types and gives each its own icon:
- Explore — codebase search and discovery.
- Bash — shell execution.
- Code — focused code generation or editing.
- Plan — task decomposition and planning.
- General-Purpose — the catch-all worker for anything that doesn't fit a more specific type.
Subagents inherit the parent chat's permission mode — if your chat is in Ask mode, the subagent will ask before doing anything destructive too. If multiple subagents need approvals at the same time, each one gets its own floating permission window so nothing piles up behind the active chat.
Choosing between Claude and Codex
Admiral runs both Claude Code and the Codex CLI through a unified agent layer — pick the agent per chat tab and the right CLI launches with the right config dir. Each tab remembers its agent and model, and the agent icon is shown directly on the tab so you can tell at a glance which engine is responding.
Each profile keeps its own Codex home alongside its Claude config, so credentials stay scoped to the profile that owns them. Signing into Codex during onboarding validates the credentials before completing the step, so you find out about a bad token before your first run.
The latest Claude Opus model is the default for Claude chats. You can switch models per chat from the model picker without leaving the conversation.
Chat experience
A few v2.0 touches make long chats easier to scan and faster to scroll:
- Collapsed tool groups — consecutive tool calls collapse into a single "X tools called" row with tool icons. Expand it to see each tool and its diff preview.
- Swipe to reveal timestamps — drag the message list left, iMessage-style, to peek at per-message timestamps.
- Code block cards — code blocks render in dedicated cards with syntax highlighting, copy buttons, and consistent sizing while streaming.
- Resizable markdown tables — drag column dividers in tables to resize.
- Inline chat creation — add a new chat directly from the workspace tab bar without opening a menu.
- Polished chat input — undo support, smart-quote/dash substitution disabled, and tab-key navigation in the in-app text editor.
Profiles & Accounts
Profiles let you keep multiple agent accounts side by side in Admiral — each profile carries its own Claude Code and Codex login, plus its own credentials, session state, and projects. Use them to cleanly separate personal work from a client engagement, sandbox a second Anthropic or OpenAI account, or split work that should run against different model providers.
How profiles are isolated
Every profile owns its own CLAUDE_CONFIG_DIR. The Default profile uses ~/.claude, which is the same directory the Claude Code CLI uses on its own, so anything you’ve already done in the terminal is available in Admiral immediately. Additional profiles get their own directory under ~/Library/Application Support/Admiral/Profiles/, with separate OAuth credentials in the macOS Keychain and separate session history.
You can point a profile at an existing directory (for example ~/.claude-work) if you want to share state with another tool. This is an advanced option exposed on each profile card.
The Profiles & Accounts pane
Open Settings → Profiles to manage every profile in one place. Each profile is shown as a card with its name, account email, sign-in status, color, icon, and config directory.

The Profiles & Accounts settings pane
/docs/profiles-pane.png
For each profile you can:
- Sign In… to Claude (Anthropic) and / or Codex (OpenAI) — each login runs against that profile’s config directory, so it never touches your other profiles
- Pick a Color and Icon — these show up on the profile dot in the sidebar footer
- Rename…, Set as Default, or reorder profiles with Move Up / Move Down
- Reveal Config Dir in Finder if you need to inspect the underlying files
- Delete… a non-default profile (the Default profile can’t be removed)
Click Add Profile at the bottom of the pane to create a new one. You’ll be prompted for a name, then dropped back into the list where you can sign in.
Switching profiles
The active profile is selected from the sidebar footer, where each profile shows up as a colored dot. Click a dot to switch — Admiral filters the sidebar to show only the projects assigned to that profile, and any new chat or project you create is attached to the active profile. Drag the dots to reorder them, or right-click any dot for a quick menu to rename, set as default, or delete. The selection is remembered between launches.

Profile switcher in the sidebar footer
/docs/profiles-switcher.png
Admiral continuously probes the auth status of each profile's Claude and Codex CLIs in the background, so the sign-in state and account email shown on the profile card stay accurate without you having to refresh. If a profile's credentials expire or it's never been signed in, an orange badge appears on its dot. Clicking it takes you to that profile's card in Settings so you can sign in again.
If the active profile has no signed-in agent on either provider, Admiral disables the new-chat and new-workspace buttons until you sign in. Click the orange badge on the profile dot to jump straight to the right sign-in card in Settings.
Moving a project between profiles
A project belongs to whichever profile owned the active session when you added it, but you can move it later — drag a project from the sidebar onto a profile dot in the footer. The project (along with every chat in it) re-homes to that profile so it shows up only when that profile is active.
Deleting a profile
When you delete a non-default profile, Admiral asks whether you want to Delete Profile (which keeps the config directory on disk) or Delete Profile and Files (which removes the directory too). Either way, any projects that were assigned to the deleted profile are re-pointed at the Default profile rather than orphaned, so your chats and history remain intact.
Where the Default profile comes from
On first launch, Admiral bootstraps a profile called Default that points at ~/.claude. If you upgraded from a pre-profile build, every existing project is automatically backfilled onto the Default profile, so nothing disappears. There’s no separate onboarding step for profiles — you can keep using just the Default profile indefinitely if you don’t need more than one account.
Project Management
Adding Projects
Add a project by clicking the + button at the top of the sidebar and selecting a folder. Admiral will detect the project type and scan for git repositories automatically. Each project gets its own section in the sidebar holding the workspaces you create inside it — each workspace owns one or more chats scoped to a branch. Project-level settings (folder path, default branch, icon, color) are managed from the per-project Settings sheet, reachable from the project's right-click menu, ellipsis menu, or the project overview toolbar.
Project Overview
The project overview dashboard gives you a high-level view of your project's state. It includes:
- Summary metrics and project health
- Recent and archived chats
- Open worktrees with options to create chats or remove them
- Branch management (switch, merge, delete)
- Memory files for preserving context across sessions
- Project hygiene checks
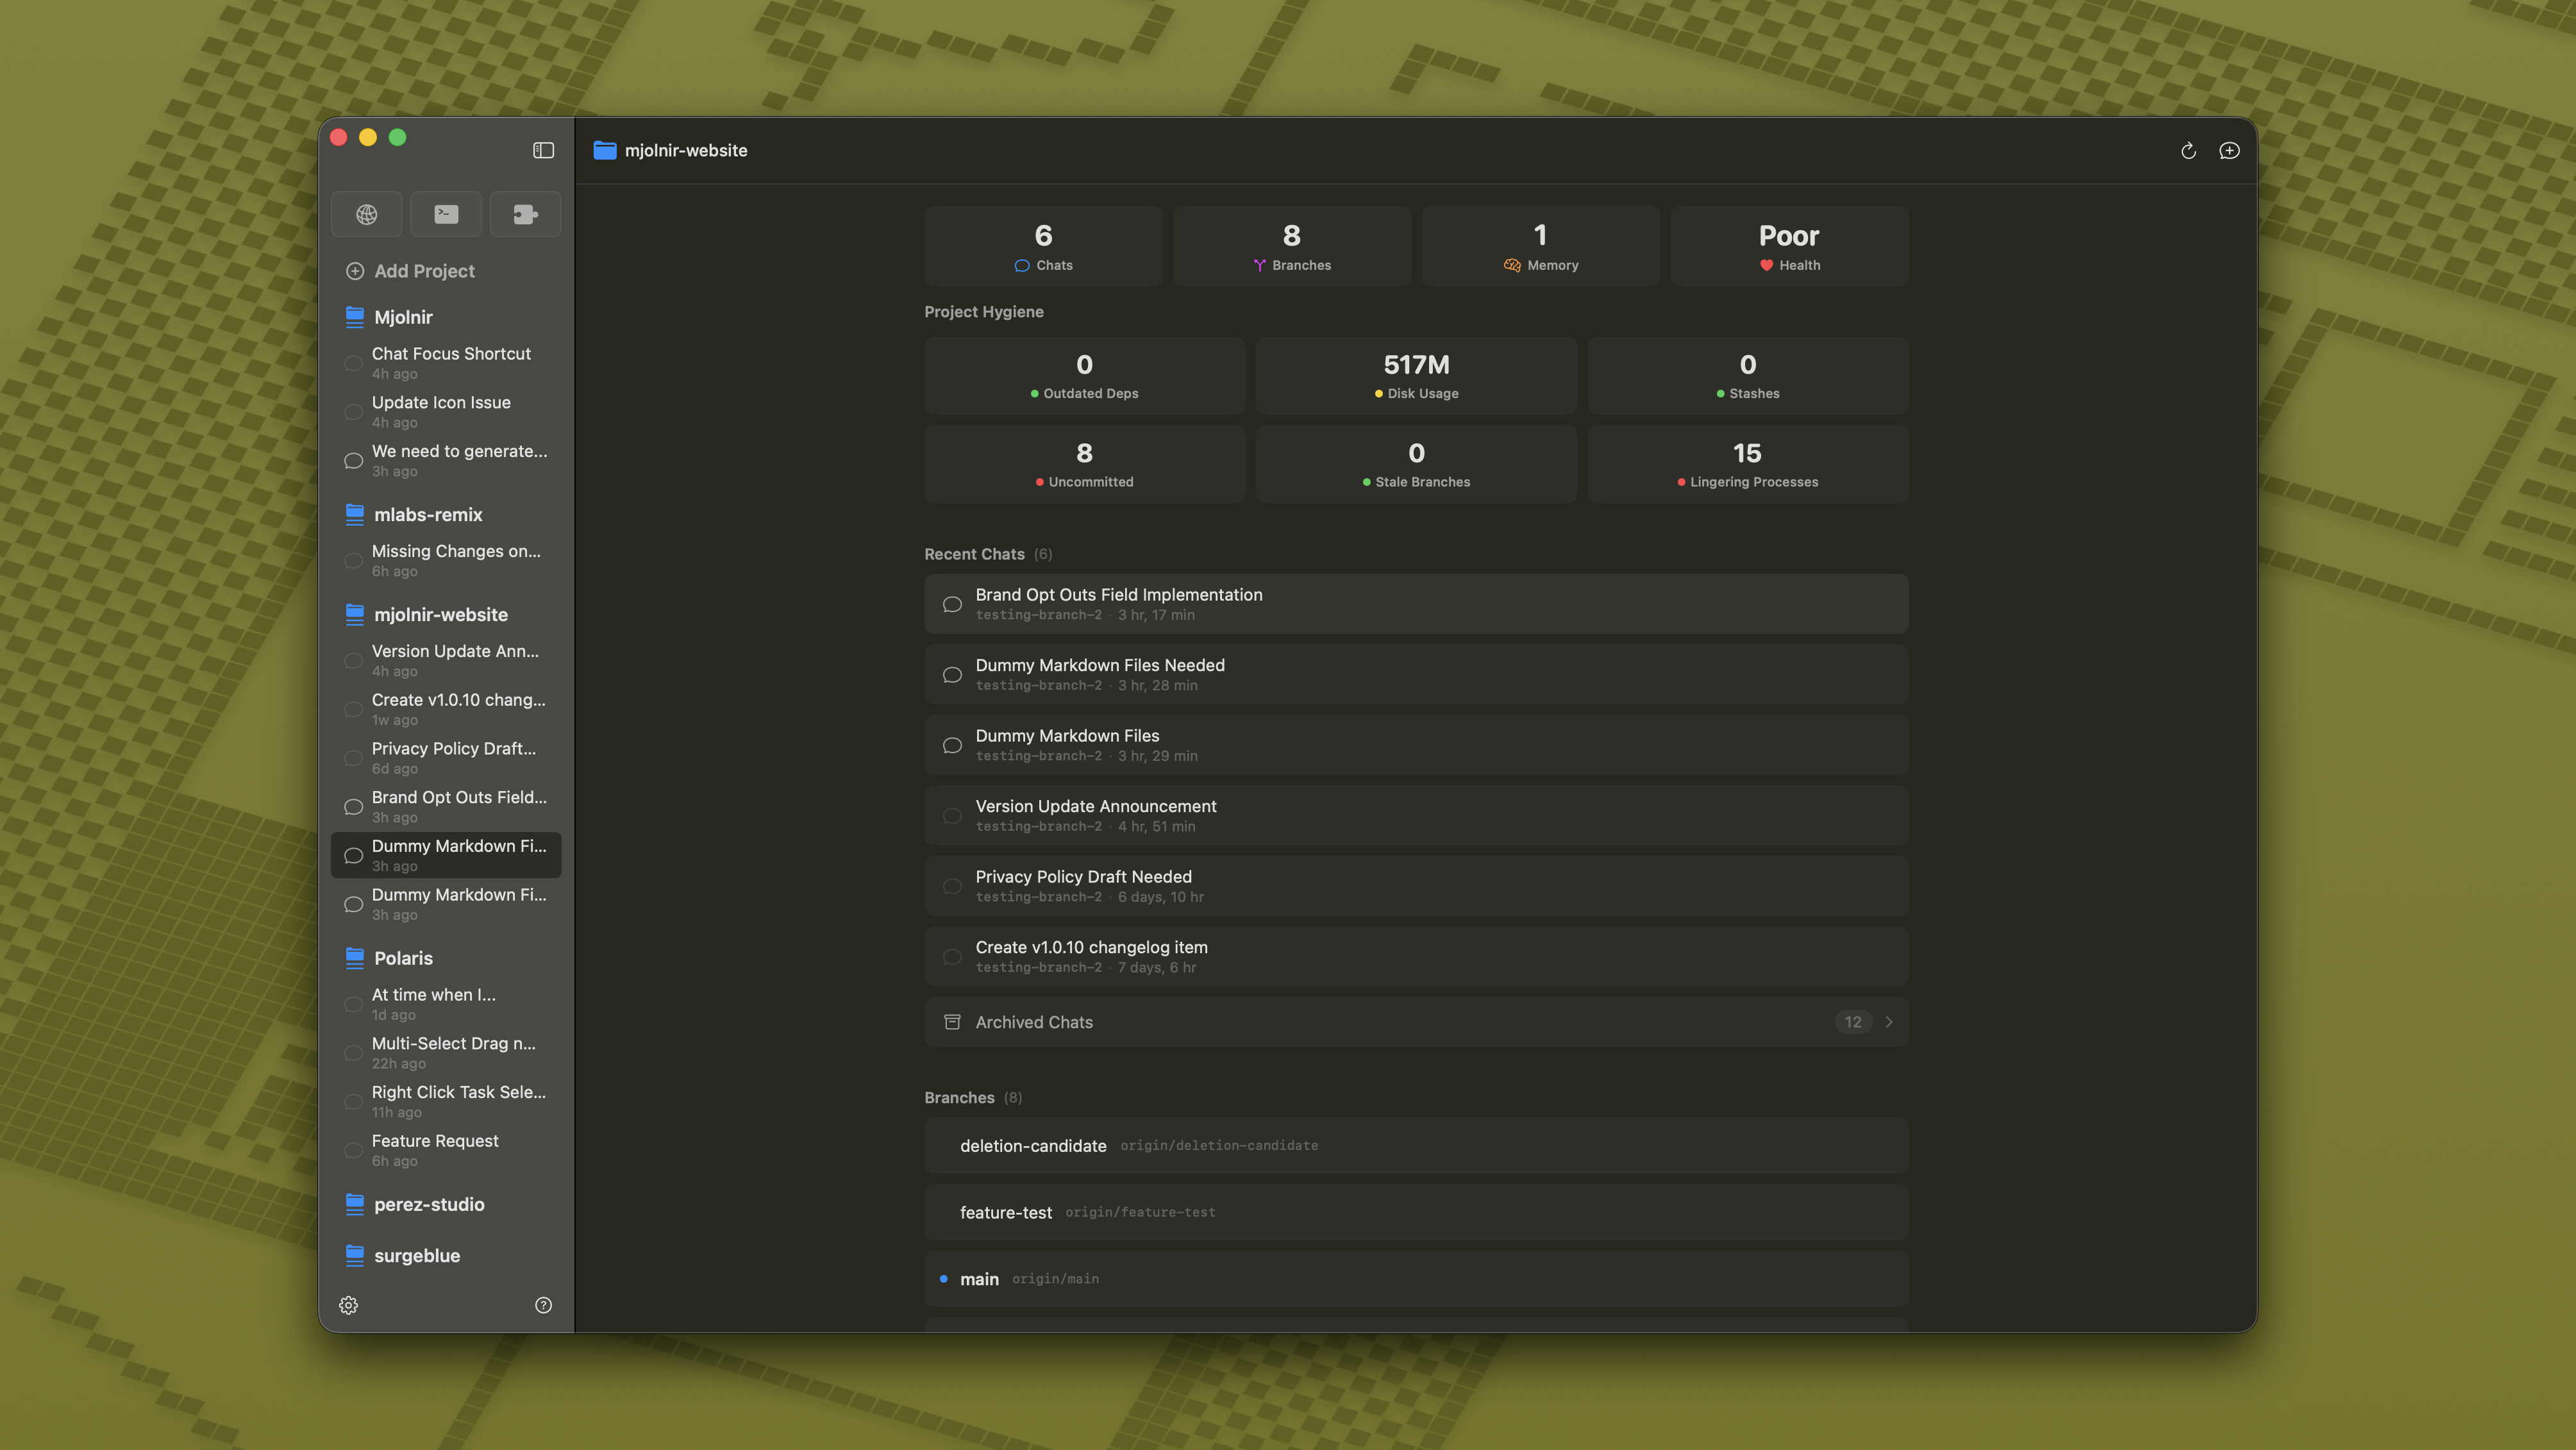
Project overview dashboard
/docs/project-overview.png
Project Actions
You can add custom action buttons to each project for frequently used scripts or commands. Actions live in a grouped card list under Settings → Actions with hover Edit / Duplicate / Delete menus and drag-and-drop reordering. Each action supports a multiline script input, so one button can fire a chain of commands. Configured actions show up in the project toolbar for one-click access.
Project Hygiene
Admiral monitors the health of your project and flags potential issues:
- Disk usage across the project
- Uncommitted changes and untracked files
- Stale branches that haven't been updated recently
- Lingering zombie processes
- Git stash count
- Outdated dependencies
Memory Files
Memory files let you preserve important context across chat sessions. These are Markdown files stored in your project that Claude can read to understand prior decisions, conventions, or project-specific knowledge. You can browse and edit them directly from the project overview using the inline Markdown editor.
Workspaces
Workspaces are how Admiral organizes work inside a project. A workspace ties one or more chats to a single branch and (optionally) a dedicated git worktree, so everything you do — chats, terminal, file diffs, the linked pull request — stays scoped to that branch. Think of workspaces as branch-scoped tabs: keep one workspace per feature, switch between them without losing state, and archive them when you ship.

Workspaces in the project sidebar
/docs/workspaces-sidebar.png
Creating a Workspace
There are a few ways to create a workspace:
- Press ⌘T (or File > New Workspace) to open the new-workspace sheet.
- Click the + button next to a project name in the sidebar.
- Right-click a project and choose New Workspace.
When you create a workspace you pick the branch it should work on. The default comes from the project's Branch New Workspaces From setting, falling back to whatever branch the project is currently on. New workspaces are named "New Workspace" by default — right-click and choose Rename Workspace… to give it something meaningful.
Chats and the Tab Bar
Each workspace can hold multiple chats that all share the same branch and worktree. When a workspace has more than one chat, a Safari-style tab bar appears under the workspace header showing every chat as a pill. Click a tab to switch chats; click the + at the end of the tab bar to add a new one. Pressing ⌘T while a workspace is selected creates a new chat inside that workspace instead of a new workspace.
Switching chats inside a workspace is cheap. Admiral remembers the terminal pane's height and visibility, the active Inspector tab (Files / Git, plus Issue Detail and Plan when an issue is linked), the current commit-message draft, and any in-flight push or pull — so jumping between conversations on the same branch never loses your place.

Workspace tab bar with multiple chats
/docs/workspaces-tab-bar.png
Plan Status
Every workspace tracks a plan status that you can use to triage work the same way you would on a project board. The five statuses are:
- Backlog — not started yet.
- In Progress — actively being worked on.
- In Review — handed off (typically waiting on a PR).
- Done — finished and merged.
- Canceled — abandoned or no longer needed.
The status icon shows up next to the workspace name in the sidebar, and you can change it from the workspace header or the right-click menu.
Worktrees
A workspace can optionally use a dedicated git worktree — a separate working directory that git keeps in sync with the same repository. With a worktree, the workspace's file edits, commits, and terminal commands all happen in an isolated folder, so you can have multiple branches checked out at the same time without stepping on each other.
Worktrees are created and managed from the project overview. Open the Worktrees section, click Create Worktree, pick a base branch, and Admiral hands you a workspace already wired up to it. Existing worktrees show a Create Workspace button to attach a new workspace, and a Remove Worktree button when you're done. Removing a worktree warns you that any uncommitted changes inside it will be lost.
The worktree picker browses both local and remote branches via a tab bar. Pick a remote ref and Admiral creates the matching local tracking branch automatically, so you can spin up a workspace against a teammate's branch without dropping into the terminal first.
A locked worktree icon means git is currently using that worktree (for example, another Admiral window has it open). You can still browse the workspace, but git operations will wait until the lock is released.
Pull Requests and Issues
A workspace can be linked to one open pull request and one issue at a time. Once linked, Admiral caches the PR's number, title, status, head and base branches, and author so you can see at a glance where the workspace stands without leaving the app. The linked issue's plan file shows up in the Inspector's Plan tab so the spec stays one click away from the chat working on it.
Archiving and Deleting
When you finish a feature or just want to declutter, archive the workspace instead of deleting it. Hover over a workspace row in the sidebar and click the archive icon, or right-click and choose Archive Workspace. The workspace disappears from the sidebar but every chat and message is preserved.
Archived workspaces live under Settings > Archived Workspaces, sorted by archival date. Each row shows the workspace name, how many chats and messages it contains, and how long ago it was archived. From here you can Restore a workspace back into the sidebar or Delete it permanently. Permanent deletion removes the workspace and all its chats and messages and cannot be undone.

Archived workspaces in Settings
/docs/workspaces-archived.png
Stopping In-flight Work
If a workspace has a chat that's actively running an agent, hover over the workspace row and click the X button to stop every session in that workspace at once. This is the fastest way to bail out of a long-running task without having to find the right tab first.
What's Scoped to a Workspace
It helps to know what stays the same when you switch chats inside a workspace versus what is per-chat:
- Per workspace: branch, worktree, file tree, modified-files diff, terminal pane, Inspector tab, commit-message draft, push/pull state, plan status, linked PR, linked issue.
- Per chat: conversation history, the running agent session (Claude or Codex), in-flight permission requests.
Two chats in the same workspace see the same files on disk — uncommitted changes don't disappear when you switch tabs, because nothing is being stashed. They're just two conversations operating on the same branch.
Git Integration
Admiral provides a complete git workflow without leaving the app. The inspector panel's git tab shows your repository state at a glance, and inline tools let you stage, commit, and push changes.
Viewing Changes
The git status panel shows staged and unstaged changes with line-level add/delete counts. Click on any file to open a side-by-side diff view showing exactly what changed.
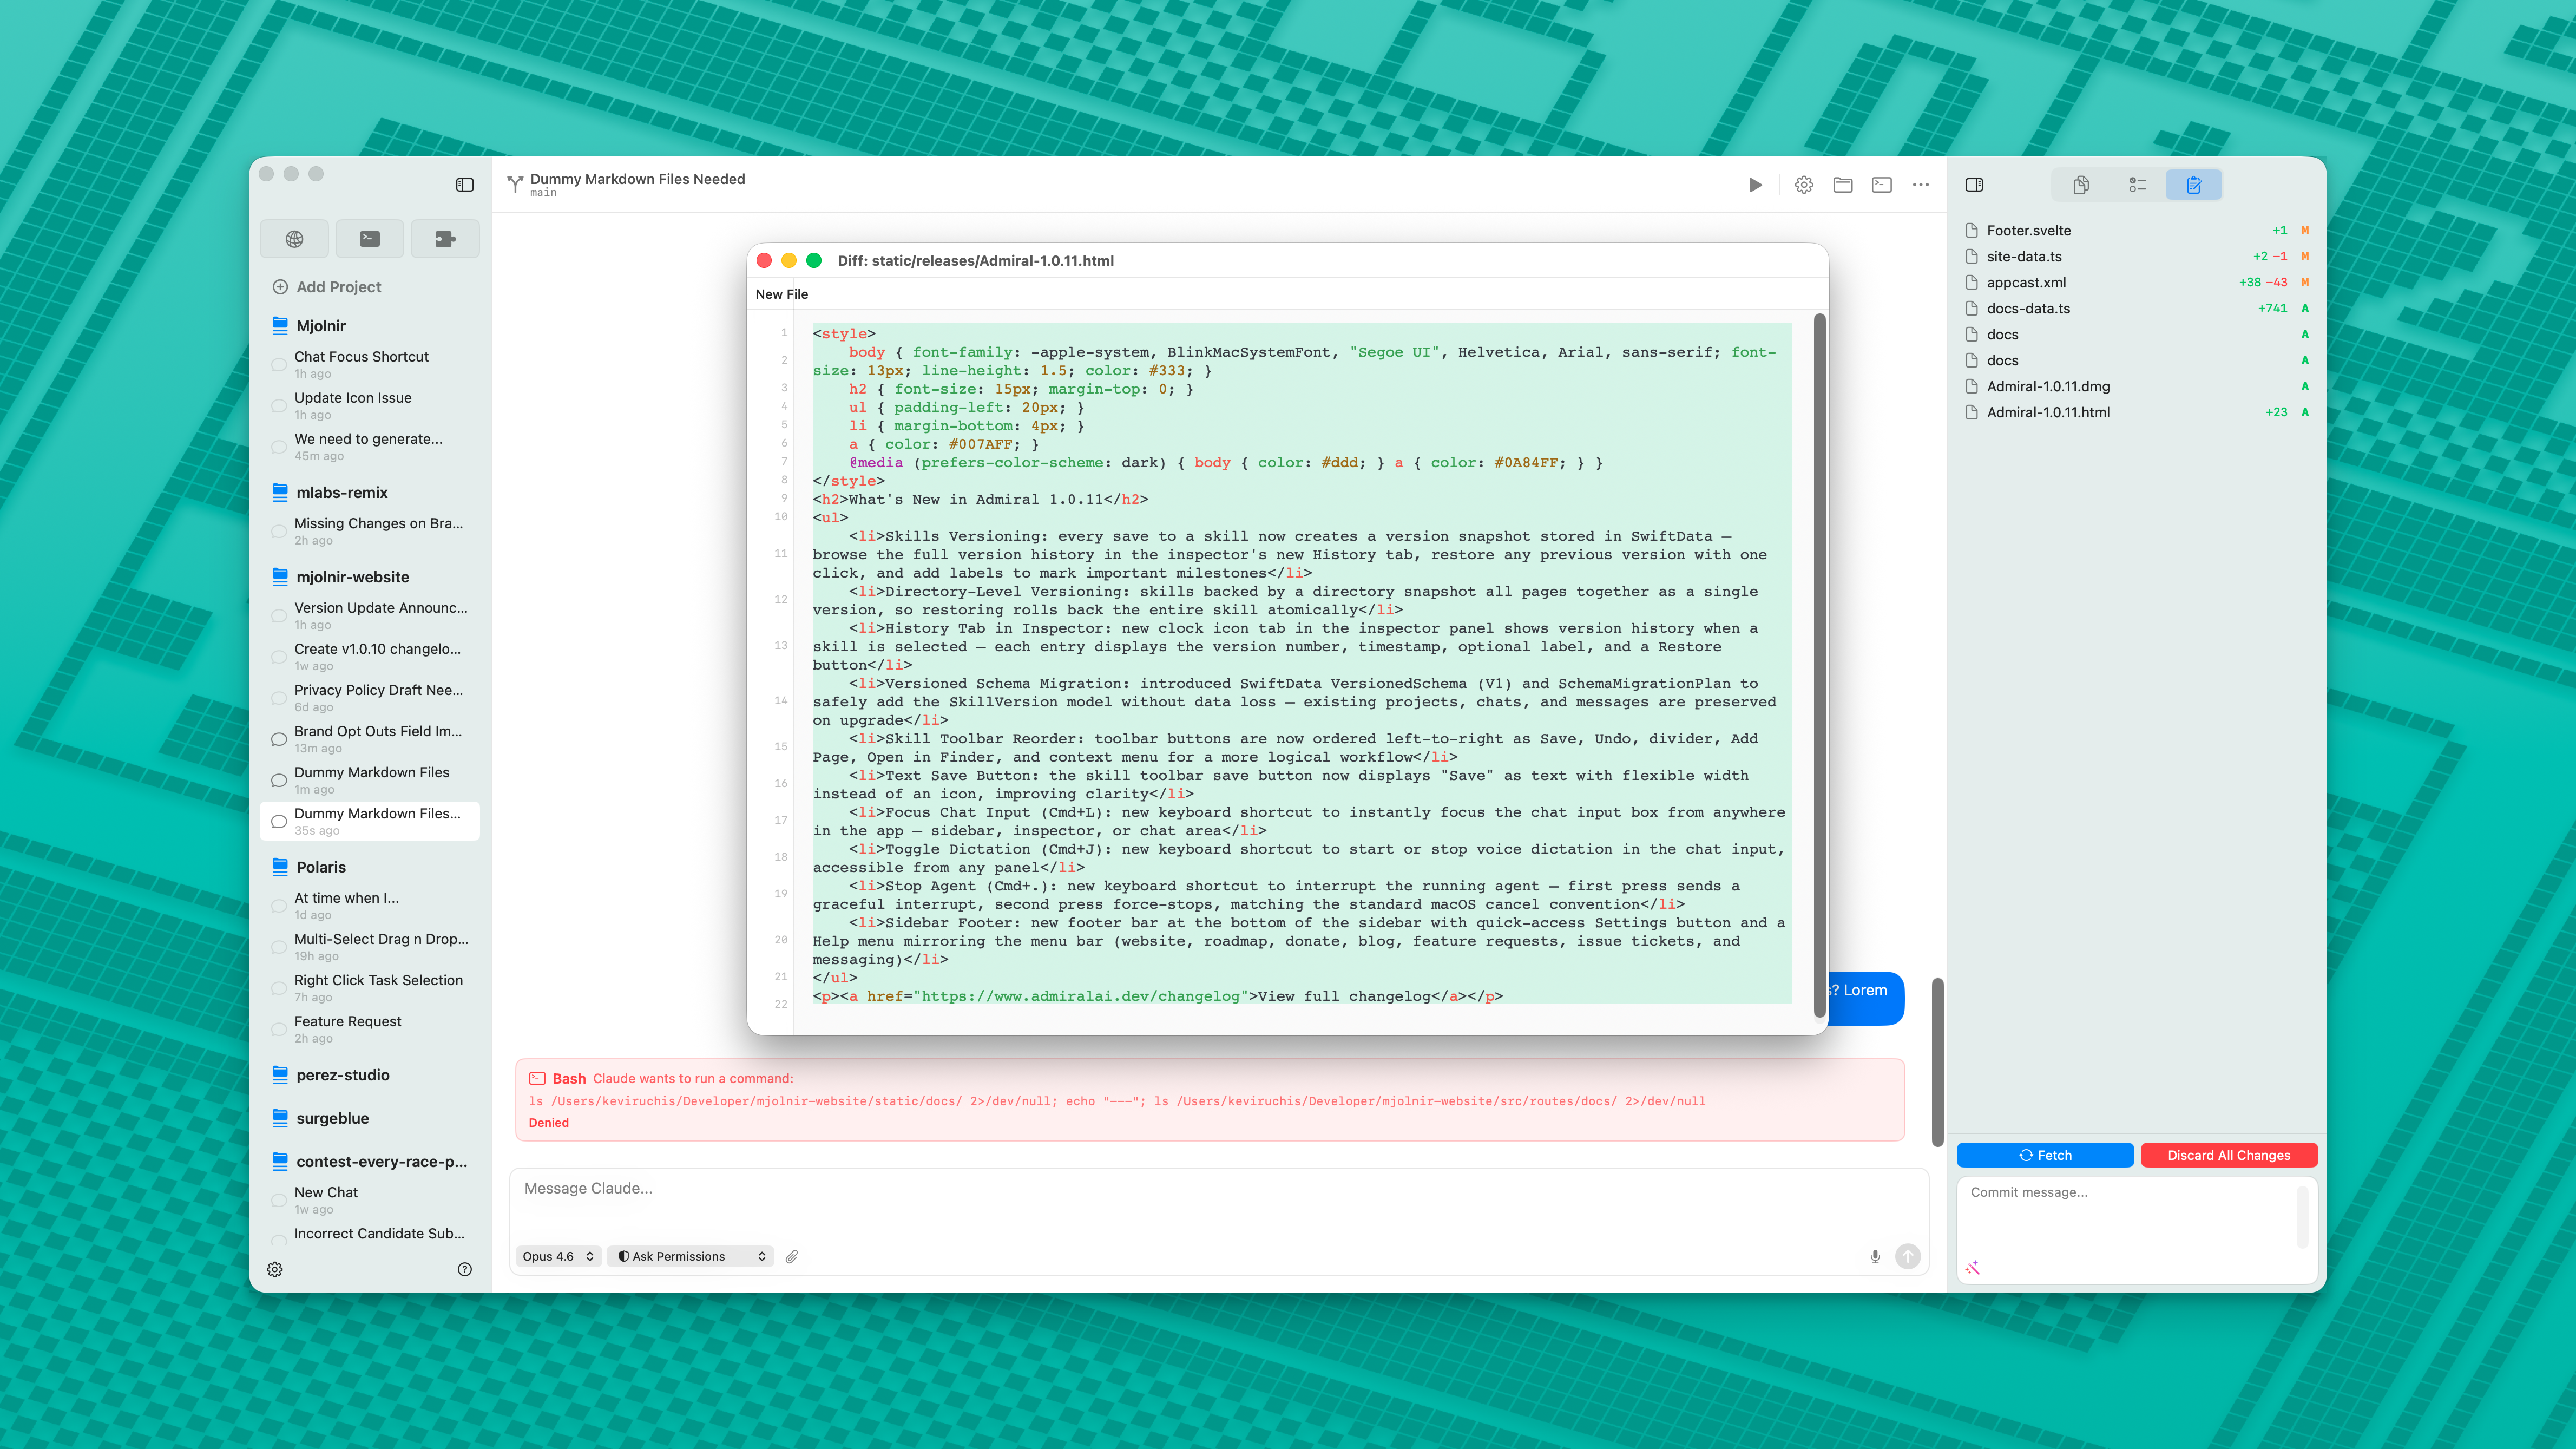
Git diff viewer
/docs/git-diff.png
Staging & Committing
Stage individual files or all changes directly from the git panel. When you're ready to commit, Admiral can generate a commit message for you using AI - it analyzes your staged changes and drafts a conventional commit message. You can accept it as-is, edit it, or write your own.
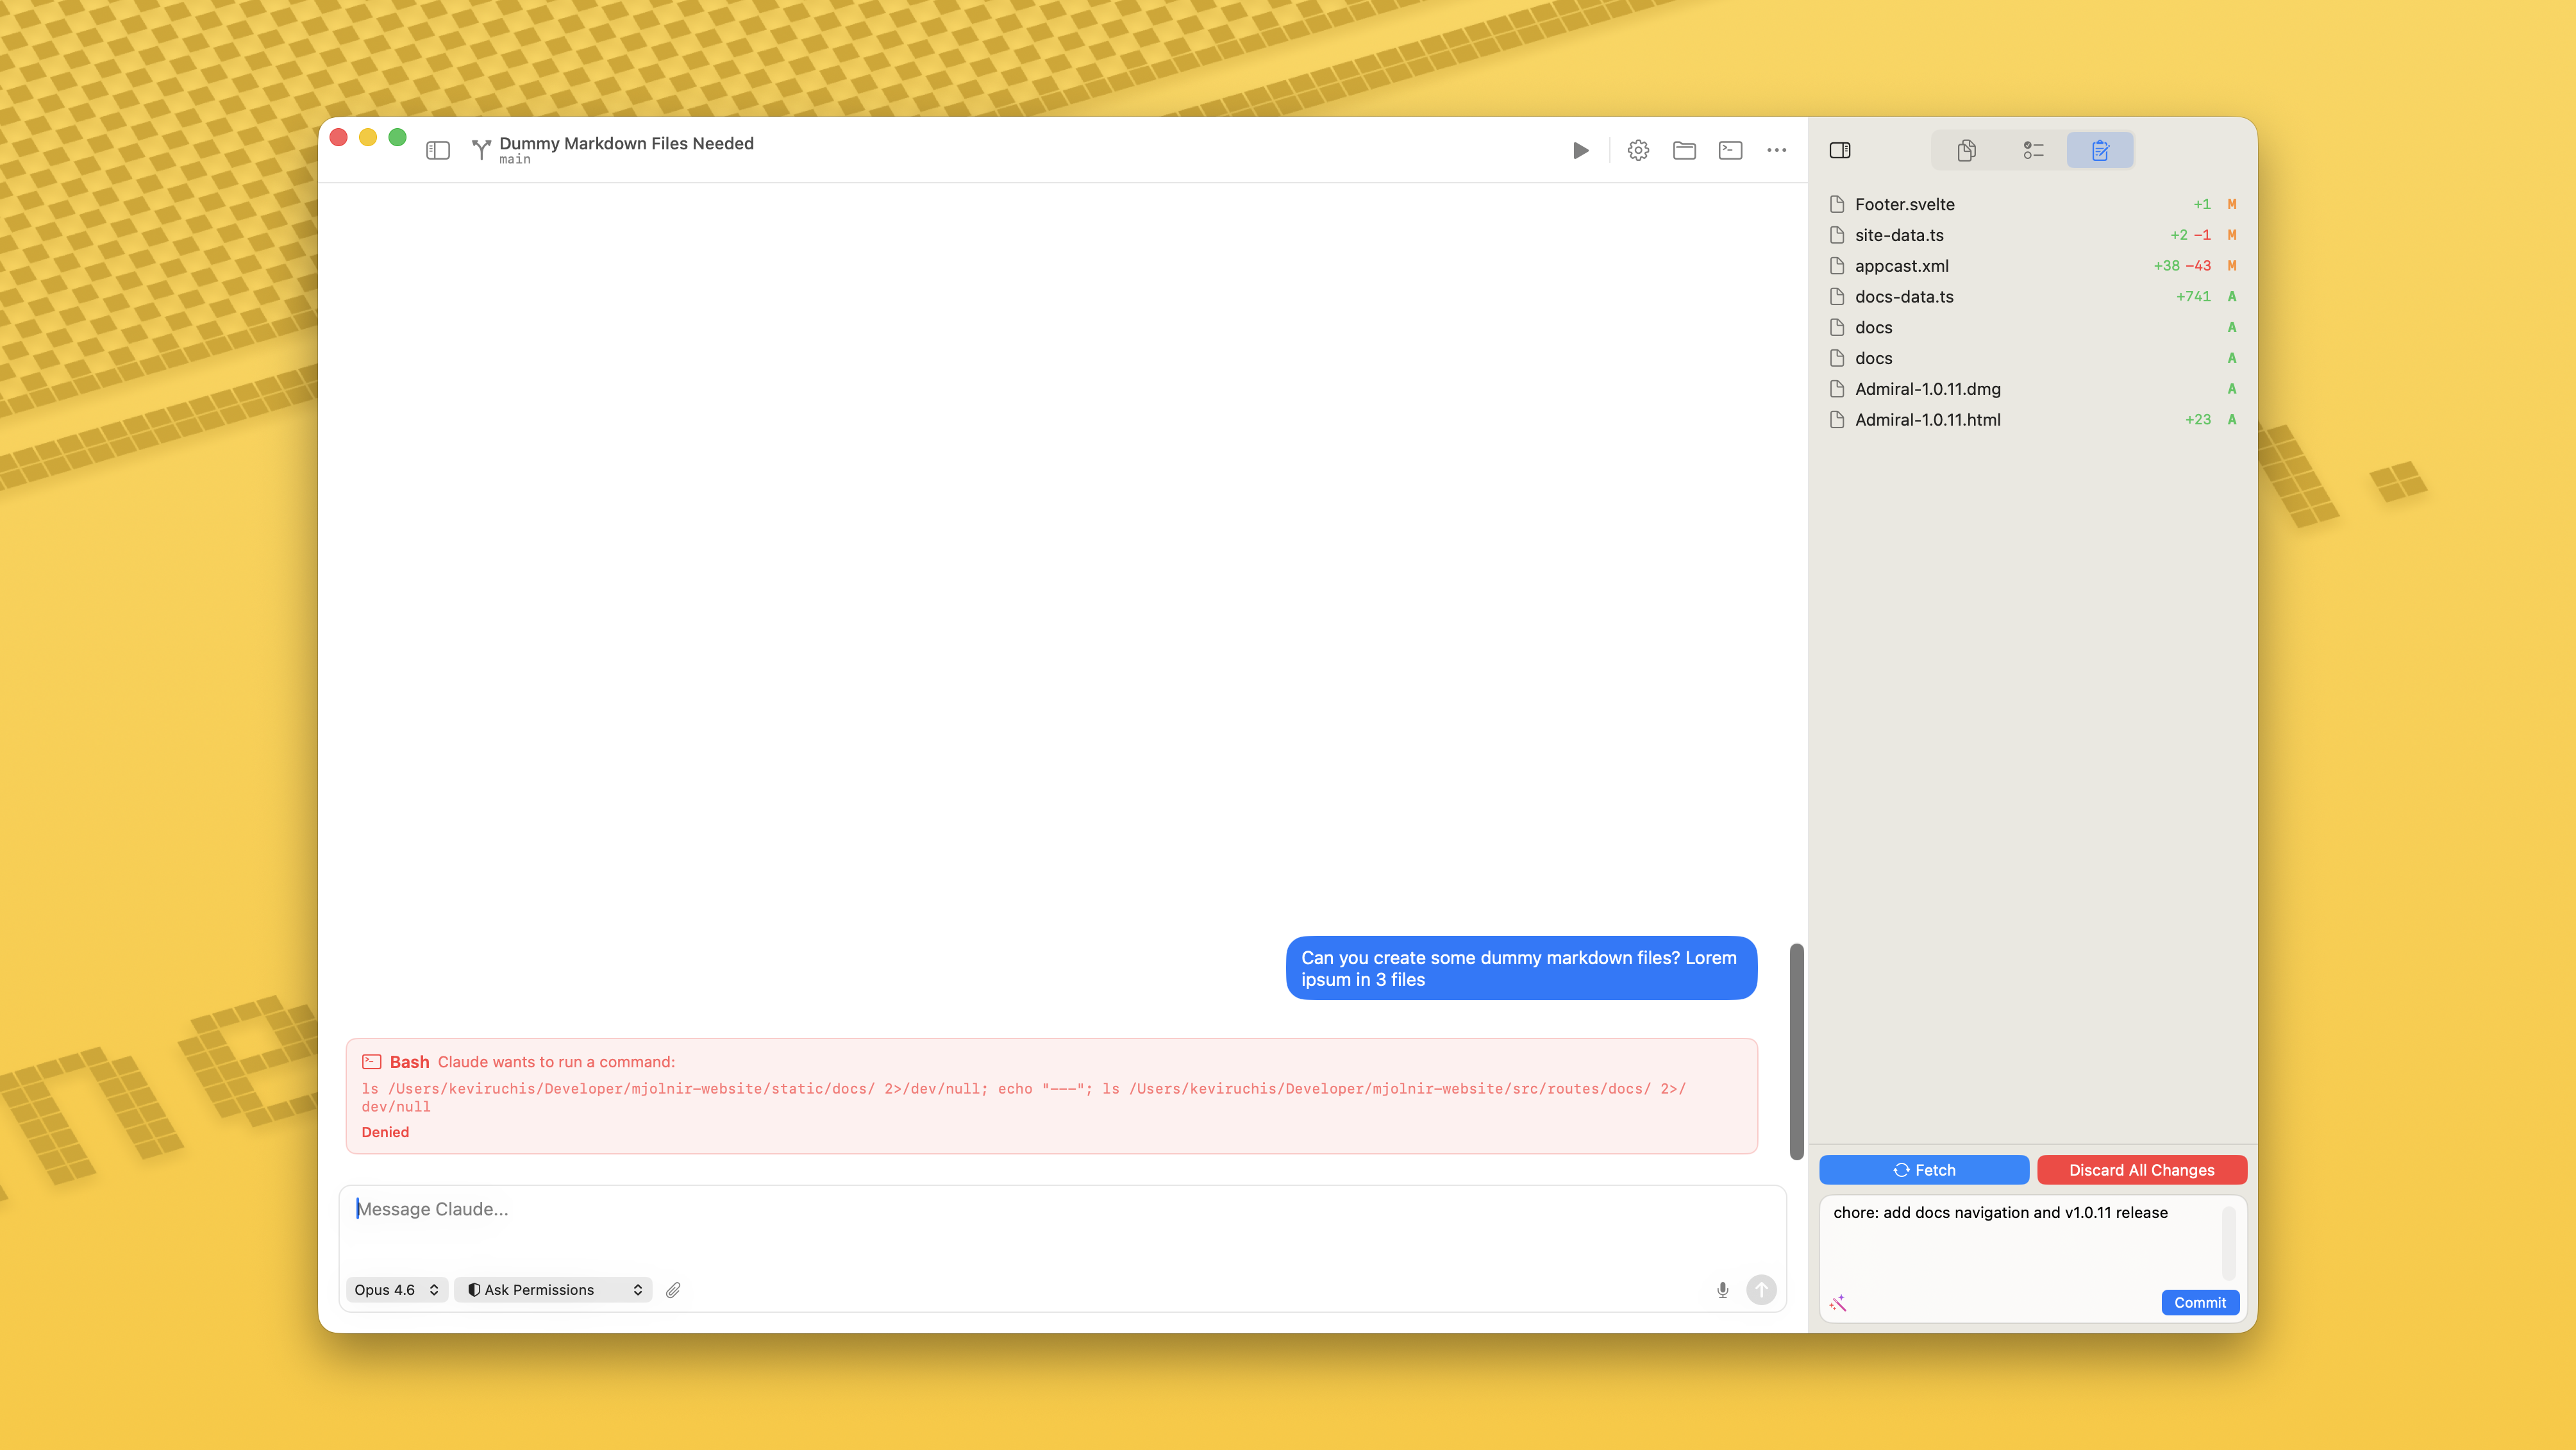
Inline commit with AI-generated message
/docs/git-commit.png
Branch Management
The branch picker lets you switch between local and remote branches, create new branches, and view branch history. The Changes tab toolbar has a fetch / pull / push button row for everyday sync, plus an ellipsis menu with Merge Branch, Rebase Branch, Stash Changes, and Push Changes for the operations you'd otherwise drop into the terminal for.
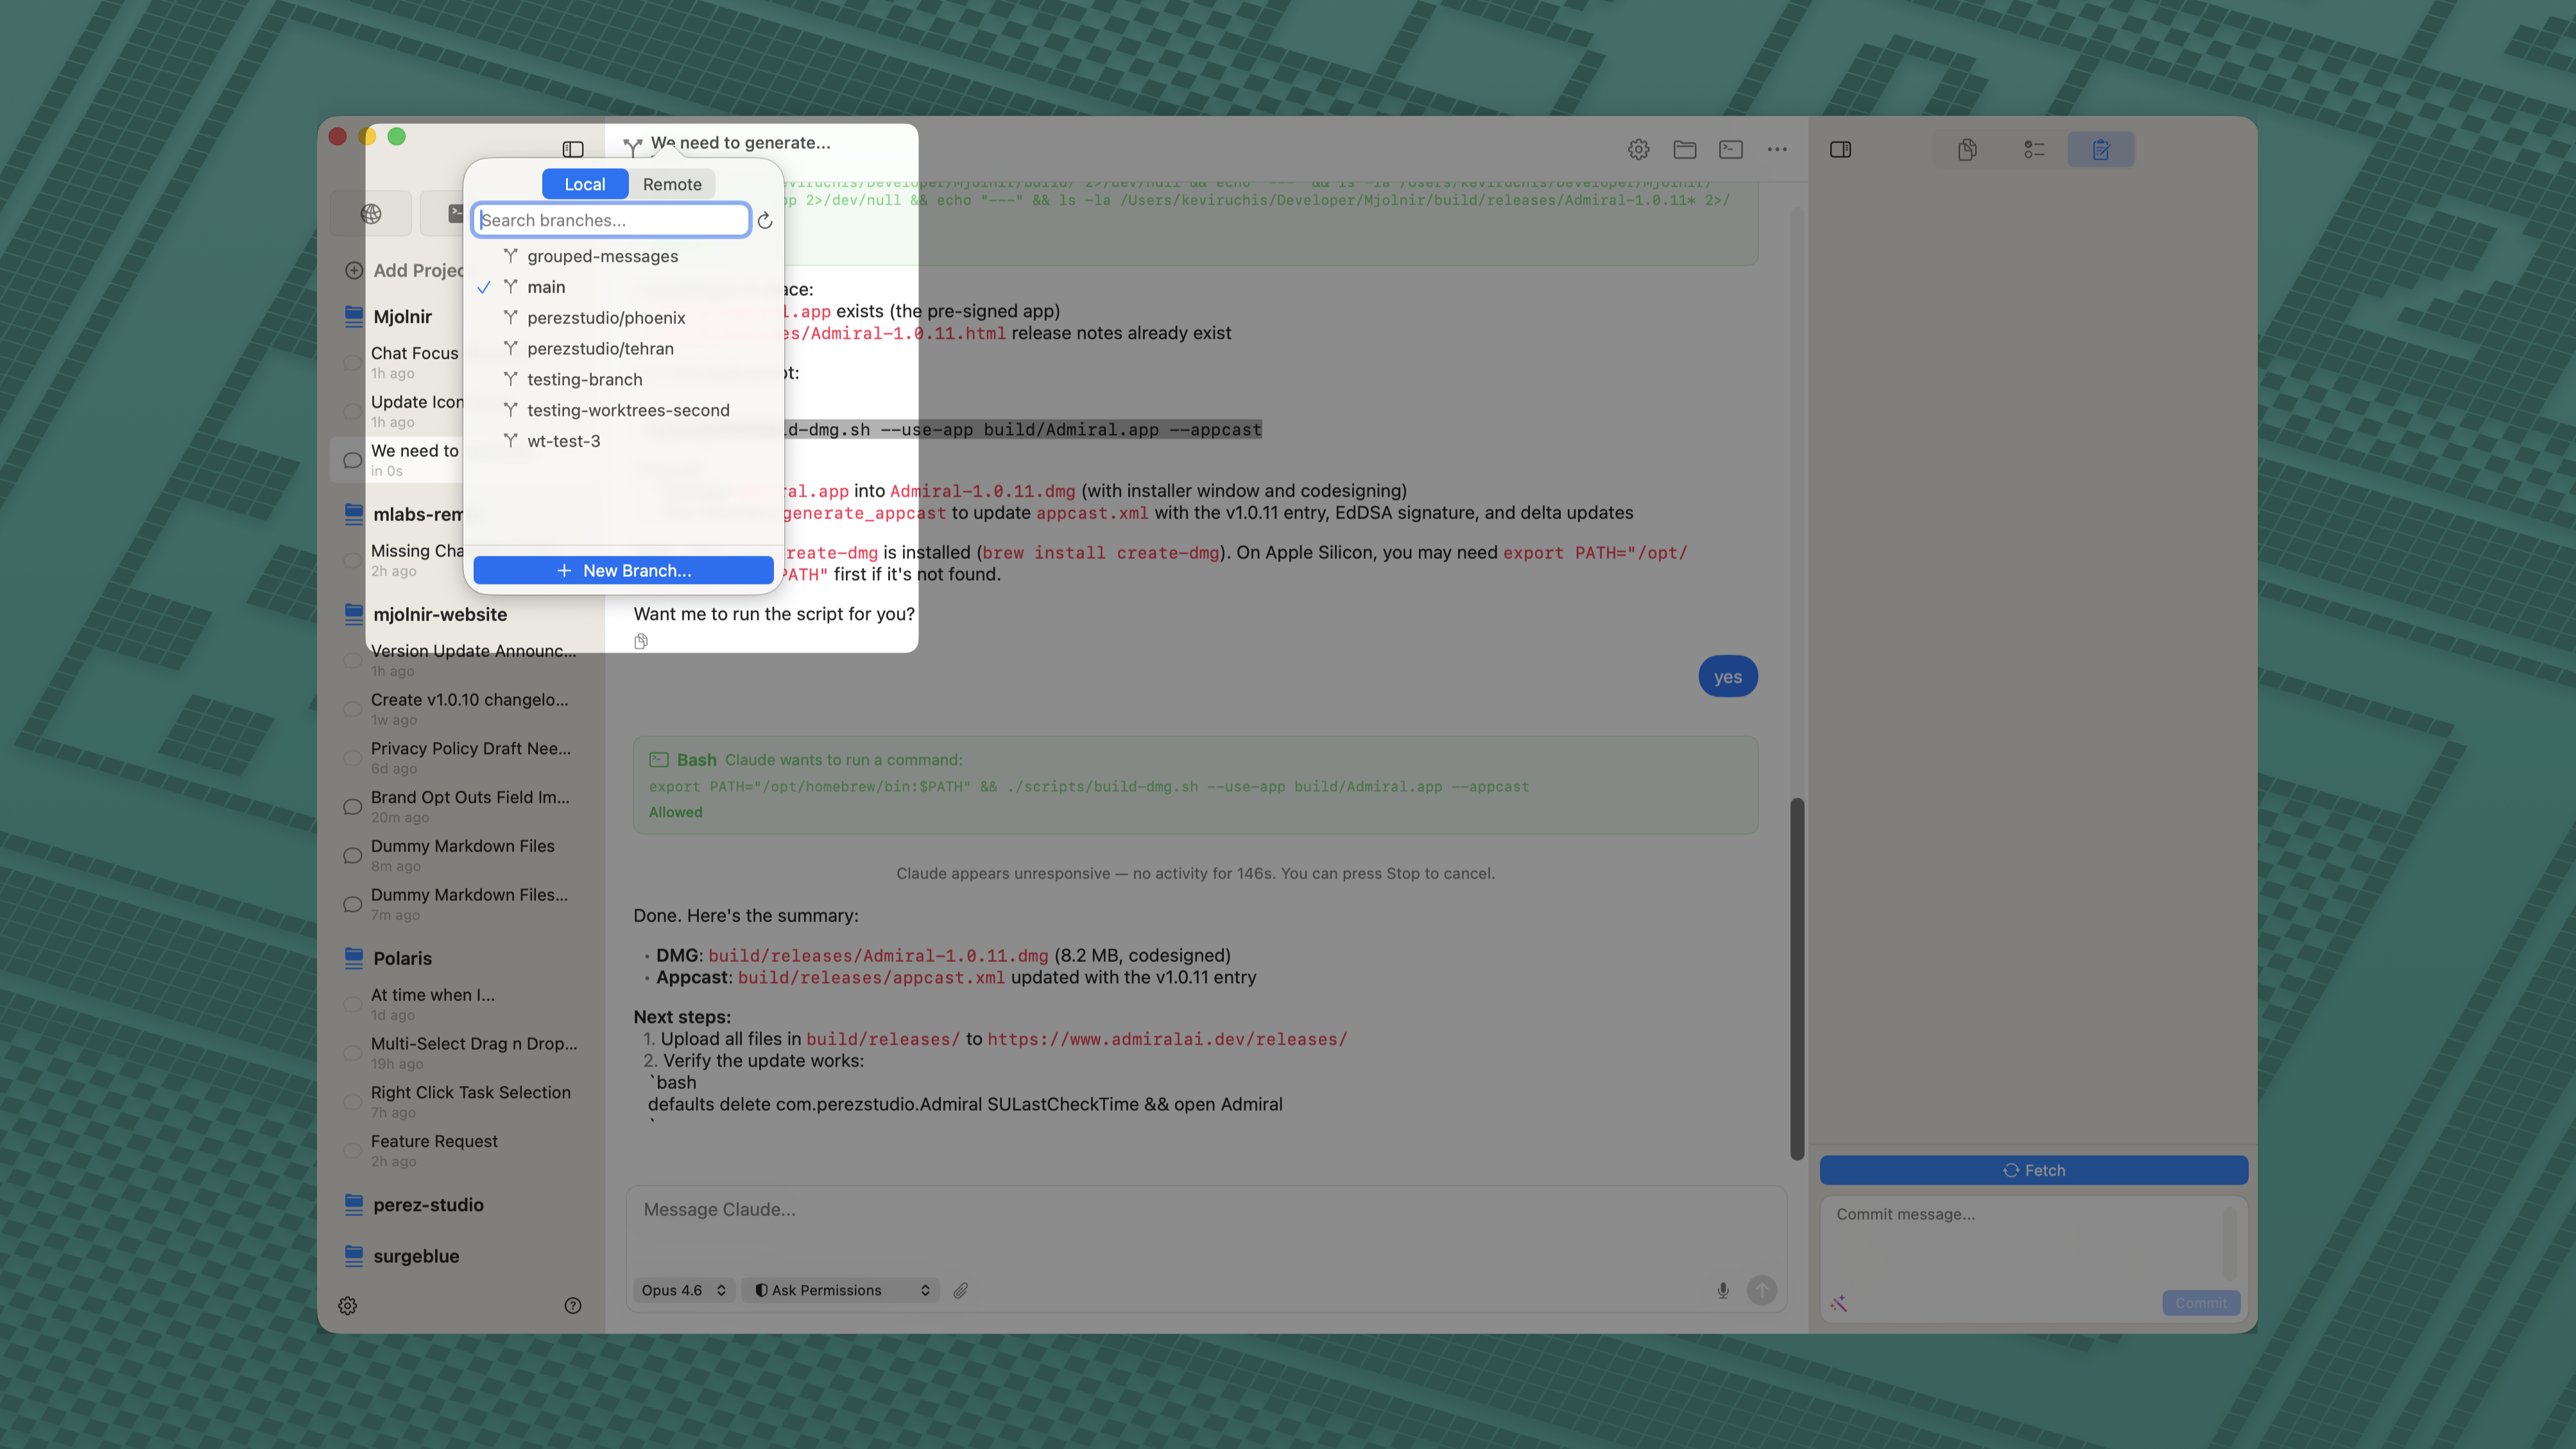
Branch picker with local and remote tabs
/docs/branch-picker.png
Worktrees
For tasks that need isolation, Admiral supports git worktrees. You can create a worktree for a specific chat session, giving it its own branch and working directory. This lets you run experiments without affecting your main working tree. When you're done, merge the changes back or discard the worktree entirely.
Stash Management
View and manage your git stashes from the project overview. Admiral shows your stash count and lets you apply or drop stashes without touching the terminal.
Pull Requests
Admiral links each workspace to a pull request so you can keep an eye on review status, jump to the PR on GitHub, and even draft new PRs without leaving the app. The PR tools live in the Inspector's Modified tab and on the right-click menu of every workspace.
Pull request features currently support GitHub only. Authentication is shared with the system git credential helper — if git push works on your machine, Admiral can talk to GitHub too.
Signing in to GitHub
Admiral talks to GitHub through its REST API using your system git credentials — the same git credential fill / approve / reject flow that git push already uses. No GitHub CLI required, no separate token to manage. The simplest setups are signing in via Xcode's accounts pane or running git credential approve with an existing personal access token. Once credentials are in the Keychain, PR buttons appear automatically. If you haven't signed in yet, the Modified tab shows a Sign in to GitHub to create PRs notice instead of the buttons.
For finer control, the new Source Control tab in Settings exposes an Enable Source Control toggle, GitHub account management with live token validation, your git author name and email, a global gitignore path, and toggles for auto-refresh, auto-fetch, and prefer-rebase. If you work across multiple GitHub accounts, you can also pin a project to a specific username in project settings so the right token is used for the right repository.
Linking an Existing PR
When a workspace has no linked PR yet, the Modified tab shows three buttons: Create PR, Draft PR, and Connect Existing. Click Connect Existing to open the picker. Admiral fetches every open PR in the repository (sorted by most recently updated) and, if any of them has a head branch matching your current workspace branch, surfaces it under Suggested for [branch-name] at the top.
Search the picker by PR number, title, head branch, or author login. Selecting a row shows Will connect #[number] in the footer; click Connect to attach it to the workspace. You can also link a PR from the workspace's right-click menu via Connect Pull Request….

Connect Pull Request picker
/docs/pr-picker.png
Creating a New PR
Click Create PR (or Draft PR for a draft) to open the PR composer. The sheet has a title field, a Markdown body editor with live preview, and an Auto-fill button that uses an agent to generate a conventional-commit-style title and a structured description from your branch diff and commit log. Which agent powers Auto-fill is set per profile in Settings → Models — not the chat's currently selected agent.
The Auto-fill button toggles generation on and off — click it once to start, click again to cancel mid-stream. You can edit the generated title and body before submitting. When you click Create PR (or press ⌘↩), Admiral pushes any unpushed commits, sets up an upstream branch if needed, opens the PR on GitHub, and links it back to the workspace in one go.

Create PR composer with Auto-fill
/docs/pr-composer.png
What You See When a PR is Linked
A linked workspace shows a compact PR card in the Modified tab with the PR number, a state badge (Open, Draft, Merged, or Closed), the title, the head and base branches, the author, and a relative "updated N hours ago" timestamp. A small dot in the same color appears next to the workspace name in the sidebar so you can see PR status at a glance.
Admiral focuses on the workspace-to-PR link rather than reproducing every part of the GitHub UI. Reviews, inline comments, file diffs, and CI status all live on github.com — Admiral gets you there in one click.
Acting on a Linked PR
The PR card has three controls:
- Open PR #N on GitHub — opens the PR in your default browser.
- Copy link — copies the PR URL to your clipboard.
- Ellipsis menu — Refresh re-fetches the latest metadata from GitHub, Change Pull Request… reopens the picker, and Disconnect removes the link from the workspace (without touching the PR on GitHub).
Right-clicking the workspace in the sidebar offers the same actions: Open PR #N, Change Pull Request…, and Disconnect Pull Request.
Refreshing PR Status
Linked PRs auto-refresh in the background so the inspector stays up to date without you clicking anything. The PR's URL, title, status, and draft state are cached on the workspace, so the inspector stays populated when you're offline or switching workspaces. Click Refresh in the ellipsis menu to force a pull if you want the very latest. If something goes wrong (auth expired, network error, PR deleted), an inline error banner explains what happened and stays put until you dismiss it.
Git Operations Menu
The Changes tab toolbar has an ellipsis menu for the git operations you don't want to drop into the terminal for: Merge Branch, Rebase Branch, Stash Changes, and Push Changes. Each one runs against the workspace's current branch, with confirmations where they matter.
Branch Mismatch Warnings
If you switch the workspace to a different git branch after linking a PR, Admiral notices that the workspace's current branch no longer matches the PR's head branch and shows a branch mismatch warning. The link stays in place — that's often what you want when you're bouncing between worktrees — but the warning is there so you don't accidentally push commits to a branch that isn't the one in the PR.
Stopping a Generation in Progress
Auto-fill kicks off a background agent process to draft the PR description. If you change your mind, click the Auto-fill button again to cancel — the in-progress draft is discarded. Closing the composer with the Esc key also cancels any pending generation.
Planning & Issues
Admiral has a built-in planner so you can capture work, draft an implementation strategy, and link a workspace to the issue that's driving it — all without bouncing out to a separate tracker. Issues, plans, and checklists are stored locally in your Admiral project; nothing is synced to GitHub Issues or any other external tool.
The Planner
Open the planner from the sidebar tools to see every issue in your project laid out across four columns: Backlog, Planned, In Progress, and Done. Click + (or press ⌘I from anywhere in the app) to create a new issue, drag cards between columns to update status, and click any card to open its full detail sheet.
A few details make the board fast to scan: every card shows a four-segment priority cellular bar so you can spot urgent work without opening the card; hover any card to cycle its status without opening it; and the columns reflow for narrow widths so the board is usable in a smaller window. The planner toolbar has a collapsible Finder-style search field for filtering down to a specific issue.

Planner kanban view
/docs/planner.png
Anatomy of an Issue
Every issue is a self-contained record with the following fields:
- Title and Description — the core of the issue.
- Type — Feature, Bug, or Task.
- Priority — None, Low, Medium, High, or Urgent.
- Status — Backlog, Planned, In Progress, or Done.
- Due date, labels, and an optional milestone.
- A checklist of subtasks you can check off inline.
- An optional link to one workspace.
- A markdown plan file stored at
.admiral/plans/{issue-id}.md.
All of this metadata is editable from the issue detail sheet — click a property to change it, or use the inline Add item field at the bottom of the checklist to capture subtasks as you think of them.
Linking an Issue to a Workspace
Each issue can be linked to one workspace, and each workspace to one issue. From the issue detail sheet's Workspace section, click Link Workspace to attach an existing workspace, or Create Worktree to spin up a fresh worktree-backed workspace dedicated to this issue. Once linked, clicking the workspace button jumps you straight to it in the sidebar.
The link is bidirectional: in the linked workspace, the Inspector picks up two extra tabs — Issue Detail and Plan — so the spec is always one click away from the chat working on it.
The Plan Tab
The Plan tab is a split view. The left pane shows the issue's metadata — title, status, priority, due date, labels, milestone, checklist — all editable inline. Click the circle next to the title to toggle the issue between Done and not-done without leaving the chat. The right pane is a dedicated chat for refining the plan itself.

Plan tab in the Inspector
/docs/plan-tab.png
Plan Chat
Plan chat is a lightweight Claude conversation scoped to a single issue. It runs in print mode — no tools, no permission prompts, no filesystem access — and streams pure markdown back to you. Use it to sketch an approach, refine an existing plan, or talk through trade-offs before any real code gets written.
When you ask Claude to draft a plan, the request includes the issue title, description, and the current plan file contents (if any). The streamed response can be saved straight to the issue's plan file or discarded — your call. Plan chat respects the active profile, so the conversation runs against whichever Claude account that profile is configured for.
Plan Files on Disk
Saved plans live as Markdown files in your project at .admiral/plans/{issue-id}.md. They're plain files — you can commit them, browse them, and edit them outside Admiral if you want. The filename uses the issue's internal ID so the link to the planner stays stable even if you rename the issue.
Issue Status vs. Workspace Plan Status
Admiral tracks two related-but-separate states:
- Issue status (Backlog / Planned / In Progress / Done) — lives on the issue and is what shows up in planner columns.
- Workspace plan status (Backlog / In Progress / In Review / Done / Canceled) — lives on the workspace and is what shows up as a colored badge in the sidebar.
They're intentionally orthogonal. A workspace can be In Review waiting on a PR while the issue it's linked to is still In Progress, or vice versa. Update each one where it makes sense; Admiral won't force them in lockstep.
Checklists
Checklists are first-class on every issue. Add items inline from the issue detail sheet or the Plan tab; tick them off as you ship them. Once you've added at least one item, a progress counter (e.g., 3/7) appears in the issue header so you can see at a glance how much is left.
Pulling Issue Context into Chat
Type @task in a chat input and Admiral injects the linked issue's full context — title, type, priority, status, labels, milestone, due date, description, plan file, and every checklist item — into the message you're composing. The token highlights in indigo as you type and shows up as a chip in the sent bubble so you can see at a glance which messages were issue-aware.
If the workspace isn't linked to an issue when you type @task, Admiral surfaces a system warning before sending — no silent no-ops.
Empty State
A brand-new project starts with an empty planner — four columns and a + button. If you open the Plan tab on a workspace that isn't linked to an issue, you'll see a prompt to open the planner and link or create one.
Developer Tools
File Browser
The inspector's file browser lets you navigate your project tree, see modified files at a glance, and preview file contents. You can drag and drop files to rearrange them or drop external files into your project to copy them in.
If a drop would overwrite a same-named entry in the destination folder, Admiral prompts you to skip, replace, or keep both — no accidental clobbers.
Toggle Show Hidden Files in preferences to reveal dotfiles in the navigator. .git and .DS_Store stay filtered out regardless, so the tree never gets noisy.
Code Diffs
When the AI suggests file edits or writes new files, Admiral renders the changes as clean visual diffs. You can review every change line by line before approving. This applies to both Write (new file) and Edit (modify existing file) operations.
Quick Open
Press ⌘K to open the quick search. It searches across all your chat names and message transcripts, similar to Spotlight. You can filter results by chats or messages, and jump directly to a specific message with a highlight animation.
File Editor
Admiral ships with a native file editor that opens as an overlay on top of your workspace. It's designed for the quick tweaks you don't want to leave Admiral for — fixing a typo, tweaking a config value, or reviewing exactly what the agent just wrote before you commit it.

Admiral in-app file editor overlay
/docs/file-editor.png
Opening a file
Open any file by clicking it in the inspector's file browser, or jump straight to it from Quick Open (⌘K). The editor opens as an overlay so your active chat and terminal stay exactly where they were — close the editor and you're right back in the conversation.
Editor features
- Line numbers alongside the gutter, with the active line highlighted.
- Scrollable minimap on the right edge for fast navigation in long files.
- Syntax highlighting for the common languages in your project.
- Save to disk on
⌘S; Admiral writes the change directly to the file on disk so the next agent or terminal command sees it.
Working alongside the agent
You can edit files while a chat is running — the agent's next read picks up your changes. If you and the agent edit the same file at the same time, Admiral's diff view will surface the difference so nothing is silently overwritten.
Tools
Admiral includes a set of built-in tools that extend your workspace beyond chat and code review.
Terminal Overview
The Terminal Overview is a dedicated tool that aggregates and displays all active terminal sessions across every chat and project in Admiral. It gives you a bird's-eye view of everything running in your workspace.
The overview shows:
- A summary bar with total terminal count, running terminal count, and active project count
- A scrollable list of every terminal session with its status (running or stopped), project name, associated chat, and working directory
- Action buttons on each row to navigate directly to the chat containing the terminal or stop a running process
The terminal list auto-refreshes every few seconds so you always have an up-to-date picture. You can also click the refresh button in the header to update manually.
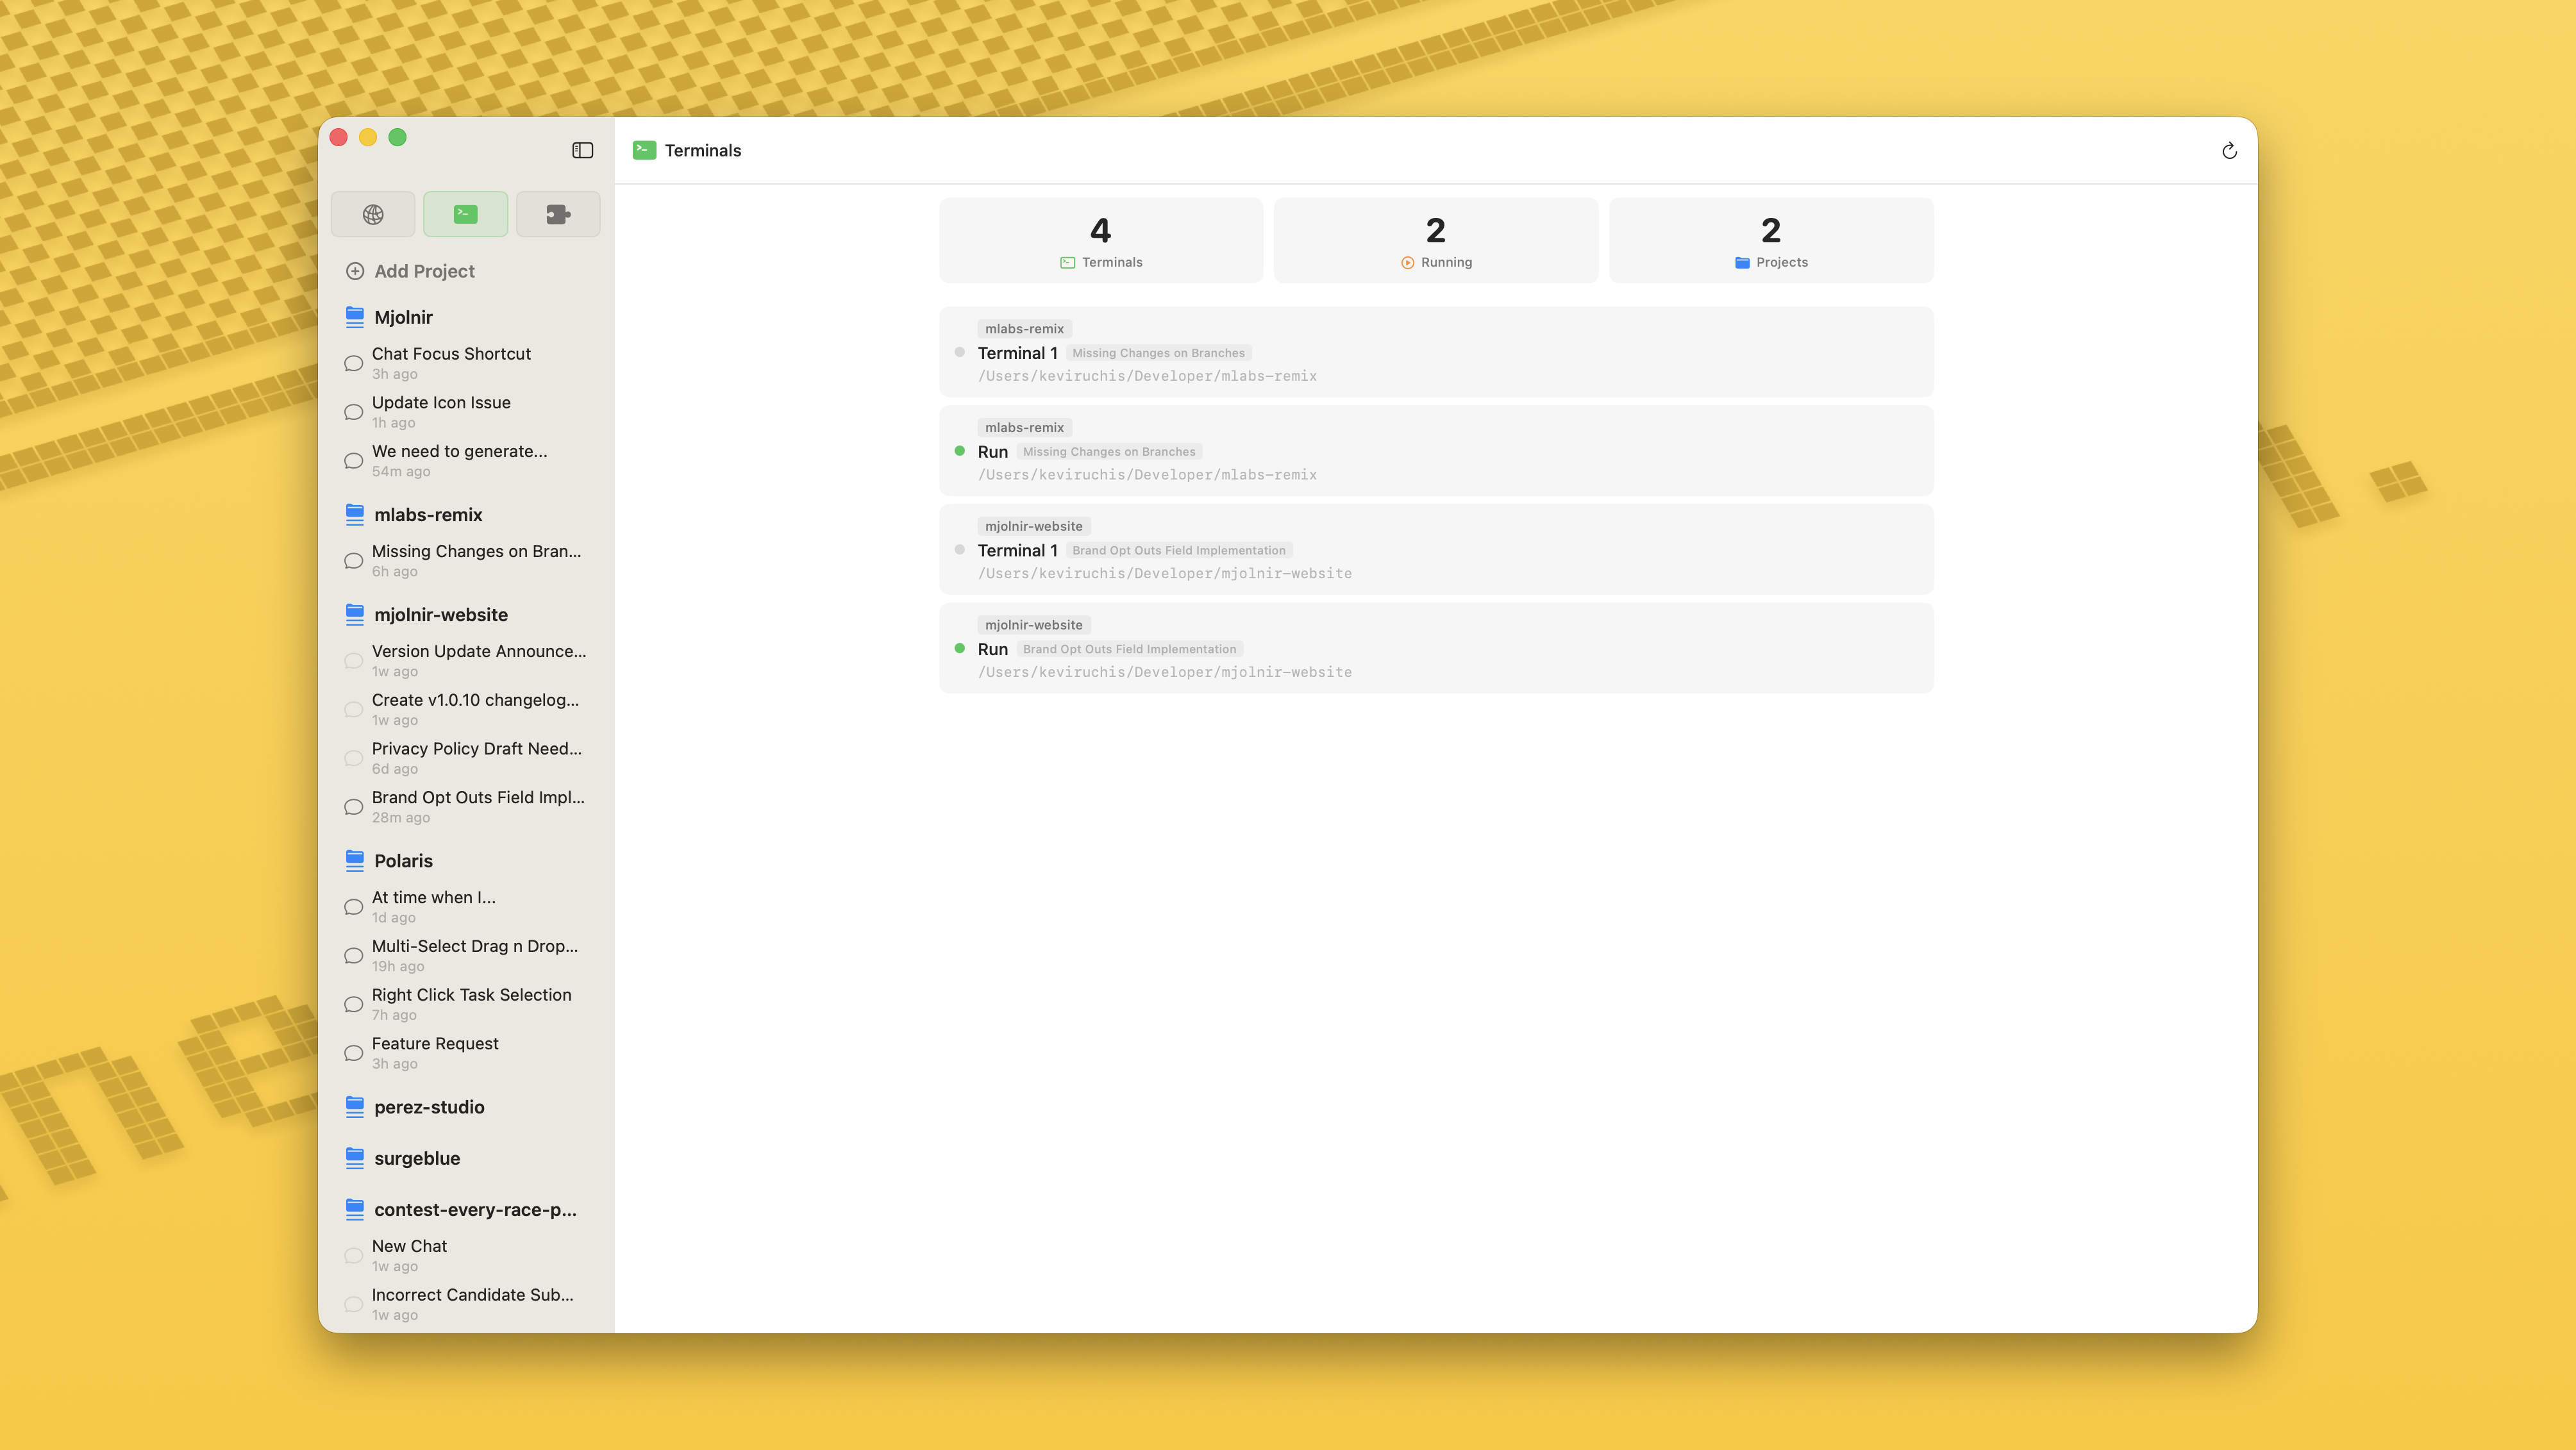
Terminal Overview tool
/docs/terminal-overview.png
Ports
The ports tool detects active listening TCP ports on your machine and shows them per project. This is especially useful when working with local dev servers, APIs, or any service that binds to a port.
For each detected port you can:
- Open it directly in your browser with one click
- See which process is holding the port
- Kill the process if it's no longer needed
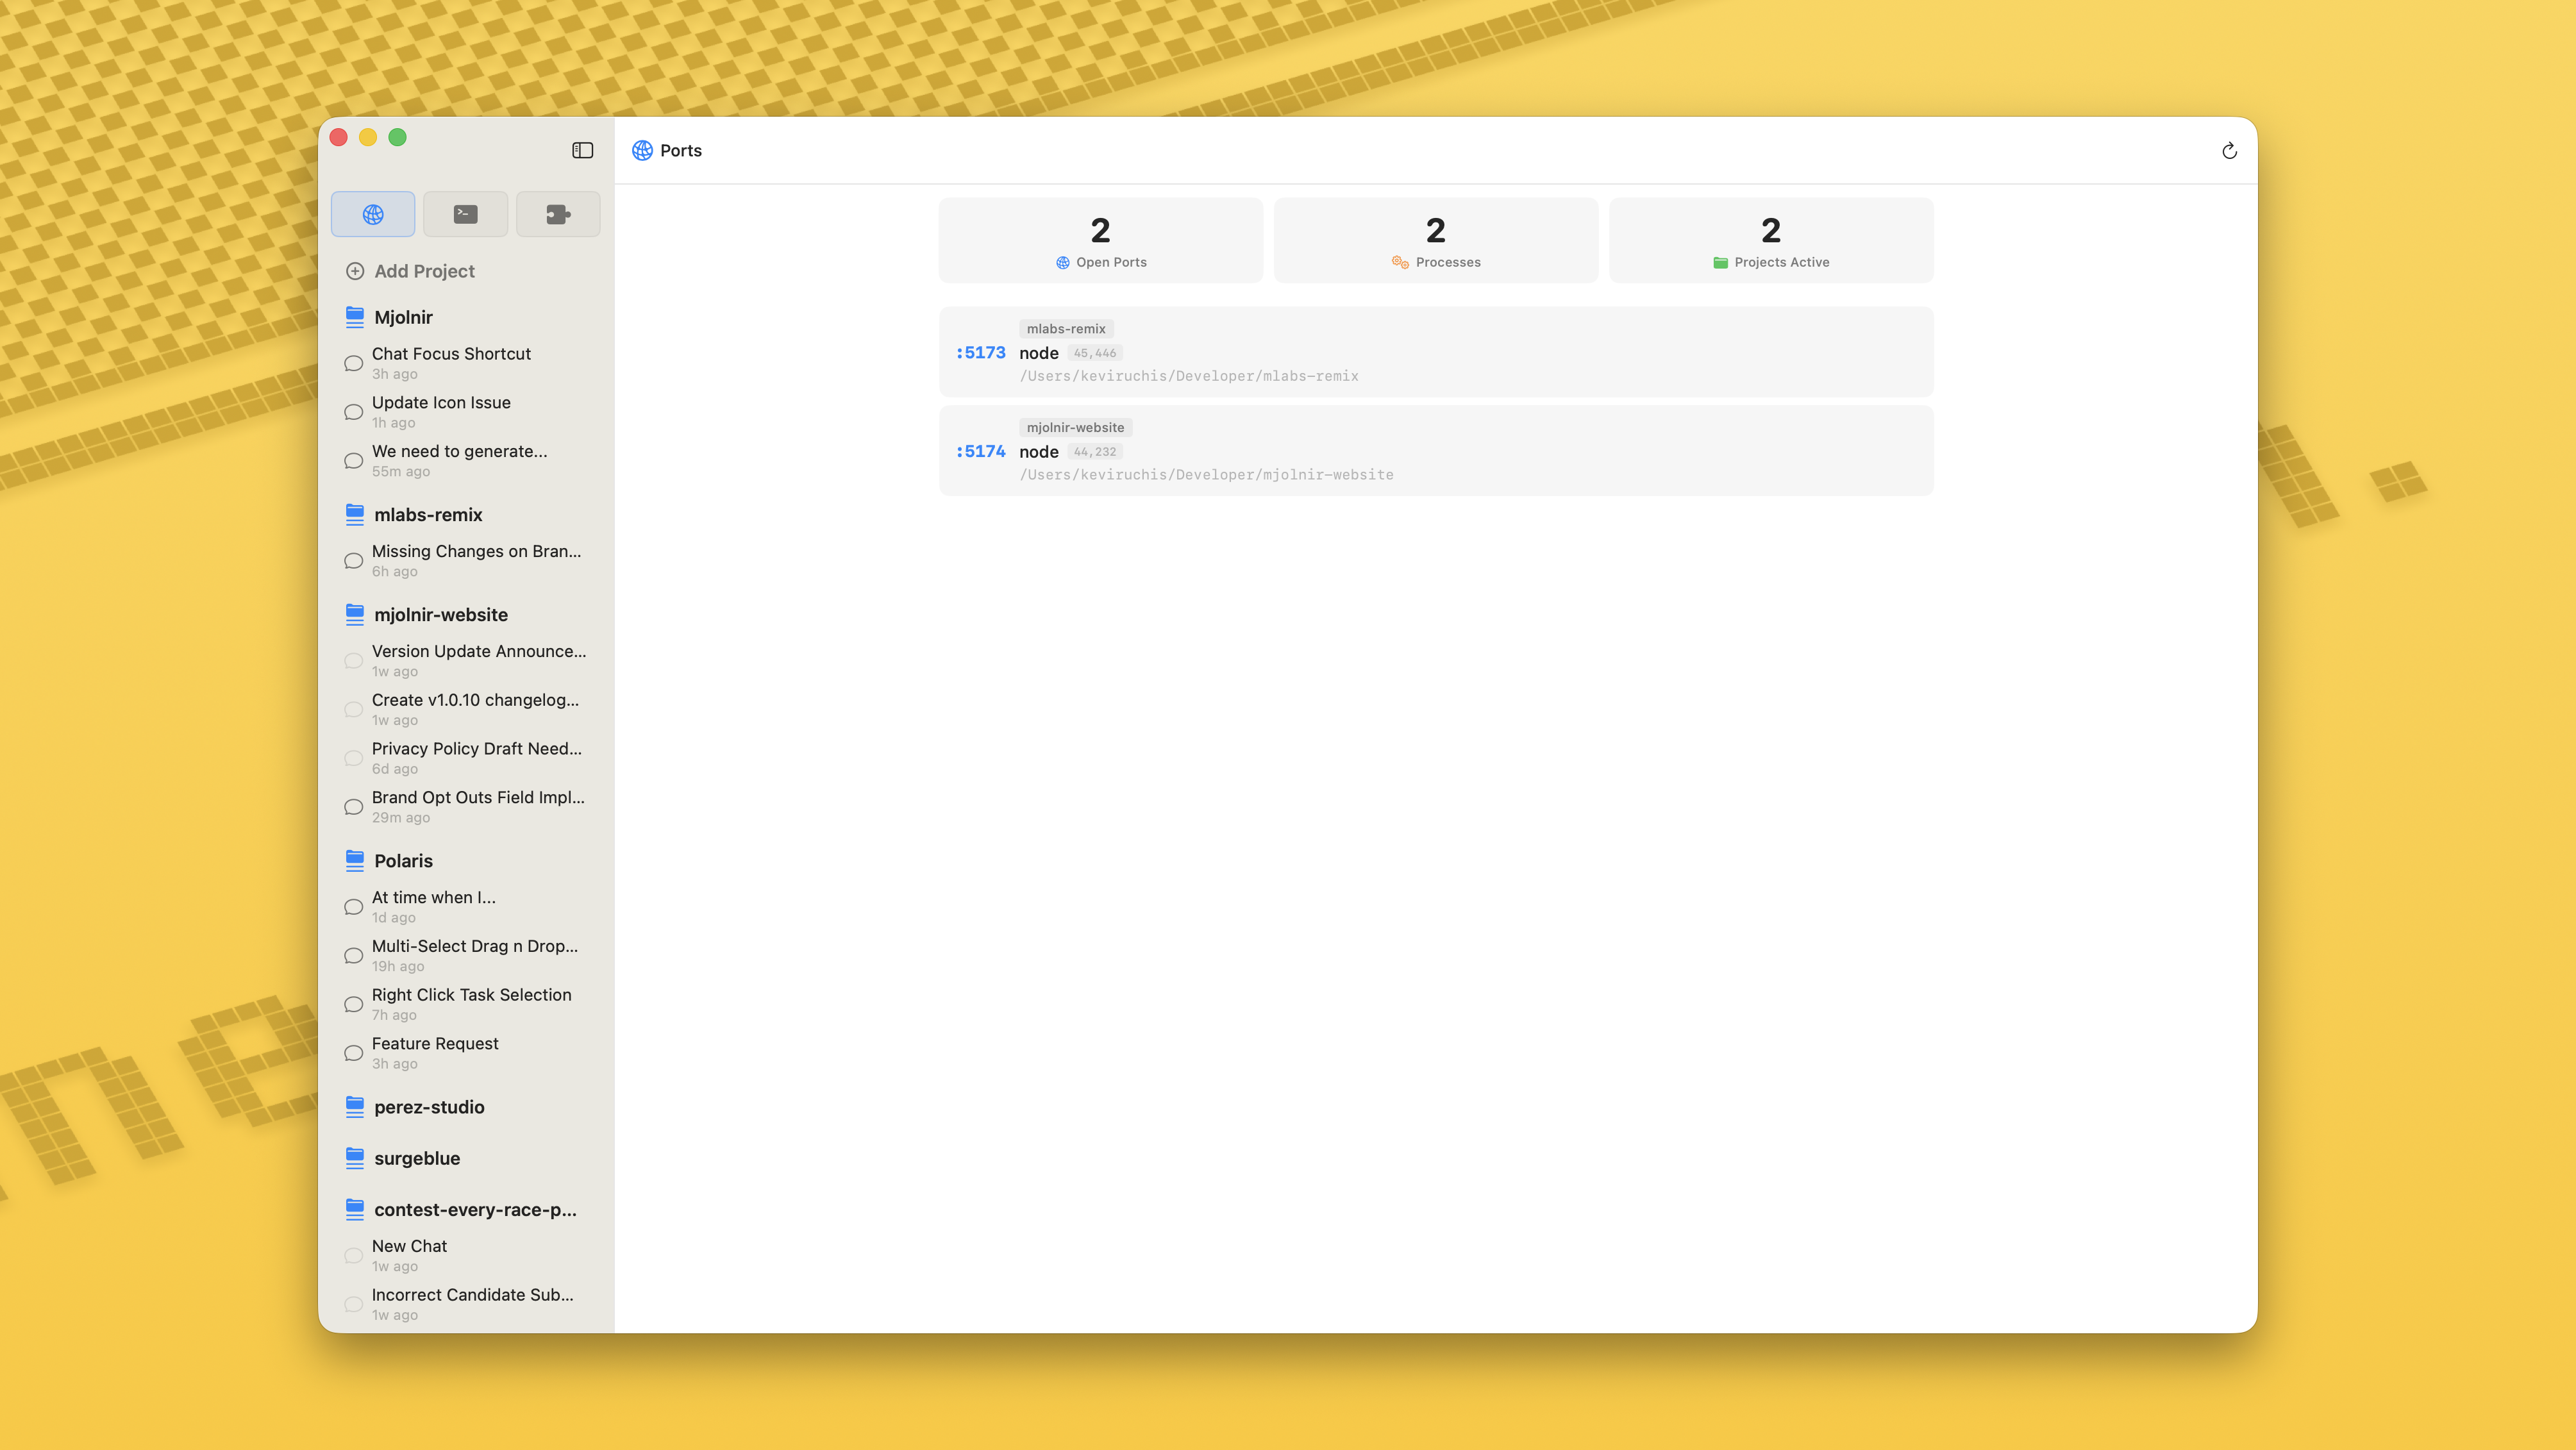
Port monitoring panel
/docs/ports.png
Skills Manager
Skills are a Claude Code feature — they don't apply to Codex chats.
Skills are reusable prompts and instructions that extend what Claude can do in your project. The Skills Manager lets you browse, create, edit, and organize your Claude Code skills and commands from a single interface.
You can manage two types of skills:
- Global skills (from
~/.claude/skills/) - available across all your projects - Project skills (from
.claude/skills/) - scoped to a specific project
Each skill can have a name, description, version number, argument hints, and a list of allowed tools. Skill content is written in Markdown. The toolbar provides Save, Undo, Add Page, Open in Finder, and a context menu for additional actions.
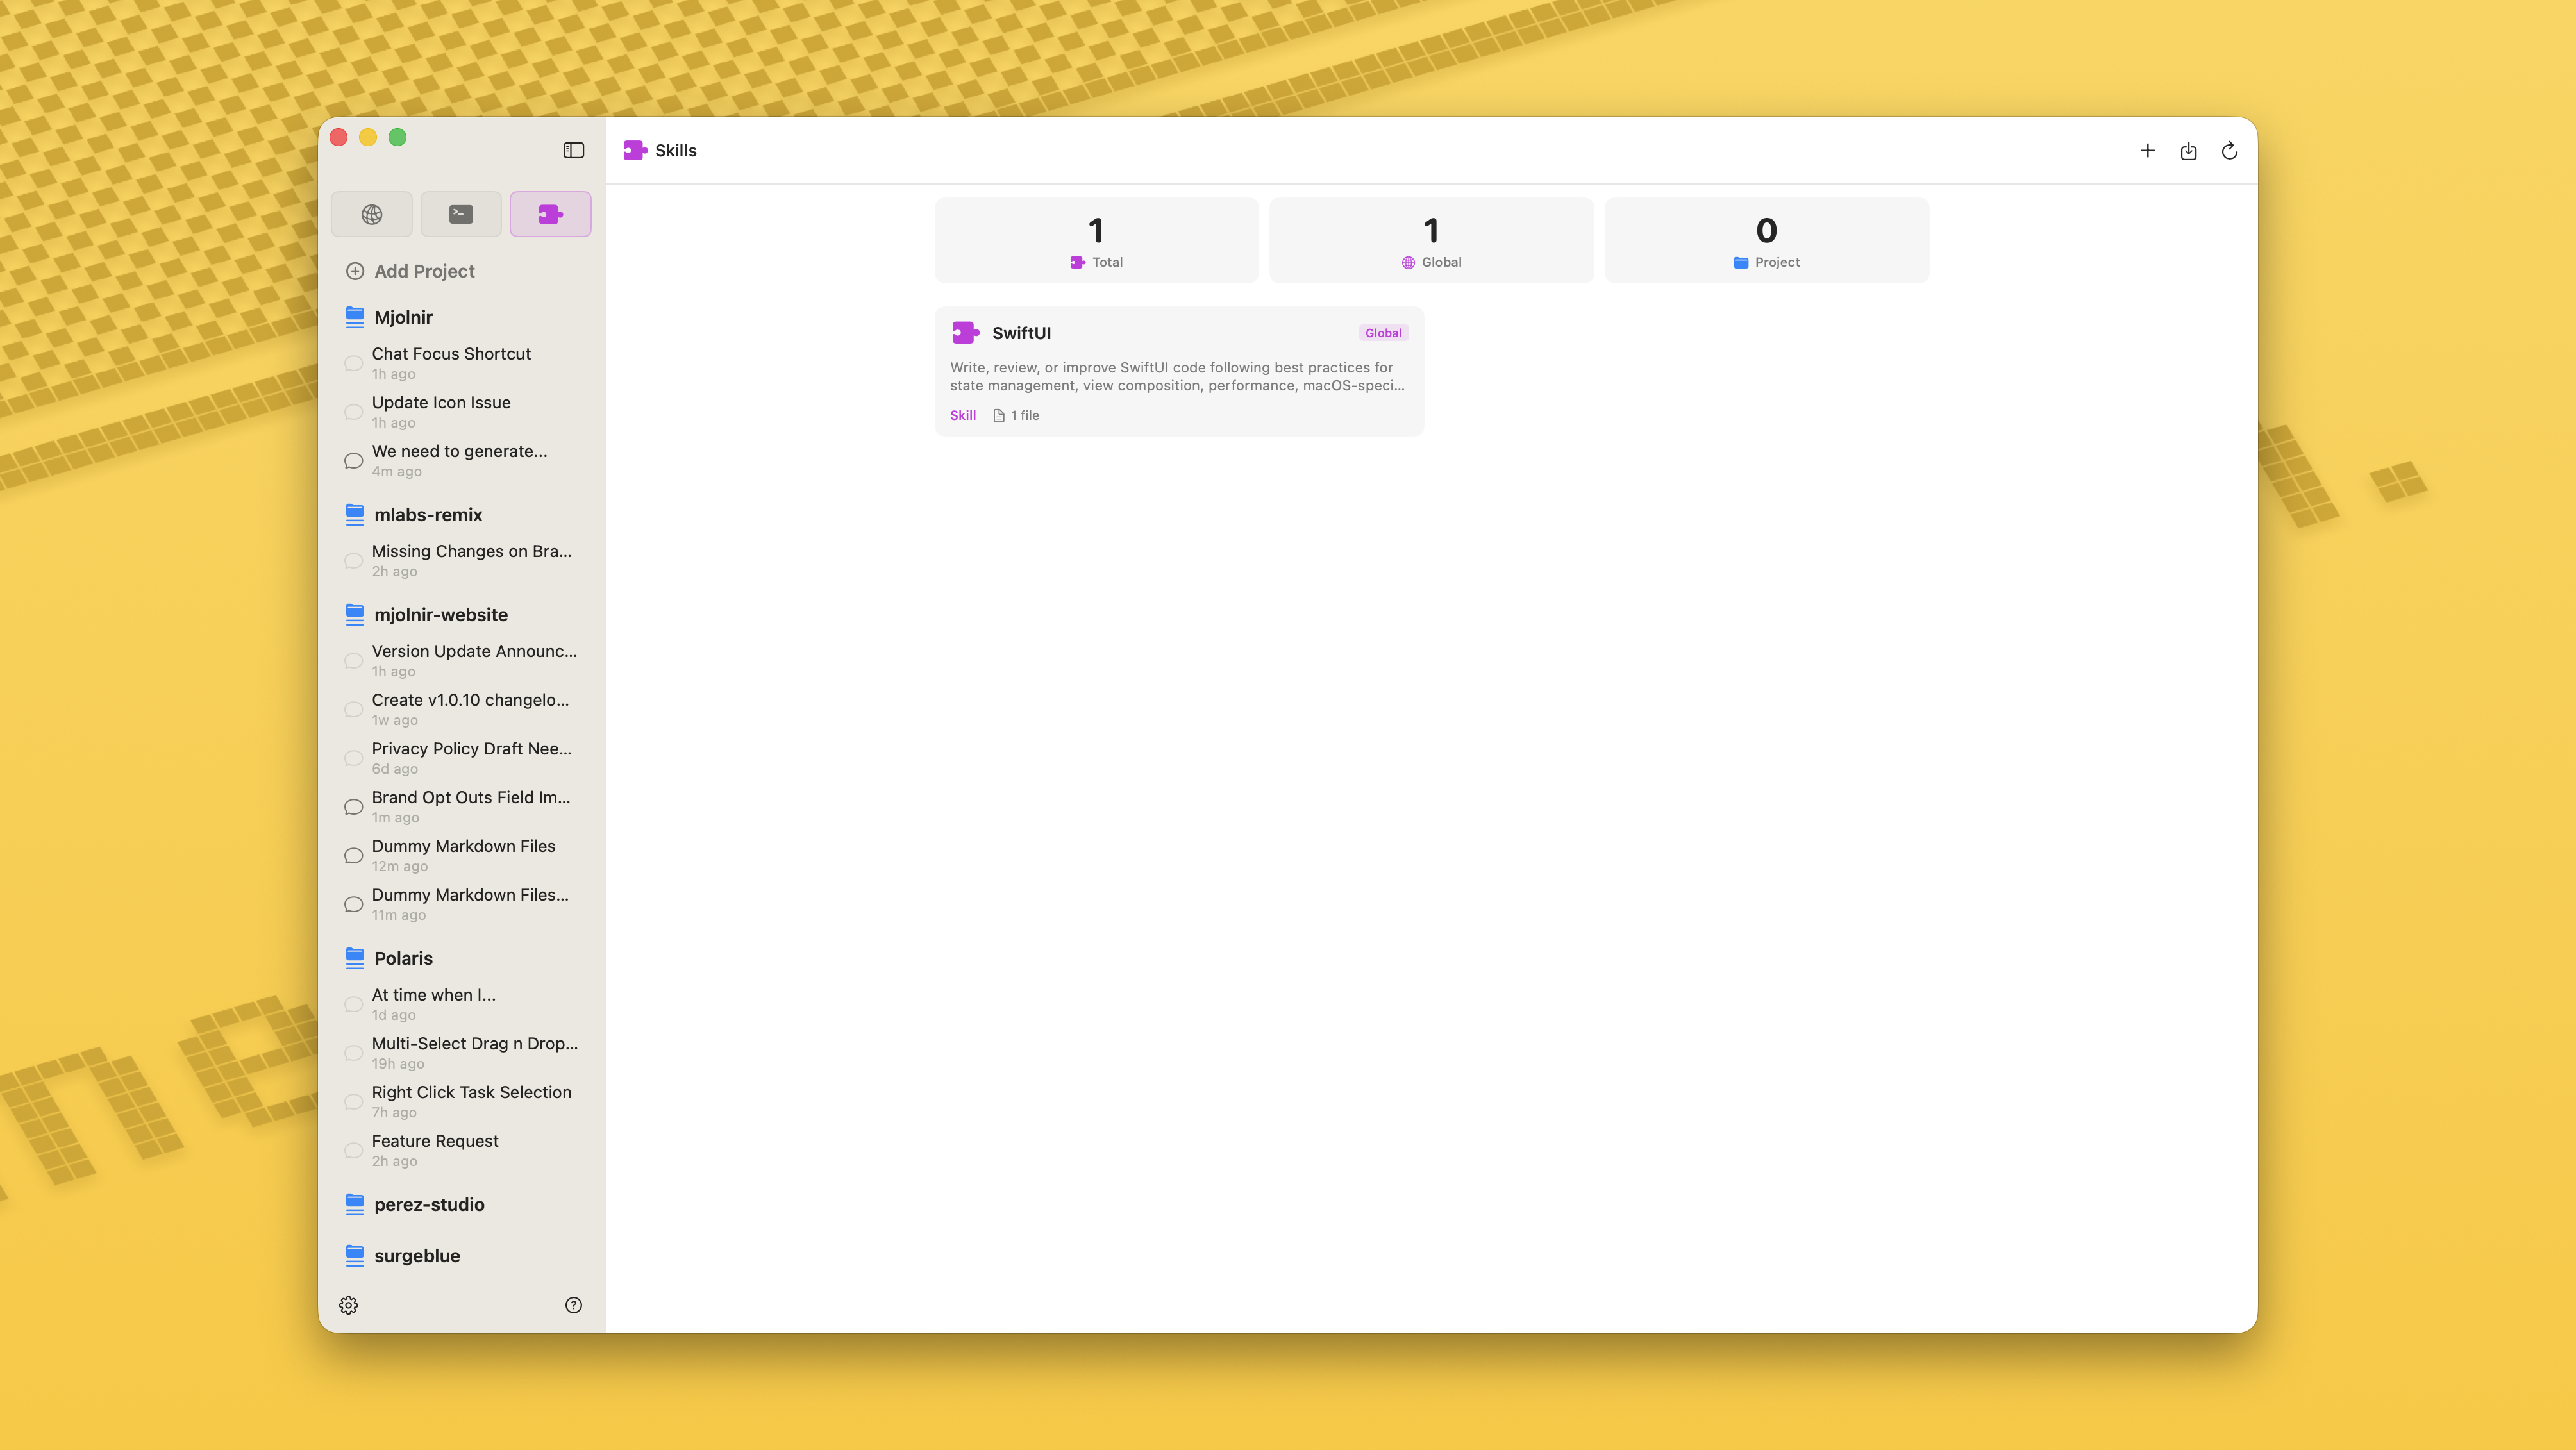
Skills manager interface
/docs/skills-manager.png
Skills Versioning
Every time you save a skill, Admiral automatically creates a version snapshot. This gives you a complete history of changes and the ability to roll back at any time.
Each version captures:
- An auto-incrementing version number
- A timestamp of when the save occurred
- A full snapshot of all files in the skill
- An optional label you can add to mark important milestones (e.g., "before refactor")
For skills backed by a directory with multiple files, all pages are snapshotted together as a single version. Restoring rolls back the entire skill directory atomically, so you never end up with a partial or inconsistent state.
You can browse the full version history in the inspector's History tab (clock icon). Each entry shows the version number, timestamp, optional label, and a Restore button. Hover any version row for an ellipsis menu with Preview, Restore, Edit Label, and Delete — so you can poke at an old version before deciding whether to roll back.
Preview opens the version in a dedicated two-pane window that mirrors the main Admiral layout — a material sidebar listing every file in the snapshot and a read-only live markdown view on the right. It's the fastest way to confirm "yes, this is the version I want" before you Restore.
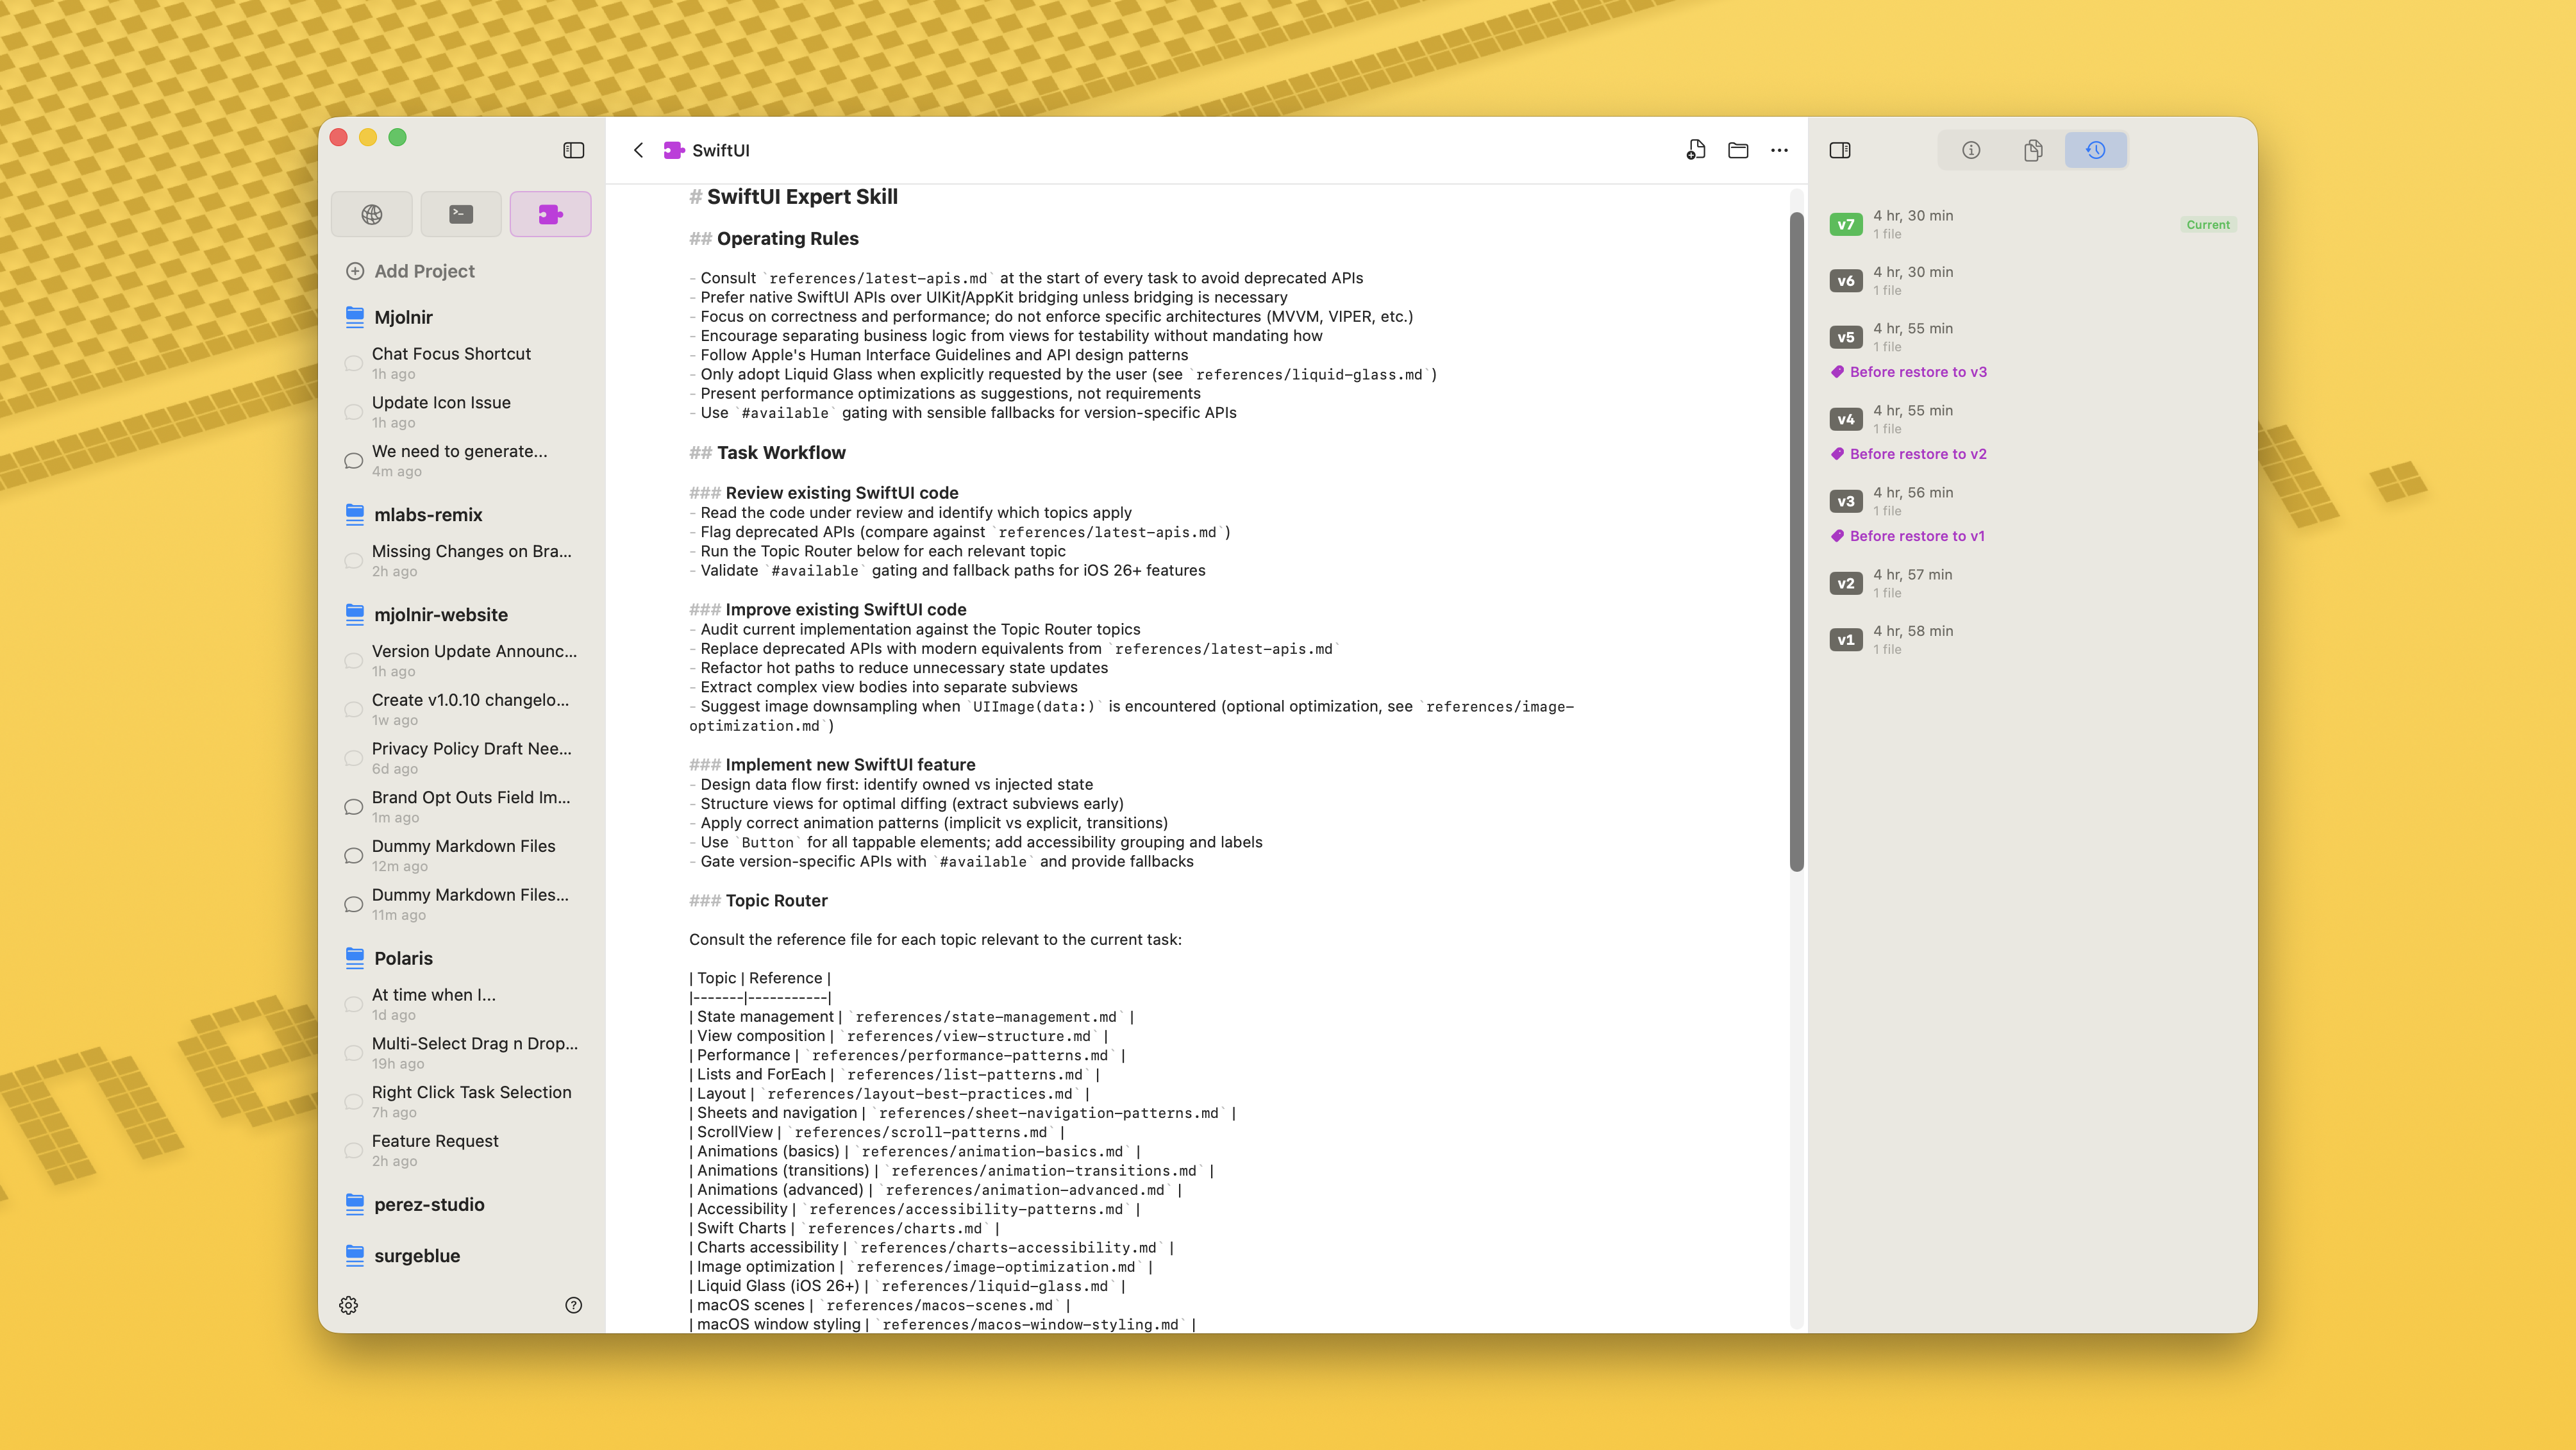
Skills version history in the inspector
/docs/skills-versioning.png
Pulse
Pulse is a chronological feed of every chat that has had activity, across every project and workspace. Open it from the sidebar — it's the orange bolt icon labeled Pulse — when you want to find a conversation by "when" instead of "where".
Activity is grouped into natural-language buckets — Today, Yesterday, This Week, Last Week, then by month — and each row shows the workspace name, the chat name, the chat's status (running, active, or archived), the profile color it belongs to, and a timestamp. Click any row to jump straight into that chat; archived chats are restored automatically.

Pulse activity timeline
/docs/pulse.png
Pulse loads in pages of 100 entries at a time and pages in more as you scroll. Use the refresh button in the header to pull the latest activity on demand.
In-Chat Terminal
Every workspace has its own terminal panel docked below the chat. It's a full ANSI-compatible emulator with 256-color and truecolor support, so builds, tests, and scripts run with the same colored output you'd see in iTerm or the system Terminal — without leaving the app.
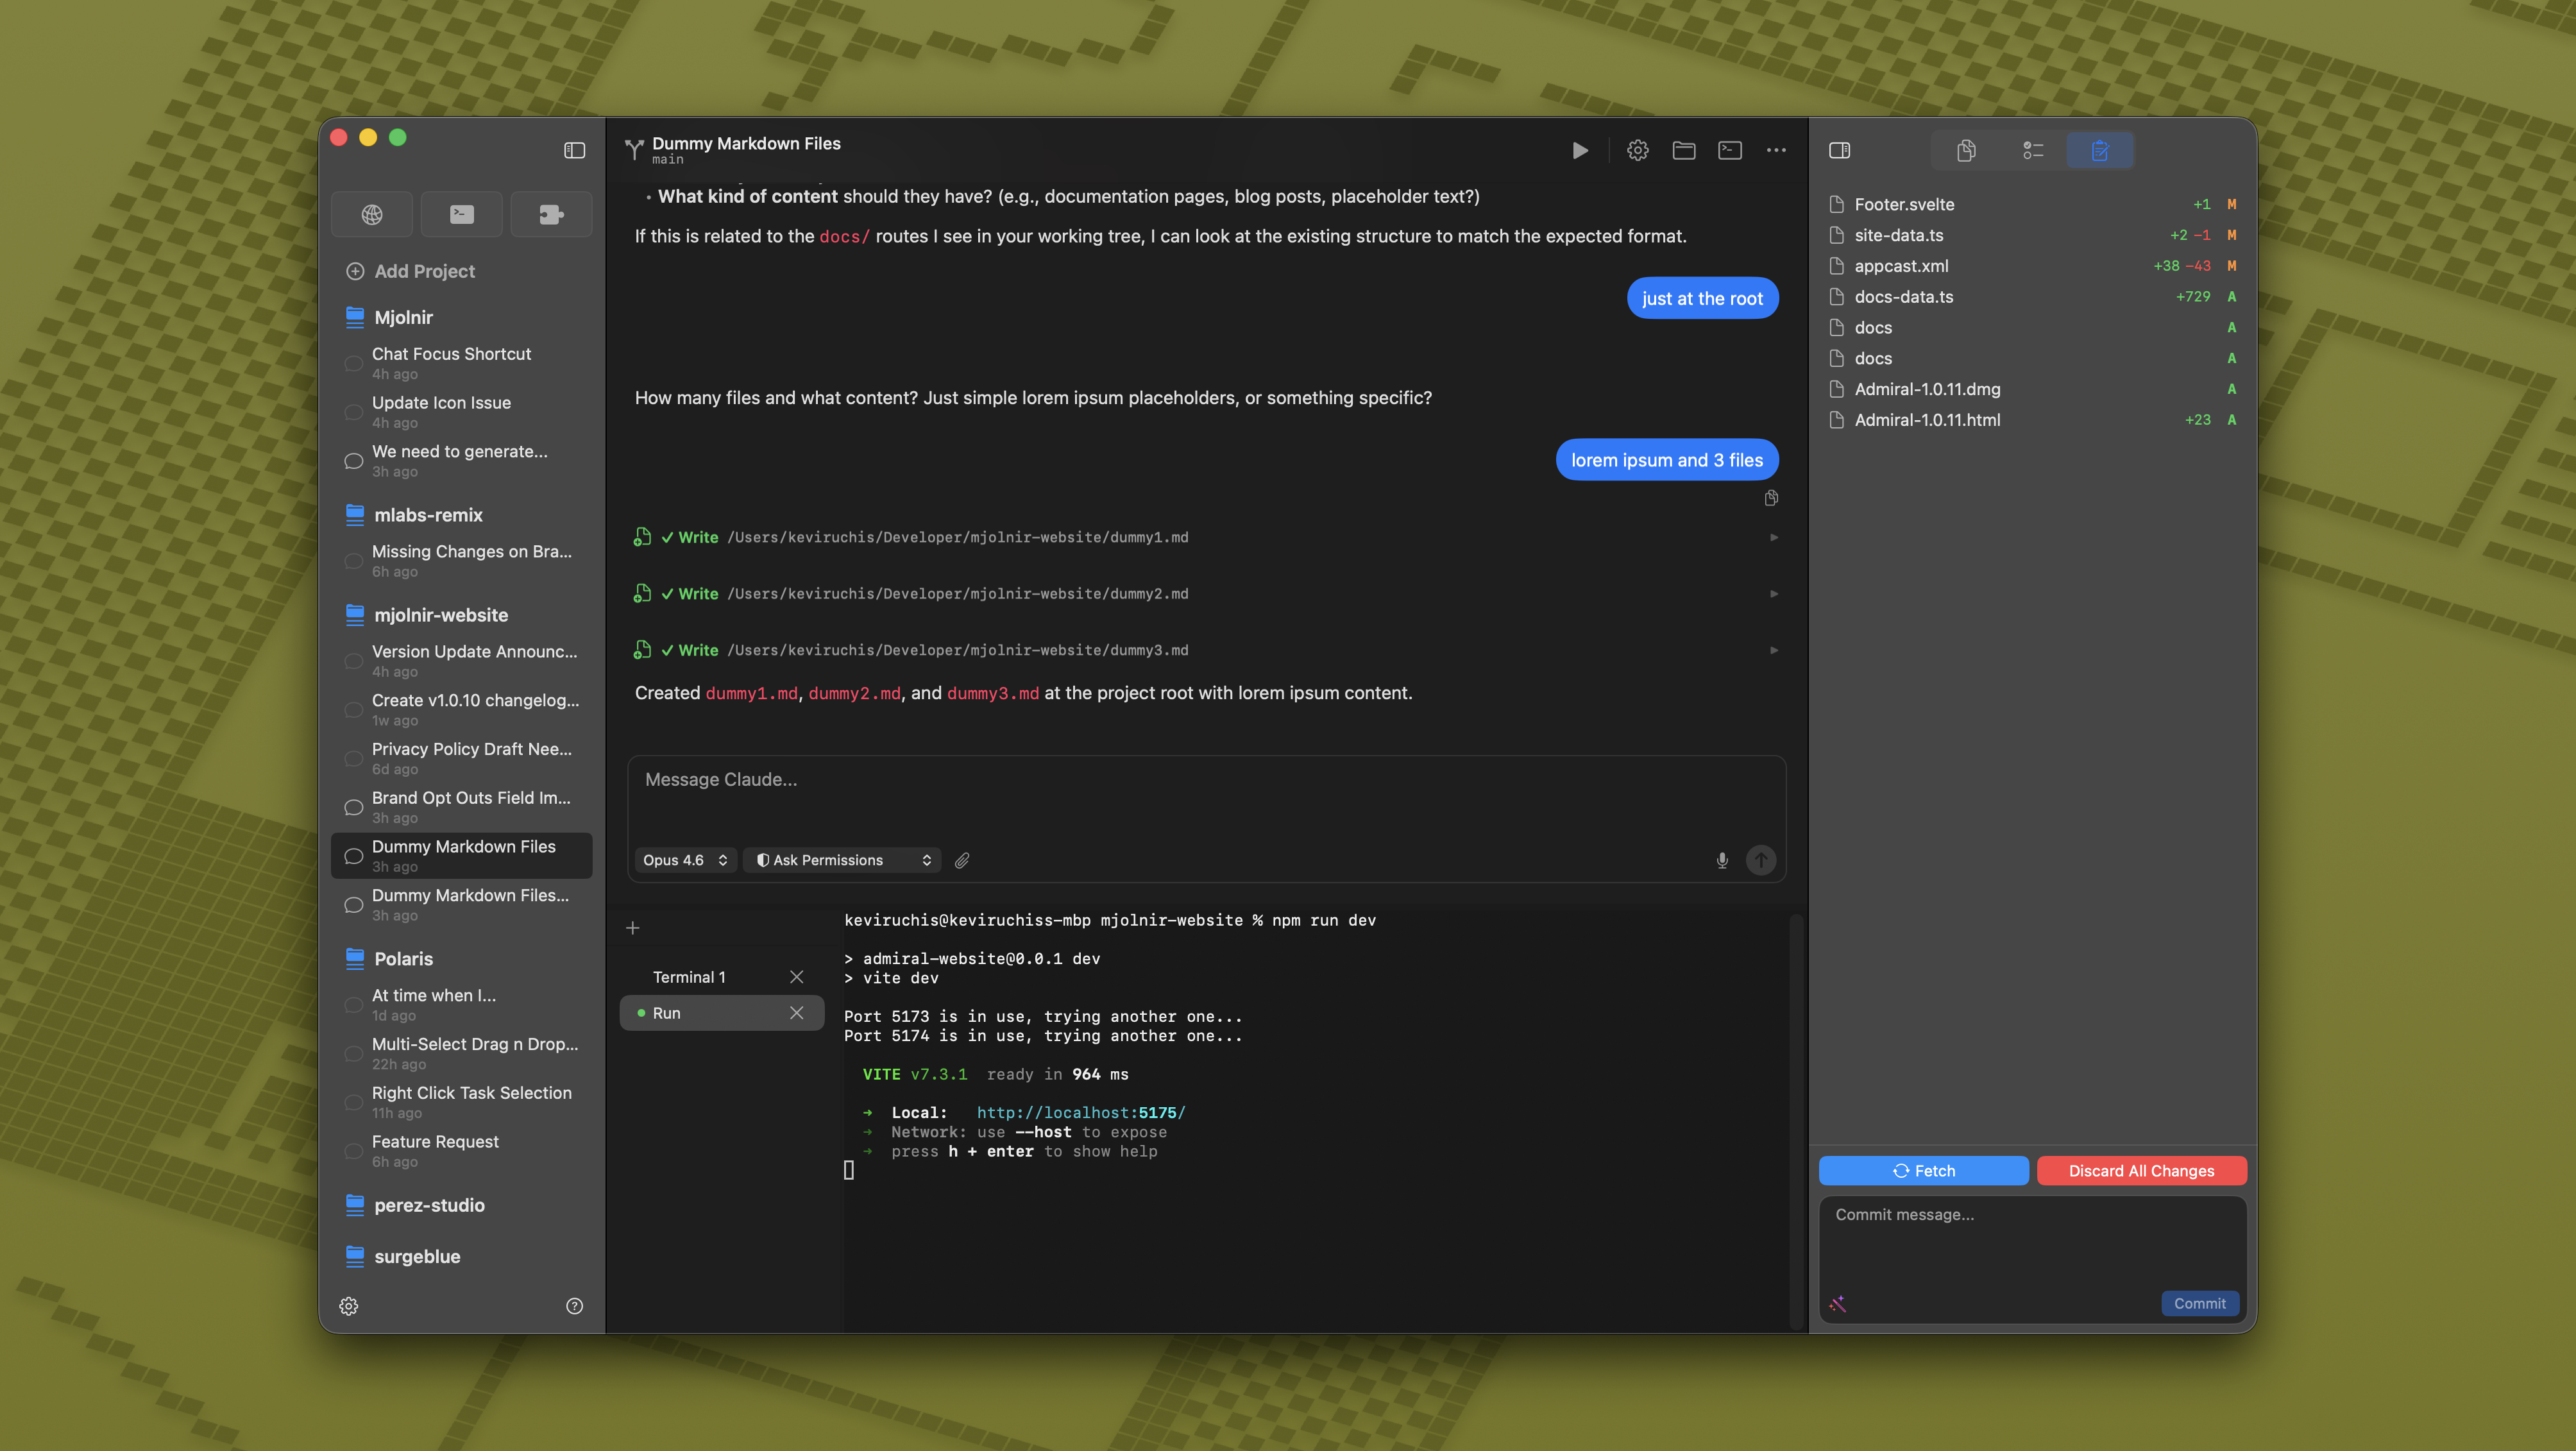
Built-in terminal panel
/docs/terminal.png
Showing and Hiding the Terminal
Toggle the terminal pane from the menu bar with View > Show Terminal (it switches to Hide Terminal when visible) or with the ⌘⇧T shortcut. The pane's height and visibility are remembered per workspace, so you can keep it tall in your build workspace and tucked away in another.
Drag the divider above the terminal to resize it. The minimum height is 100pt and the default is 200pt; you can pull it as tall as the chat allows.
Multiple Terminal Sessions
Each workspace can run several terminal sessions side by side. The session list on the left of the terminal panel lists every session, with a green dot next to anything currently running. Click + New Terminal to start a new session, double-click a session name to rename it, and click the X on hover to close one.
Sessions live at the workspace level, so they persist as you switch between chats inside the same workspace. They survive tab switches; they don't survive deleting the workspace.
Working Directory
Each terminal session opens at the workspace's effective working directory. For workspaces backed by a git worktree, that's the worktree folder; otherwise, it's the project root. So commands you run from the terminal always operate on the same files the agent is editing in that workspace.
Shell and Appearance
Admiral honors your $SHELL environment variable and falls back to /bin/zsh if it isn't set. Terminal output is rendered in SF Mono 12pt. Theme is configured in Settings > Appearance > Terminal Appearance with three options: Auto (matches the app theme), Light, and Dark.
Selecting and Copying Output
Click and drag to select; ⌘C copies, ⌘V pastes. Pasting selected output back into the chat as context is the fastest way to ask Claude about a stack trace, a failing test, or any output you don't want to retype.
Session Management
Archiving Chats
When you're done with a conversation but want to keep it for reference, you can archive it. Archived chats are hidden from the sidebar but remain accessible from the project overview. You can view archived chats in a read-only standalone window, restore them to active status, or permanently delete them. Set a retention interval in Settings → Archived Chats and Admiral prunes anything older automatically.
Whole workspaces can be archived the same way — hover a workspace row and click the archive icon. Restore or permanently delete archived workspaces from the new Archived Workspaces pane in Settings.
Importing Sessions
If you've been using Claude Code or Codex from the terminal, you can import those sessions into Admiral. The session import browser reads the JSONL files each CLI writes (Claude Code under ~/.claude/projects/, Codex under its own config home), lets you search and filter by date or model, and imports them with full message history preserved.
Admiral automatically detects sessions that have already been imported to avoid duplicates. You can preview a session's full message history in a read-only window before importing — click the eye icon on any row — and select multiple sessions for batch import.
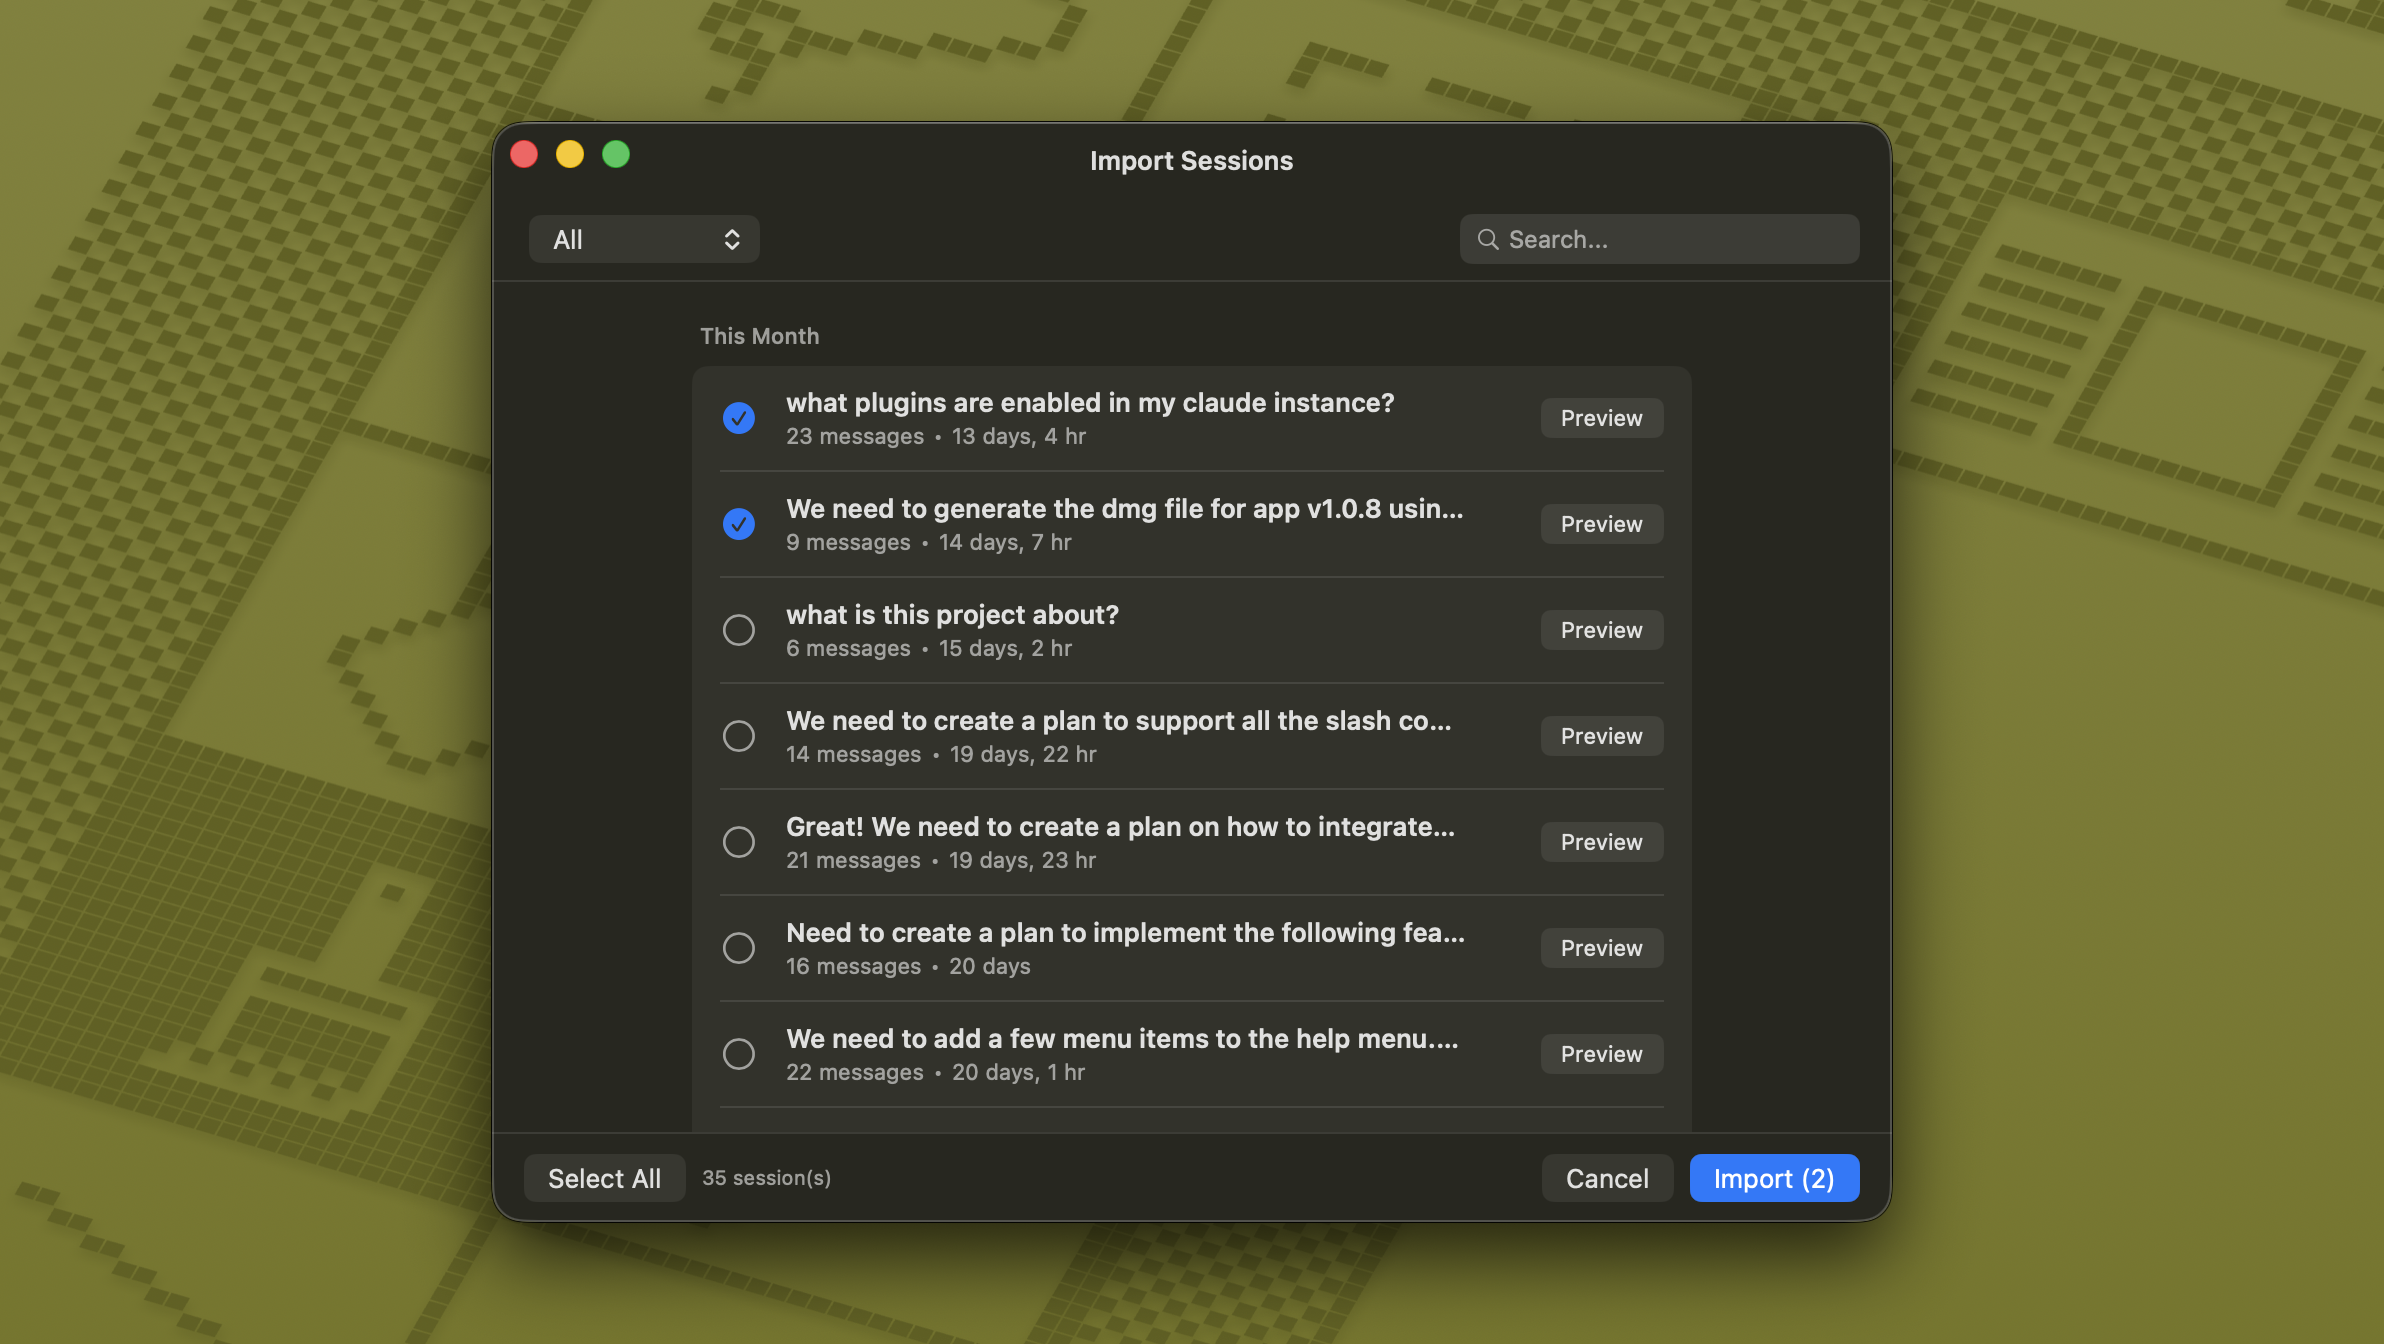
Session import browser
/docs/session-import.png
Session Resumption
Admiral can resume previous chat sessions, picking up exactly where you left off. The conversation history and context are preserved, so Claude remembers what you were working on.
Settings & Customization
Open Settings with ⌘, or from the sidebar footer. v2.0 reworked Settings into a sidebar-based split view — categories live in a material sidebar on the left, the detail pane fills the rest of the window edge-to-edge, and a collapsible detail inspector on the right surfaces secondary controls when a category needs them. It replaces the old toolbar tab strip with something that scales as more preferences land.
Appearance
Admiral supports both light and dark mode, following your macOS system preference or set manually. Every color in dark mode has been hand-tuned for contrast and readability during long sessions. You can also adjust text scaling to your preference.
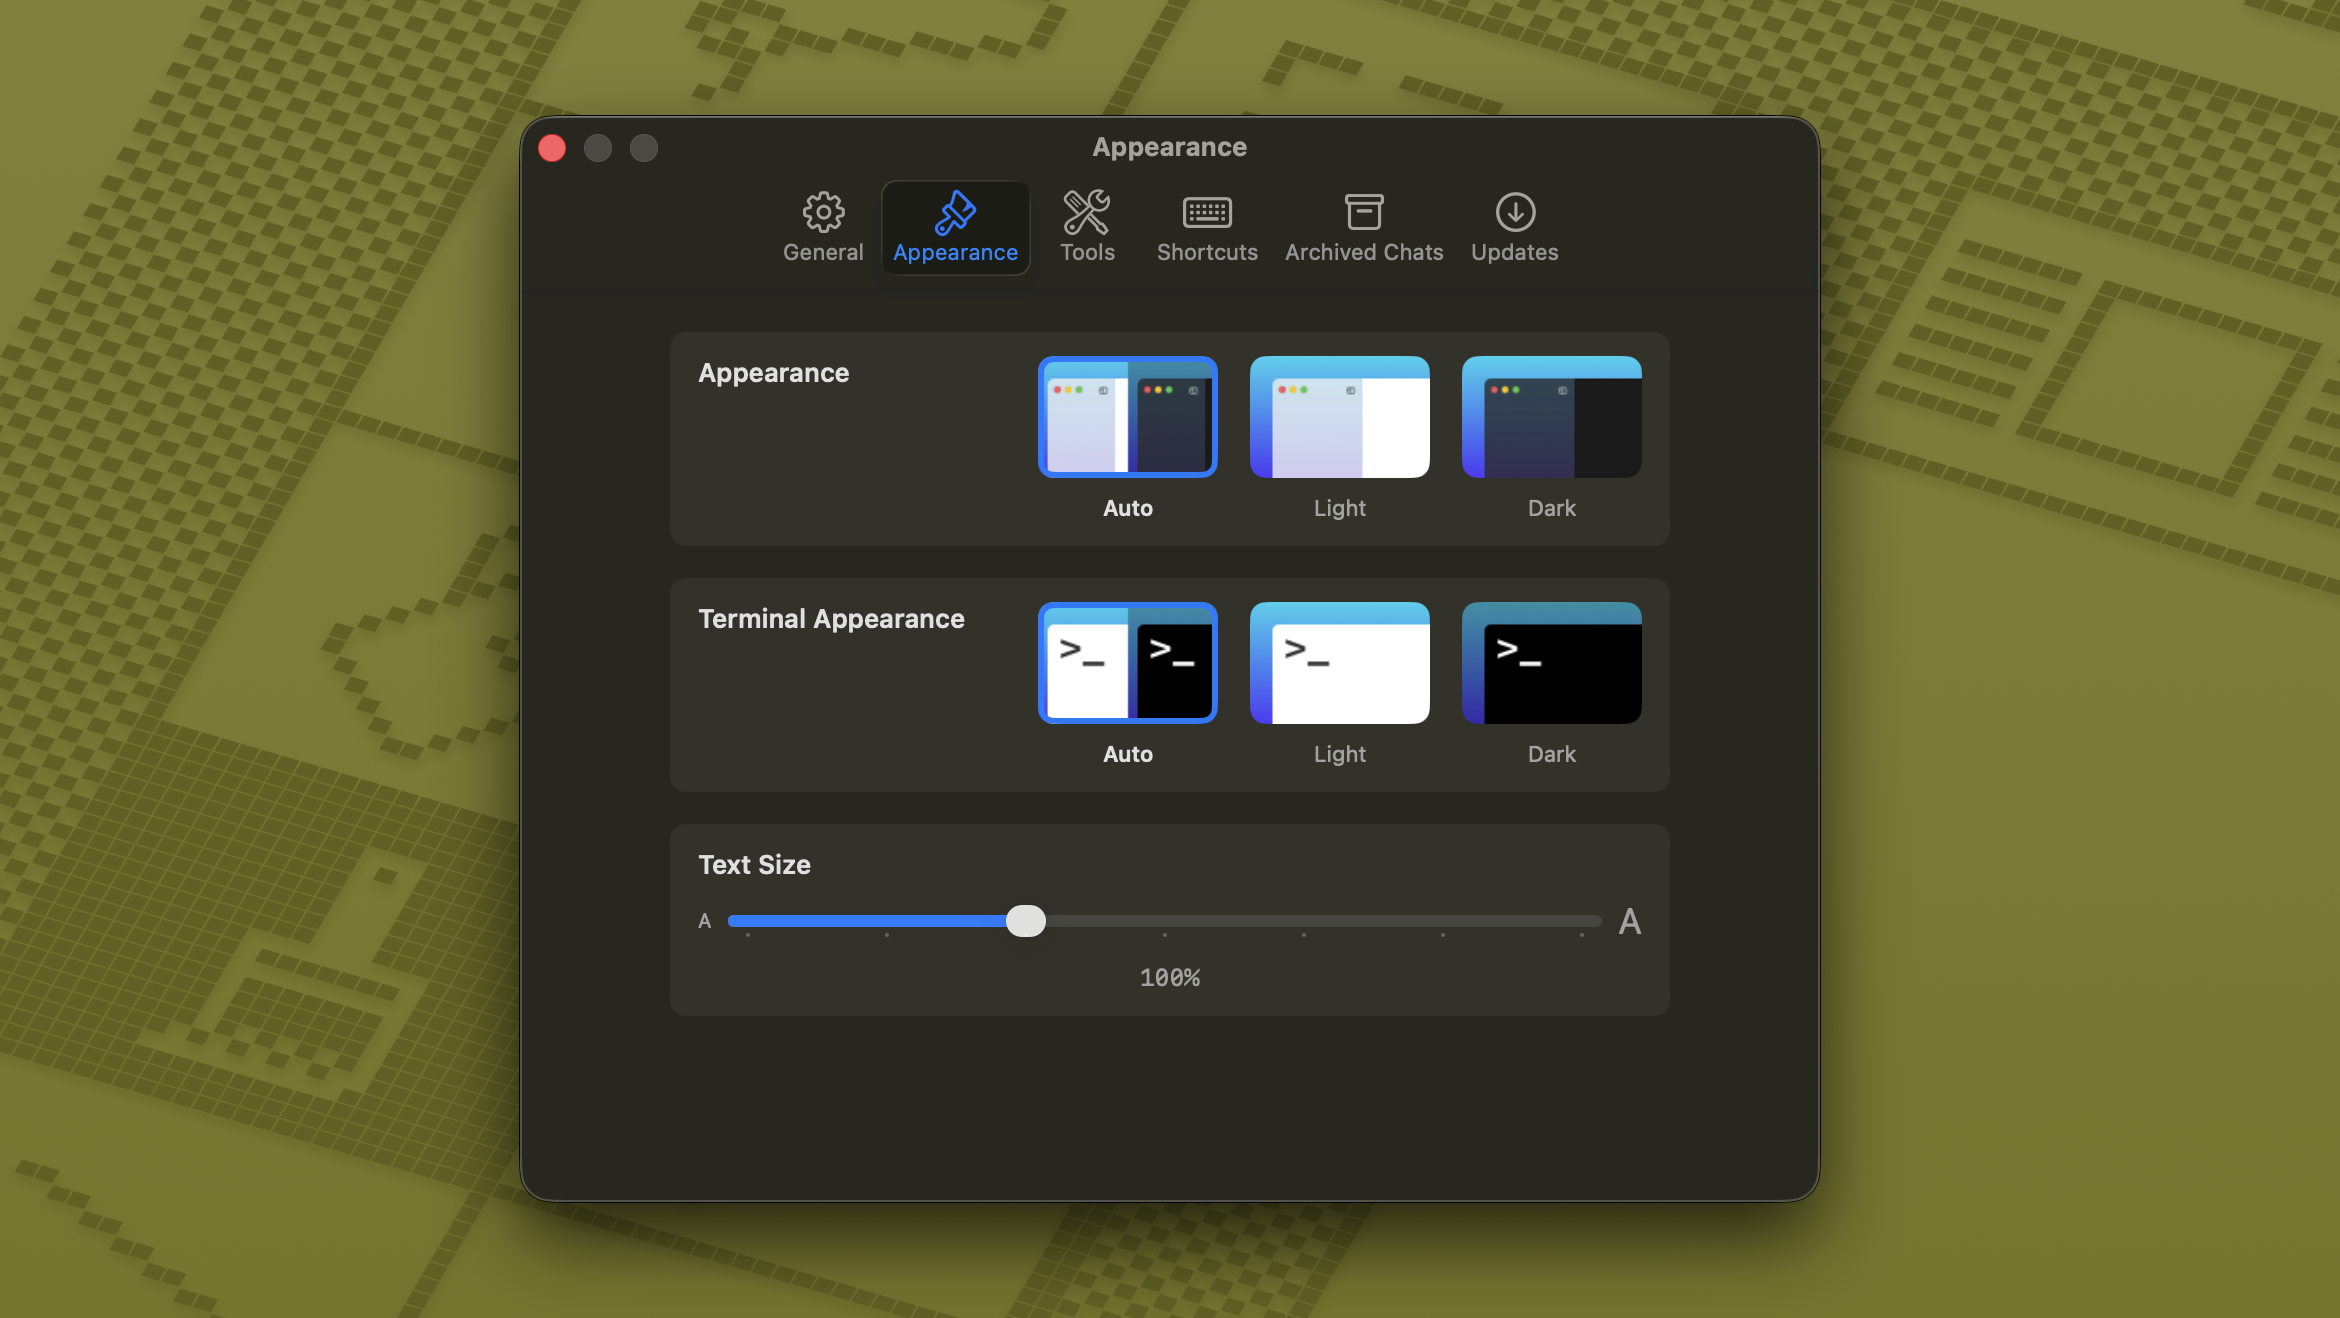
Admiral in dark mode
/docs/dark-mode.png
Models
The Models pane lets you choose which agent — Claude or Codex — and which specific model powers auxiliary tasks per profile. Auxiliary tasks include AI-generated commit titles in the Changes tab and PR description Auto-fill in the create-PR composer. These are intentionally separate from your chat's active agent, so you can keep a heavy reasoning model in chat while a cheaper fast model handles one-shot helpers.
The picker only shows providers the active profile is signed into. Sign in via Settings → Profiles first if a model you expect to see is missing.
Keyboard Shortcuts
Admiral comes with a full set of keyboard shortcuts that you can customize from Settings > Shortcuts. There are 16 customizable shortcuts covering common actions like creating new chats, toggling panels, opening quick search, and approving permissions. Notable shortcuts include:
⌘L- Focus the chat input box from anywhere in the app (sidebar, inspector, or chat area)⌘J- Toggle voice dictation in the chat input⌘.- Stop the running agent (press once for a graceful interrupt, twice to force-stop)
The shortcut editor includes conflict detection so you won't accidentally assign the same key combination to multiple actions. You can reset all shortcuts to defaults at any time.
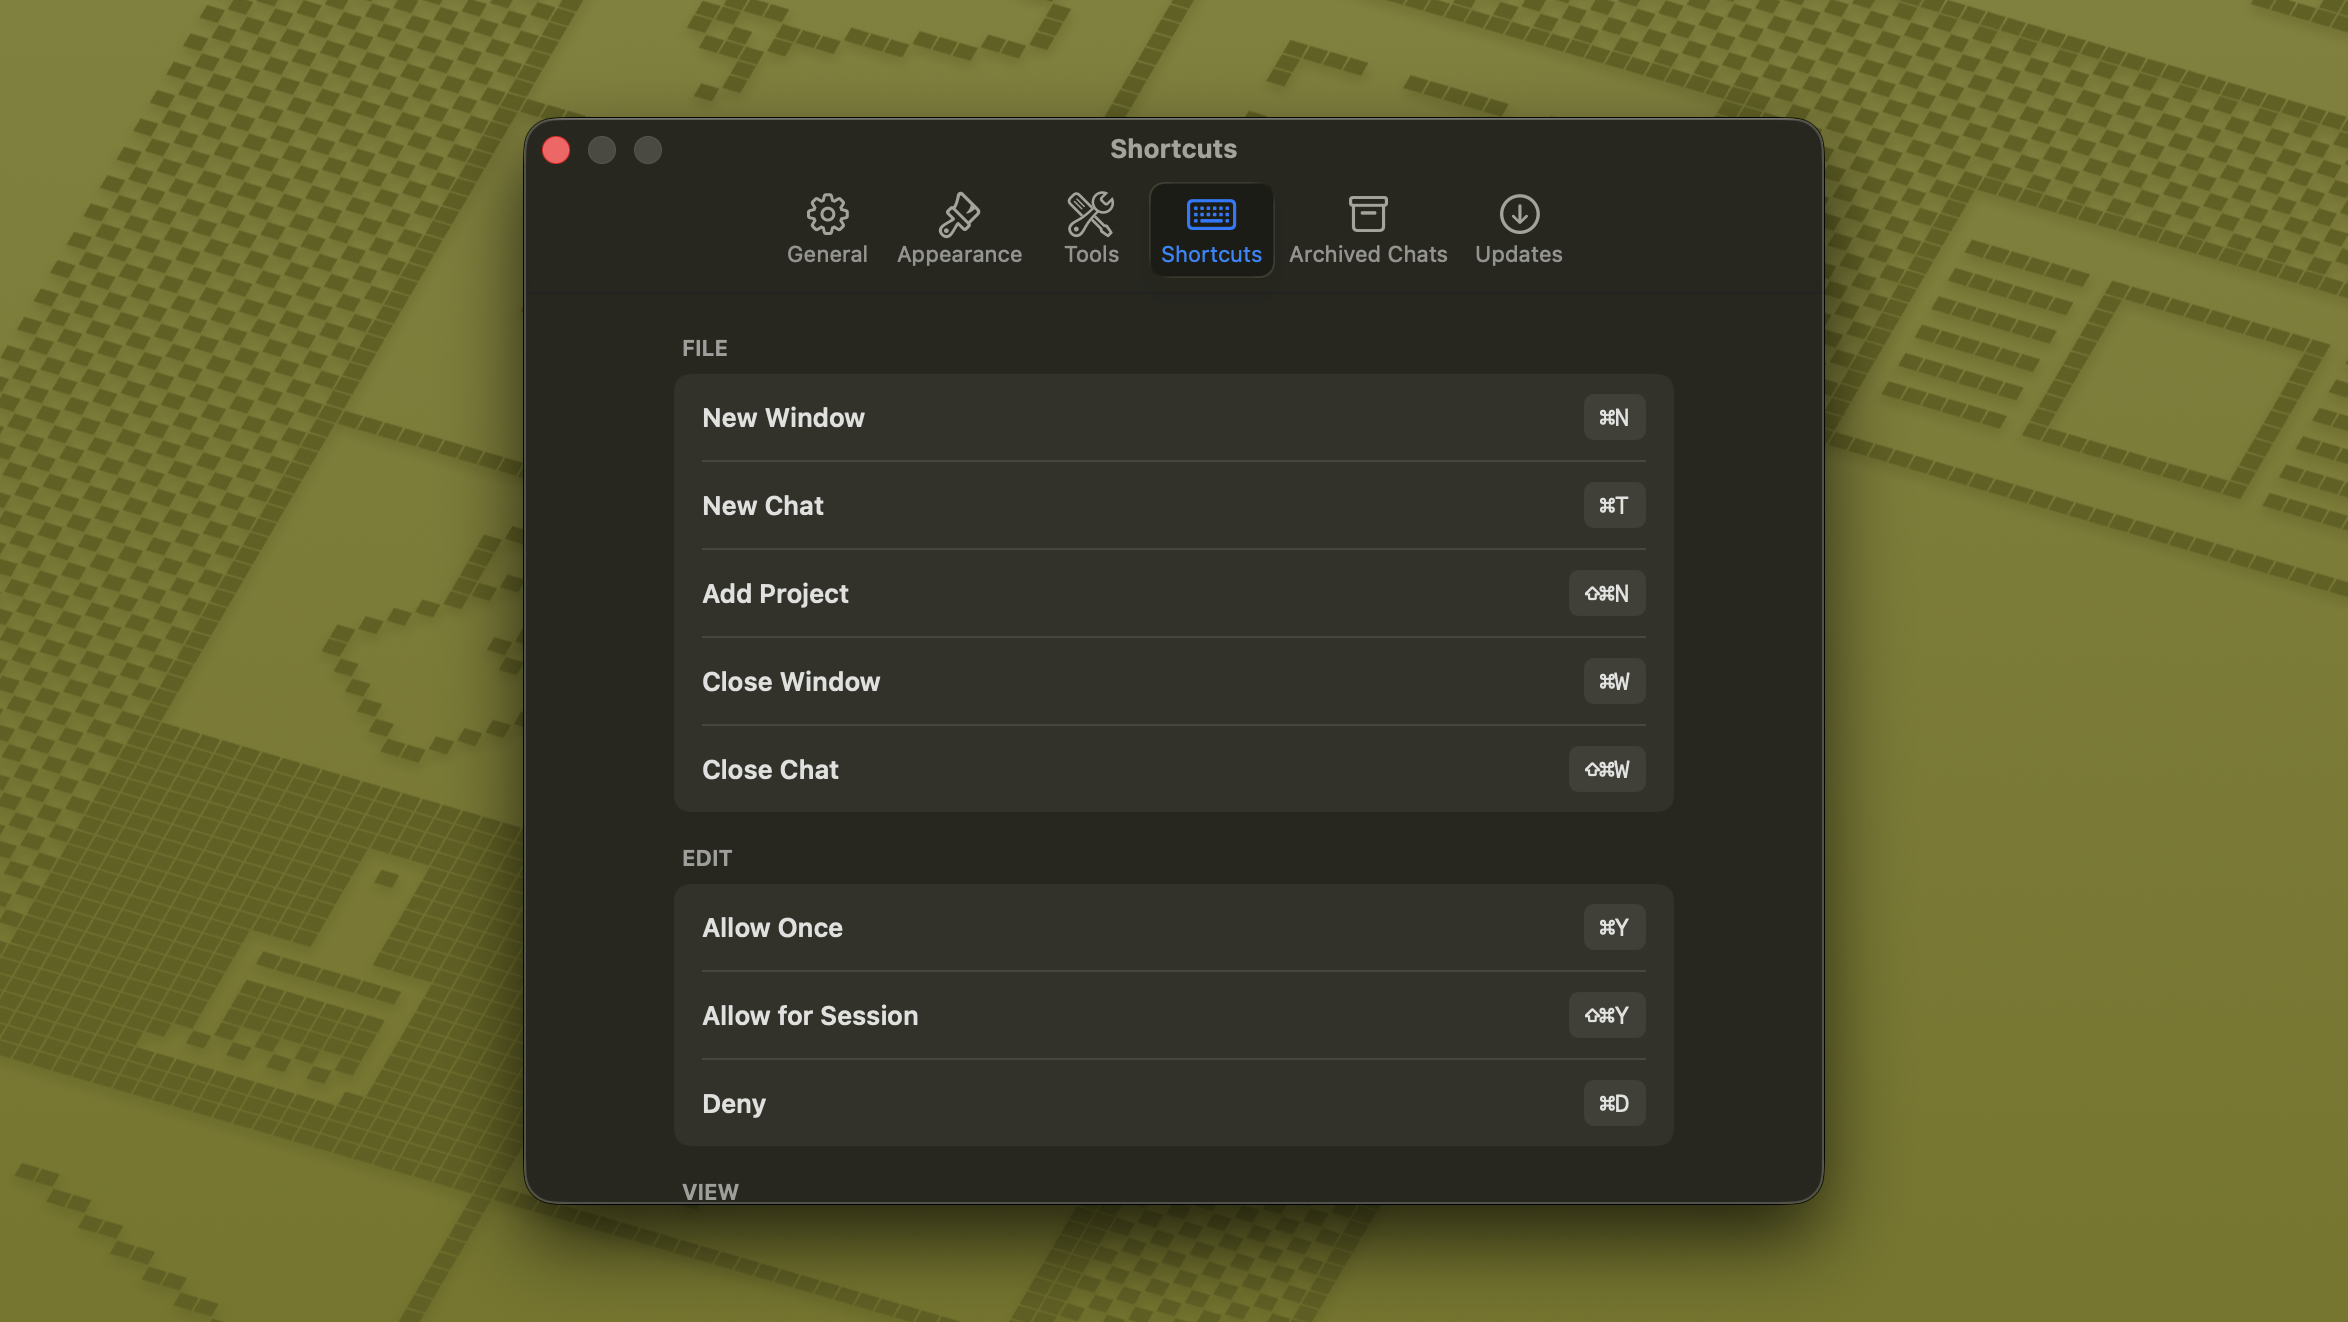
Keyboard shortcuts settings
/docs/keyboard-shortcuts.png
Terminal Settings
The terminal panel has its own appearance settings, independent from the main app. You can choose a separate theme for the terminal and toggle between light and dark mode independently.
Tool Visibility
You can control which tools are visible in the chat interface from the settings. This lets you hide tools you don't use frequently to keep the interface clean.
Per-Project Settings
Each project has its own settings sheet, opened from the project's right-click menu, ellipsis menu, or the project overview toolbar. From there you can change the project folder path, set the default branch new workspaces should fork from, configure the remote origin URL, and pick an SF Symbol icon and accent color for the project — the icon and color show up on the project row in the sidebar and on every workspace icon underneath it.
Archived Chats Auto-Cleanup
Archiving keeps your sidebar clean without losing chats, but old archives can pile up. The Archived Chats pane in Settings lets you set a retention interval — anything older than the chosen window is pruned automatically — alongside the existing controls to manually restore or permanently delete individual archived chats.
Action Buttons
Action settings now use a grouped card list with a hover ellipsis menu on each card (Edit, Duplicate, Delete) and drag-and-drop reordering with spring animations. Editing an action opens a secondary sheet with a multiline script input so a single action can fire multiple commands — useful for stitching together build steps or chained scripts you want one click away.
Agents & Flows
Agents and Flows are Admiral's way of automating multi-step work. A Flow is a recipe — a sequence of phases like planning, implementing, and reviewing — and each phase runs as a native subagent driven by one of your Agent definitions. Quality gates between phases keep runs honest by re-checking your project before the flow moves on.
Both live in the sidebar as their own tools — the Agents tool (sparkles icon) for definitions you reuse across flows, and the Flows tool (bonjour icon) for the multi-step recipes themselves. First launch seeds a starter Implementer + Reviewer flow so you have something to edit or duplicate right away.
Agent definitions
An agent definition is a reusable bundle of system prompt, model, and allowed tools. Define an agent once in the Agents sidebar tool and reference it from any flow — when the flow runs, the named agent spawns as a native subagent with exactly those settings.

Admiral agent definition editor
/docs/agent-editor.png
Flows
A flow is a Coordinator chat that orchestrates one or more subagent phases. The most common pattern is Coordinator → Implementer → Reviewer: the Coordinator decides what to work on, the Implementer makes the change, and the Reviewer checks it. You can edit the phases, swap which agent runs each one, or add additional phases to fit your workflow.
Flows can be defined globally or scoped to a single project. Project-scoped flows show up only when you're working inside that project.
Quality gates
A quality gate is a scripted shell check that runs between flow phases — typically a build, a test suite, a lint, or a custom validation command. If the gate passes, the flow moves to the next phase. If it fails, the gate's output is fed back into the Coordinator chat as a formatted message so the next iteration has the failure context to work from.
Quality gates are your safety net. Wire your test suite or build into a gate and the flow can't silently regress your project — a broken build will bounce the work back to the Implementer instead of being marked as done.
Running a flow
Kick off an automation run from the inspector of any issue. A status banner appears at the top of the chat showing the active phase, the iteration count, and the result of the most recent gate. The Coordinator chat shows the orchestration in real time, and each spawned subagent renders as a collapsible card with its own message history.

Automation run status banner
/docs/automation-run.png
Run recovery
Long flows survive app restarts. In-flight runs are bootstrapped on the next launch and pick up where they left off, so closing Admiral mid-flow doesn't lose progress.
Privacy & Security
Local-First Architecture
Admiral is built with a local-first philosophy. All your project data, conversation history, and settings are stored on your Mac using SwiftData (backed by SQLite). Nothing is synced to the cloud, and Admiral never transmits your code or conversations to its own servers.
How AI Communication Works
When you chat with AI in Admiral, your messages go directly from your machine to the AI provider — Anthropic for Claude, OpenAI for Codex. Admiral does not act as a middleman, proxy, or relay. Your credentials are stored securely in the macOS Keychain.
Data Access
Admiral accesses the following information on your machine to provide its features:
- Project files - to display the file browser and provide context to AI
- Git repository data - branches, diffs, stashes, and commit history
- Active network ports - to detect running dev servers
- Running processes - for terminal sessions and zombie process detection
- Microphone (optional) - for voice dictation, processed on-device via Apple Speech Recognition
Analytics
Admiral uses TelemetryDeck for anonymous, aggregated usage analytics (app launches, feature usage signals). No personally identifiable information, file paths, source code, or message content is ever collected. TelemetryDeck does not use cookies or track users across apps.
Permissions
Every action the AI wants to perform — editing files, running commands, accessing tools — requires your explicit approval. Requests open as a floating permission panel that doesn't block the main window, so you can keep working while you decide. Permissions are visible, adjustable, and never assumed. You control whether to grant access per action ("Allow Once") or per session ("Allow for Session").
Updates
Admiral keeps itself up to date with the Sparkle framework. By default it checks for new versions in the background; when one is available, an update prompt appears with the new version number, release notes, and three buttons: Install, Skip This Version, and Remind Me Later.
Manually Checking for Updates
Choose Admiral > Check for Updates… from the menu bar at any time. You can also click Check Now in Settings > Updates. If you're already on the latest version, Sparkle confirms with a small dialog so you know the check ran.
Auto-Update Preferences
Two toggles in Settings > Updates control how Admiral handles updates:
- Check for Updates Automatically — periodically polls for new versions in the background.
- Download and Install Automatically — when an update is found, Admiral downloads it in the background and prompts you to restart when it's ready. Requires automatic checking to be on.
Security
Every update is signed with an EdDSA key and verified by Sparkle before installation. If the signature doesn't match, the update is rejected automatically — there's nothing you need to configure.
You can view the full release history on the Changelog page, or read about what's new on the Blog.